

TL;DR:
- Many Long Island homeowners believe that hardwood floor restoration always involves extensive sanding, dust, and long curing times, leading to delayed maintenance. Floor surface screening offers a quick, single-day alternative that lightly abrades the finish beneath, promoting adhesion without damaging the wood. Proper assessment ensures screening is suitable, providing minimal disruption and a refreshed appearance for surface-level wear.
Many Long Island homeowners assume that restoring hardwood floors always means days of sanding, thick dust clouds, and tiptoeing around for up to 72 hours while finishes cure. That assumption leads a lot of people to put off maintenance longer than they should. The good news is that a method called floor surface screening, also known as screen-and-recoat, can refresh your floors in a single day with minimal mess and disruption. This guide breaks down exactly what screening is, who it works for, and how to decide whether it fits your floor’s current condition.
Table of Contents
- What is floor surface screening?
- Who should consider floor screening? Eligibility and edge cases
- Why screening is ideal for low downtime and minimal disruption
- The screening process step-by-step: From assessment to new finish
- A fresh take on screening: What most guides miss
- Smart screening solutions for your hardwood floors
- Frequently asked questions
Key Takeaways
| Point | Details |
|---|---|
| Screening is fast | Most floor screening jobs can be completed in one day with minimal dust and disruption. |
| Eligibility matters | Screening only works if your floor’s finish is intact and damage is surface-level. |
| Process vs refinishing | Screening scuffs the top layer and adds a protective coat, unlike sanding down to bare wood. |
| Missteps are costly | Applying screening to floors needing deep repair results in repeat work and wasted money. |
| Local experts help | On-site assessment by professionals ensures you get the right maintenance for your floor. |
What is floor surface screening?
Floor surface screening is a maintenance process that sits between simple cleaning and full refinishing. Instead of sanding down to bare wood, a technician uses a floor buffer fitted with a fine mesh abrasive pad, typically around 120-grit, to lightly scuff the existing finish layer. That controlled abrasion creates a textured surface that allows a fresh coat of protective finish to bond properly.
Think of it this way: the existing finish is still doing its job protecting the wood. Screening just gives the top layer of that finish a light roughening so a new coat can grip and adhere evenly.
Key things screening is not:
- It is not sanding to raw wood
- It is not polishing or waxing
- It is not a deep repair for damaged or warped boards
- It is not a color change or stain application
As noted in our screen and recoat guide, this process is ideal for floors that still have a solid protective coating but have started to look dull, lightly scratched, or worn in high-traffic areas.
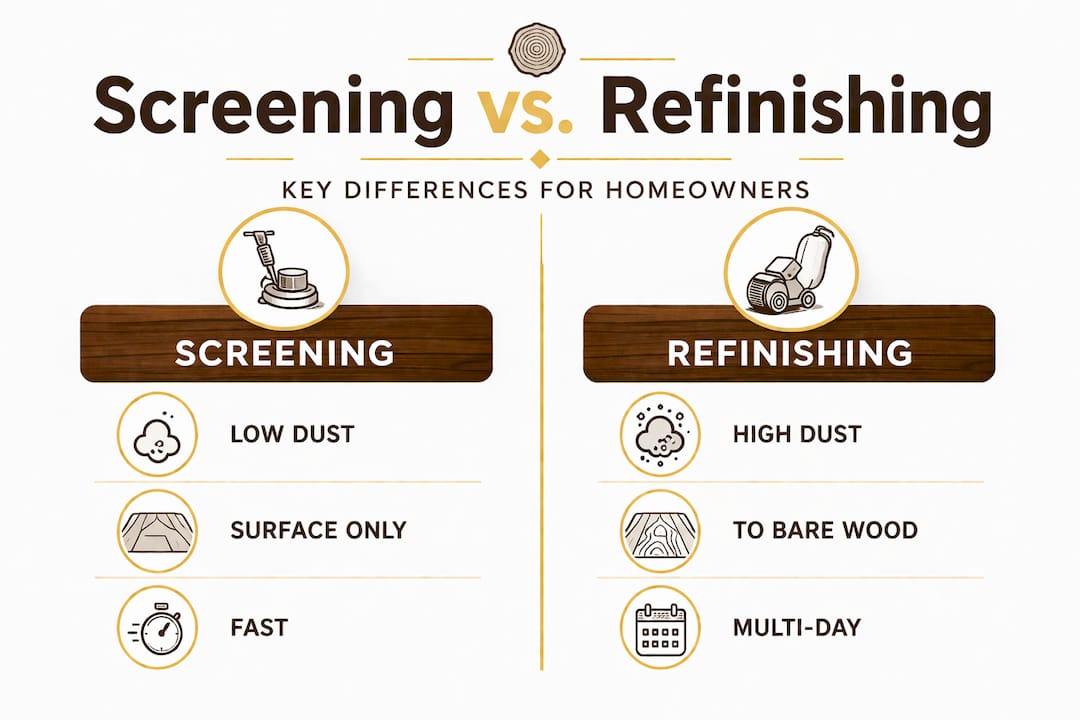
The screen-and-recoat process lightly abrades the surface finish for new protective coats, without sanding to bare wood. That distinction matters enormously. Full sanding removes a thin layer of actual wood fiber, which is why it generates heavy dust and requires longer drying times. Screening only touches the finish, which is why dust output stays very low, and the overall process stays clean and efficient.
“Screening creates a rough surface for the new finish to bond, not removal of wood.” This distinction is what makes screening such a practical maintenance tool for busy households and commercial properties alike.
Here is a quick snapshot of how screening compares to full refinishing at a glance:
| Feature | Screening | Full refinishing |
|---|---|---|
| Sands to bare wood? | No | Yes |
| Dust level | Low | High |
| Typical completion time | 1 day | 3 to 5 days |
| Changes floor color? | No | Yes (with stain) |
| Repairs deep scratches? | No | Yes |
| Disruption level | Minimal | Significant |
Who should consider floor screening? Eligibility and edge cases
Now that you know what screening is, let’s cover how to decide if your floor qualifies, or if more intensive work is needed.
Screening works only when the existing finish layer is still intact and doing its protective job. If you can see or feel that the finish has worn completely through in certain spots, exposing raw wood, screening will not hold. The fresh coat has nowhere to bond on bare, uncoated wood, and the result will peel or fail quickly.
Here is a practical way to assess eligibility:
- Look for sheen consistency. A floor that is eligible for screening still has a uniform (if dull) sheen across most of its surface. Matte patches with no sheen at all often signal finish loss.
- Check high-traffic zones closely. Areas near entryways, kitchens, and hallways wear the fastest. Run your hand across these zones. If the wood feels rough or porous, the finish may be gone.
- Inspect for deep scratches or gouges. Surface-level fine scratches that sit within the finish layer can tolerate screening. Scratches that catch your fingernail and feel deep into the wood need sanding.
- Look for water stains or gray discoloration. Gray or black staining indicates moisture has penetrated the wood itself, not just the finish. That requires full refinishing.
- Test for wax or oil contamination. Old wax or oil-treated floors will not accept a new water-based or polyurethane finish without proper removal first. Screening over a contaminated surface leads to adhesion failure.
Signs hardwood floors need refinishing confirm that screening is best when the coating is intact and damage is surface-level, while heavy scratches, water damage, or worn-through finish mean sanding is the right call.
Pro Tip: Use a simple water-drop test to check finish condition. Place a few drops of water on the floor’s surface. If they bead up, the finish is still intact and screening is likely viable. If the water soaks in quickly and darkens the wood, the finish is compromised and full refinishing is needed.
We provide more guidance on diagnosing floor treatment options, including a closer look at the sanding vs screening comparison for floors at various stages of wear. Getting the diagnosis right the first time saves you money and avoids repeat work.
| Floor condition | Recommended treatment |
|---|---|
| Dull but intact finish | Screening (screen-and-recoat) |
| Light surface scratches | Screening |
| Finish worn through in spots | Full refinishing |
| Deep scratches or gouges | Full refinishing |
| Water stains or gray boards | Full refinishing |
| Wax-coated floors | Wax removal first, then evaluate |
| Warped or cupped boards | Full refinishing or board replacement |
Why screening is ideal for low downtime and minimal disruption
When eligibility is confirmed, what makes screening such a smart choice for fast maintenance? Here is why downtime and disruption are so remarkably low.
Speed is the most immediate advantage. Screening typically takes about one day, creates minimal dust, and is widely recognized as the preferred option for low-disruption maintenance. That one-day window makes a dramatic practical difference for Long Island homeowners juggling busy schedules and for property managers who cannot afford to close off commercial spaces for days at a time.
The dust factor is equally significant. Because screening only abrades the top finish layer, and not the wood itself, the volume of particulate released into the air is far lower than full sanding. Families with young children, individuals with allergies, and anyone sensitive to air quality will notice this difference immediately.
Practical benefits at a glance:
- Most screening jobs are done the same day they start
- Floors can often be walked on within hours of finish application
- No need to empty rooms of furniture as thoroughly as full refinishing requires
- No heavy dust settling on furniture, curtains, or HVAC systems
- Less disruption to daily routines or business operations
- Preserves the structural integrity of the wood by avoiding repeated sanding
For businesses on Long Island, this is a significant operational advantage. A retail shop, restaurant, or office building can schedule a screen-and-recoat on a Sunday and be fully operational again Monday morning. Full sanding and refinishing would likely require several days of closure.
Pro Tip: If you manage rental properties on Long Island, scheduling a screen-and-recoat between tenant turnovers is one of the most cost-effective ways to keep hardwood floors looking fresh without triggering a full refinishing budget line. It extends the life of the floor and impresses incoming tenants with a clean, polished appearance.
Our cleaner buff and recoat service captures residual dust at the source using advanced equipment, and our eco-friendly screening process uses low-VOC finishes that are healthier for your home and the environment.
The screening process step-by-step: From assessment to new finish
With the advantages clear, here is exactly how real-world screening jobs are carried out and what to expect at each step.
1. On-site assessment
A technician examines the floor visually and tactilely to confirm the finish layer is intact. This is the most critical step. A rushed or skipped assessment is the most common reason screening jobs fail. Outcomes depend heavily on finish type, surface condition, prep quality, and contractor process controls, not on a one-size-fits-all checklist.
2. Surface preparation
The floor is cleaned thoroughly to remove dirt, grease, and any residue that could interfere with finish adhesion. If the floor has been treated with wax or oil in the past, that contamination must be removed before any screening begins. Skipping this step is a major cause of adhesion failure.
3. Buffing and screening
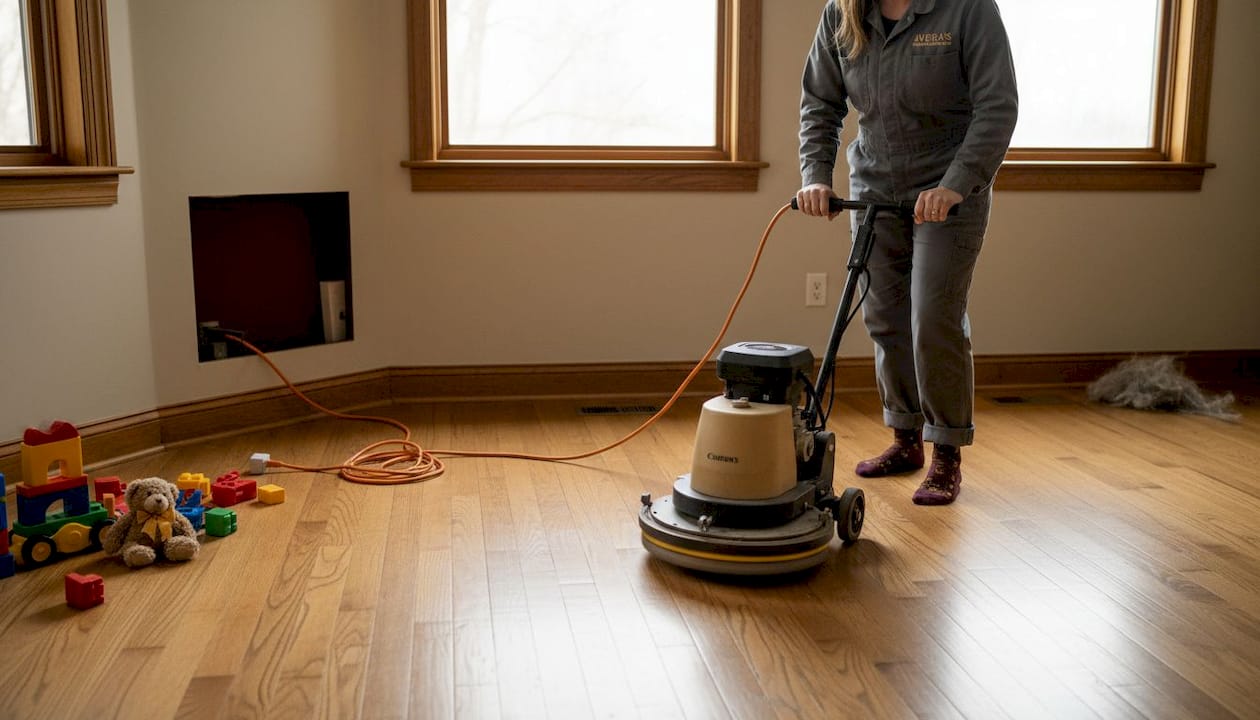
A floor buffer fitted with a fine mesh abrasive screen, typically 120-grit, passes over the entire surface in a controlled pattern. Fine mesh screens roughen the finish for bonding, creating micro-abrasions that give the new coat something to grip. This step generates a small amount of fine dust, much less than full sanding, but the room is still ventilated properly.
4. Thorough vacuuming
After buffing, all residual dust and debris are vacuumed up completely before the new finish goes down. Any particles left on the surface will be trapped under the fresh coat and create a gritty, uneven texture.
5. Application of new protective finish
A fresh coat of polyurethane or another appropriate finish is applied evenly across the floor. The finish type selected depends on the existing coating, the floor species, and the client’s preferences. We use low-VOC options wherever possible for better indoor air quality.
6. Drying and curing
Water-based finishes dry significantly faster than oil-based ones. In many cases, a screened floor can handle light foot traffic within two to four hours. For faster results, UV-cured finishes harden almost instantly, allowing same-day use without any waiting period.
7. Final walk-through
The technician inspects the finished surface for uniformity, missed spots, or debris trapped in the finish. Any issues are addressed before the job is called complete.
You can explore our detailed screening process guide and see the specific steps we follow for our screen recoat dust-free service.
Pro Tip: Ask your contractor which finish they plan to use before the job begins. Water-based polyurethane dries faster and has lower VOC levels. Oil-based polyurethane is more durable but takes longer to dry and has a stronger odor. Knowing this ahead of time helps you plan your day appropriately.
A fresh take on screening: What most guides miss
Here is what seasoned experts and Long Island property managers know that most online guides never mention.
Screening is not a universal solution. It operates within a genuinely narrow window of eligibility, and misapplication, applying screening to floors with compromised finishes, deep contamination, or worn-through areas, leads directly to repeat costs and early failure. Most online guides present screening as a straightforward, low-risk option without adequately emphasizing how easily that window can be missed.
The problem is that eligibility is not always obvious to the untrained eye. A floor might look like it just needs a refresh when it actually has finish that has broken down below the surface, or old wax layers that are invisible until a finish fails to bond. Internet articles describing screening as a quick DIY solution underestimate the importance of a proper on-site assessment. There is no standardized benchmark for screening outcomes. Results vary based on floor species, existing finish chemistry, prep quality, and the equipment used.
We have seen this pattern repeatedly with Long Island properties that had prior screening work done by unqualified contractors. The new finish peeled within months because the prep was insufficient, and the floor ultimately needed full refinishing anyway, doubling the total cost. Doing the diagnosis correctly from the start, and being honest when a floor genuinely needs full sanding, is what separates a trustworthy contractor from one who takes the easy job regardless of whether it is the right one.
If you are considering refreshing hardwood without sanding, we always recommend an in-person evaluation first. The five-minute assessment at the start of a job protects you from paying for a solution that will not hold.
Smart screening solutions for your hardwood floors
If you have read this far and recognized your floor in one of these scenarios, you are already ahead of most homeowners when it comes to understanding your maintenance options.

At Savera Wood Floor Refinishing, we bring Long Island-specific expertise to every assessment, whether you need a straightforward screen-and-recoat or a full dust-free refinishing with UV-cure finish technology. Our 99% dust-free process and instant-cure UV finishes mean you spend less time waiting and more time enjoying your restored floors. From residential living rooms in Nassau County to commercial spaces across Suffolk County, we handle it all with care and precision. Contact us today to schedule your on-site floor assessment and find out which service is the right fit for your floors.
Frequently asked questions
What grit screen is typically used for floor surface screening?
Most screening jobs use a fine mesh pad around 120-grit to effectively scuff the polyurethane finish without removing any wood fiber beneath it.
How long does floor surface screening take compared to full refinishing?
Screening usually takes about one day with minimal dust output, while full refinishing typically requires three to five days due to sanding, staining, and extended drying times.
Can screening fix deep scratches or water-damaged floors?
No. Screening only addresses surface-level wear within the finish layer. Deep scratches, gouges, or water penetration into the wood require full sanding and refinishing to properly repair.
What are common mistakes to avoid with floor surface screening?
Applying screening to floors with wax, oil contamination, or worn-through finishes leads to adhesion failure and repeat work. Always confirm eligibility through an on-site assessment before proceeding.
Does screening extend floor life as long as full refinishing?
Screening restores the protective finish layer and extends floor life, but outcomes depend on surface condition and prep quality. It cannot add color, repair deep damage, or match the longevity boost that full refinishing provides.
Recommended
- Wood Floor Screen & Recoat in Great Neck, NY Guide
- Wood Floor Screen and Recoat in Great Neck, NY Guide
- Screening Wood Floors in Huntington, NY: A Smart Way to Refresh Hardwood Without Full Sanding – Expert Wood Floor Refinishing Company | Savera Hardwood Services
- Screening Wood Floors in Huntington, NY Without Full Sanding
- Flooring Installation – Leonardo’s Flooring Corp