

Quick-action checklist for this weekend:
- Place a coarse outdoor mat and a softer indoor mat at every entry point
- Stick felt pads under all chair legs, table bases, and sofa feet
- Switch to a pH-neutral hardwood cleaner such as Bona Hardwood Floor Cleaner or Rejuvenate Floor Cleaner
- Set your vacuum to the bare-floor or hard-floor mode (brush roll off)
- Pick up a hygrometer to monitor indoor humidity
Pro Tip: If you’re in Smithtown and considering hardwood floor refinishing, start with these five habits before calling anyone. Prevention done right can add years to your existing finish.
Key Takeaways
Consistent daily habits and the right finish choice protect hardwood floors far more effectively than any single product or occasional deep clean.
| Point | Details |
|---|---|
| Stop grit at the door | Use a two-mat system and a no-shoes or soft-soled-only policy to cut the abrasion that causes most finish wear. |
| Clean daily, damp-mop weekly | Dry-dust with microfiber every day; use a pH-neutral cleaner on a barely damp mop pad once a week. |
| Control humidity year-round | Keep indoor relative humidity between 35% and 55% to prevent seasonal gaps and cupping in solid and engineered hardwood. |
| Match the repair to the damage | Surface scratches: restorer product. Thin finish: screen-and-recoat. Bare wood or cupping: full sand-and-refinish or professional assessment. |
| Saverawoodfloorrefinishing for Long Island floors | Dust-free sanding, UV-cure finishes, and same-day return-to-use make Saverawoodfloorrefinishing the professional option for homeowners who need durable results with minimal downtime. |
Table of Contents
- What actually damages hardwood floors?
- Everyday prevention habits that protect your floors
- Which pads, mats, and rugs actually protect your floors?
- How to clean hardwood floors without damaging them
- Which finish gives your floors the best protection?
- Restorer, screen-and-recoat, or full refinish: how do you decide?
- How to handle spills and stains before they become permanent
- What professional refinishing services can do that DIY can’t
- How indoor humidity affects your floors year-round
- Polish and touch-up products that restore sheen between refinishing
- Savera Wood Floor Refinishing: professional care for Long Island floors
- Sources
- FAQ
What actually damages hardwood floors?
Hardwood floors face five main threats, and knowing which one is hitting your floor tells you exactly which defense to prioritize.
Abrasion from grit. Sand, dirt, and fine debris tracked in from outside act like sandpaper under foot traffic. Every step grinds those particles against the finish, dulling it faster than almost anything else. The fix is entryway control and daily dusting.
Dents from concentrated force. High heels focus body weight onto a surface area smaller than a pencil tip. Heavy furniture legs do the same. Felt pads and a no-heels policy address both.
Moisture and water damage. Standing water seeps into seams and causes boards to cup or warp. Even a finish that looks intact can allow moisture in if it has thinned from wear. Spills need to be blotted immediately, and steam mops should never touch sealed hardwood.
UV fading. Direct sunlight bleaches wood color and breaks down finish chemistry over time. Rugs, curtains, and UV-filtering window film all slow this process.
Pet nails and heavy foot traffic. Dog nails, especially on larger breeds, leave fine scratches that accumulate into a hazy, worn look. Keeping nails trimmed and placing runners along high-traffic lanes reduces this significantly.
Everyday prevention habits that protect your floors
Prevention does more to extend finish life than any product upgrade. Consumer Reports testing confirms that entryway controls and daily dusting are among the highest-return actions a homeowner can take.
- Use a two-mat system at every entry. A coarse coir or rubber-scraper mat outside removes the bulk of sand and soil. A softer, absorbent mat just inside catches what’s left. Replace or shake both weekly.
- Adopt a footwear policy. A no-shoes rule is the gold standard. If that’s not realistic for your household or you rent and can’t enforce it with guests, a soft-soled-only rule still cuts dent risk significantly. Ban stilettos and cleats outright.
- Dry-dust or microfiber-sweep daily. A flat microfiber mop picks up grit without scattering it. This single habit prevents most of the abrasion that dulls finish in high-traffic zones.
- Lift furniture, never slide it. Sliding even a lightweight chair across hardwood can leave a visible scratch in seconds. Use two people for heavier pieces, or place furniture sliders underneath before moving.
- Trim pet nails every two to three weeks. Long nails on dogs and cats create fine scratches that accumulate quickly on softer wood species like pine or cherry.
- Place runners along traffic lanes. Hallways, kitchen work paths, and the space in front of sofas take the most daily wear. A runner sized to cover the full width of the path protects those lanes without hiding the floor entirely.
Pro Tip: Size your area rugs to leave at least 8–12 inches of bare floor visible at the edges of a room. This keeps the wood’s character visible while protecting the highest-traffic center zone. For a hallway runner, aim for a width that covers the walking path but not the full floor width, so you can monitor the floor condition on both sides.
Which pads, mats, and rugs actually protect your floors?
Not all protective products work the same way, and a few common choices can actually cause damage.
Furniture pads and glides:
- Felt pads are the best choice for most furniture legs. They slide easily, don’t scratch, and absorb impact. For heavy items like sofas or bookshelves, nail-in felt cups hold better than adhesive pads.
- Adhesive felt pads compress and collect grit over time. Replace them every three to six months, or sooner if you notice any hardening or debris embedded in the pad surface.
- Hard plastic glides are not suitable for hardwood. They concentrate pressure and can scratch even a fresh finish.
- Rolling office chairs need casters rated specifically for hard floors (soft polyurethane wheels, not hard nylon). A chair mat designed for hard floors is a simpler solution for most home offices.
Rugs and runners:
- Avoid rugs with stiff rubber backing. That type of backing traps grit underneath and can discolor or chemically react with polyurethane finishes over time.
- Choose a breathable rug pad made from felt or a felt-and-rubber combination. These grip the rug without sealing moisture against the floor.
- In kitchens, cushioned anti-fatigue mats with a non-slip base protect the floor and your feet. Look for mats labeled safe for hardwood or sealed floors.
- Outdoor coir doormats work well at exterior entries because the coarse fibers scrape debris off shoes effectively.
How to clean hardwood floors without damaging them
A consistent cleaning routine is the single most reliable way to preserve your finish between professional services.
Daily: Dry-dust with a flat microfiber mop or use a vacuum on the bare-floor setting (brush roll completely off). Consumer Reports recommends soft-bristle tools and turning off brush rolls to avoid abrasion. This removes the grit that causes most finish wear.
Weekly: Damp-mop with a pH-neutral hardwood cleaner. Spray the cleaner onto the mop pad, not directly onto the floor. The mop should feel barely damp, never wet. Follow the grain direction. Ned’s Floors recommends microfiber over string mops and specifically cautions against vinegar and Murphy’s Oil Soap, both of which build residue or etch polyurethane finishes over time.
Monthly: Move furniture and inspect traffic lanes for dull patches. If the finish looks thin or flat in those areas, that’s your signal to schedule a screen-and-recoat before bare wood is exposed.
What to avoid entirely:
- Steam mops: the heat and moisture accelerate finish breakdown and can warp boards
- Vinegar: acidic and damaging to polyurethane over repeated use
- Murphy’s Oil Soap: leaves a residue that interferes with future finish adhesion
- Bleach and ammonia: strip finish and can discolor wood
- Wax-based cleaners on poly finishes: create adhesion problems for any future recoat
Statistic callout: Microfiber mops used with a pH-neutral cleaner are the cleaning method most consistently recommended by flooring professionals and consumer testing authorities for maintaining sealed hardwood finishes.
Which finish gives your floors the best protection?
The right topcoat depends on your household, your tolerance for downtime, and how much maintenance you want to do long-term. Here’s how the main options compare:
| Finish Type | Durability / Scratch Resistance | VOC / Indoor Air Quality | Dry / Cure Time | Appearance / Ambering | DIY vs. Pro |
|---|---|---|---|---|---|
| Water-based polyurethane (1K) | Good | Low VOC | 2–4 hours dry | Clear, no ambering | DIY-friendly |
| 2K water-based (e.g., Bona Traffic HD) | Excellent | Low VOC | 2–3 hours dry | Clear, minimal ambering | Pro recommended |
| Oil-based polyurethane | Very good | High VOC | 8–12 hours dry; up to 30 days full cure | Warm amber tone | DIY possible, ventilation critical |
| Hardwax oil | Moderate | Low to medium | 12 hours dry | Natural matte, no film | DIY possible; spot repair easy |
| UV-curable finish | Excellent | Very low | Instant cure under UV lamp | Clear to natural | Pro only |
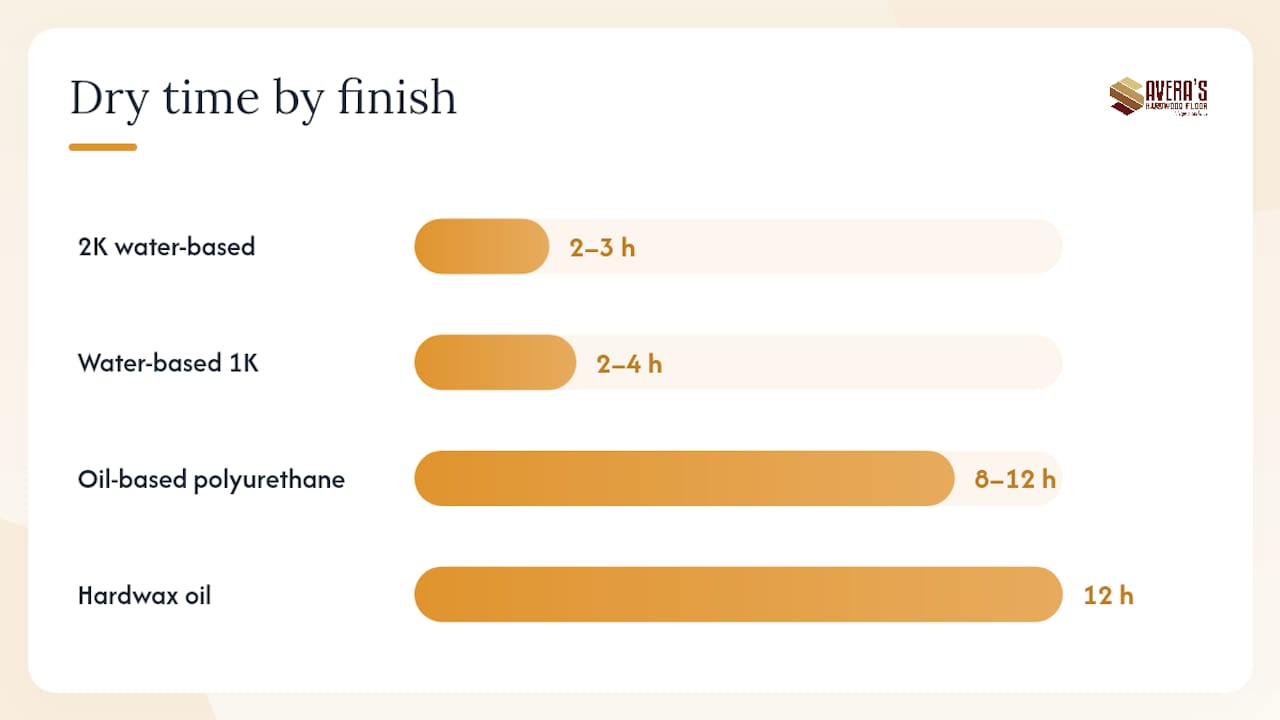
Bona’s professional guidance notes that Bona Traffic HD and similar modern waterborne systems offer strong durability with low VOCs and fast dry times, making them well-suited for family homes and occupied buildings. 2K water-based systems rival or exceed oil-based durability in lab testing while allowing faster return-to-use.
Choosing by household type:
- Busy family with pets: a 2K waterborne system or conversion-grade finish is the most durable choice
- Historic or character-focused home: hardwax oil allows easy spot repairs and a natural look, though it needs maintenance coats every one to three years
- Same-day return-to-use needed: UV-curable finish from a professional is the only option that cures instantly
Application technique matters as much as product selection. Back-rolling, applying multiple thin coats, and screening between coats prevent bubbling, improve adhesion, and extend finish life. This is one reason professional application consistently outperforms DIY for premium finishes. For low-VOC finishes and anti-slip options suited to families, the finish category and application method both need to match your household’s needs.
Restorer, screen-and-recoat, or full refinish: how do you decide?
The right repair level depends on what you’re actually seeing on the floor.
- Surface scratches and dull sheen only: A restorer product is the right starting point. Rejuvenate, Minwax revivers, and some Rust-Oleum kits can fill light scratches and restore gloss without sanding. These are short-term solutions for surface wear, not for floors with deep damage or bare wood.
- Thin finish in traffic lanes, no bare wood visible: Schedule a screen-and-recoat. This process lightly abrades the existing finish, then applies a fresh topcoat. For a 500 sq ft room, screen-and-recoat typically runs $1.00–$2.50 per square foot, with a one-day turnaround in many cases.
- Bare wood visible, deep gouges, cupping, or persistent stains: Full sand-and-refinish is needed. This removes the old finish entirely and starts fresh. For the same 500 sq ft room, full refinishing typically runs $3.00–$5.00 per square foot or more depending on condition, species, and finish selected.
- After water damage or if boards are cupping: Stop DIY work and call a professional for an assessment. Cupped boards may need to dry and stabilize before any finish work begins.
Seasonal timing also matters for gap filling. Wood expands in summer humidity and contracts in winter dryness. Filling gaps during the driest part of winter often means those fills crack or pop out by spring. A professional can advise on the right timing for your specific floor and local climate.
How to handle spills and stains before they become permanent
Speed is everything with spills on hardwood. The longer liquid sits, the greater the risk of finish penetration or wood staining.
Immediate protocol: Blot with a clean, dry cloth. Don’t scrub, which spreads the liquid and can abrade the finish. After blotting, follow with a barely damp microfiber pass, then dry the area completely with a fresh cloth.
Stain-specific steps:
- Red wine: Blot immediately, then clean with a pH-neutral hardwood cleaner on a damp cloth. Don’t let it sit.
- Pet urine: Use an enzyme-based cleaner safe for hardwood. Enzyme cleaners break down the organic compounds that cause odor and staining. Avoid ammonia-based cleaners, which can damage the finish.
- Candle wax: Let it harden completely, then gently lift with a plastic scraper. Never use a metal scraper. Follow with a damp microfiber wipe.
- Oil or grease: A small amount of dish soap diluted in water on a damp cloth usually lifts cooking oil. Dry thoroughly afterward.
If liquid soaks into the wood and leaves a dark discoloration, the finish has failed in that spot. That’s a sign to stop DIY cleaning and consult a professional. Dark staining that doesn’t lift with surface cleaning often requires sanding to bare wood and spot-treating before refinishing.
What professional refinishing services can do that DIY can’t
Some floor conditions genuinely call for professional equipment and expertise. Knowing when to make that call saves you from compounding the damage.
Dust-free sanding and HEPA containment make a real difference for households with allergy sufferers, young children, or pets. Traditional sanding releases fine wood dust throughout the home. Savera Wood Floor Refinishing’s dust-free process uses HEPA-filtered vacuums and sectional plastic containment to keep that dust out of your living space entirely.
UV-curable finishes cure instantly under a UV lamp rather than over hours or days. This means furniture goes back the same day in many cases, which is a significant advantage for families, renters on tight schedules, and commercial spaces.
Professional services that go beyond sanding:
- Screen-and-recoat for thinning finishes without full sanding
- Deep cleaning and wax removal before recoating (critical when old wax prevents new finish adhesion)
- Engineered hardwood refinishing for floors that can’t tolerate aggressive sanding
- Color correction and re-staining to update the floor’s look without replacing it
When visible bare wood, cupping, persistent stains, or post-water-damage conditions are present, a professional assessment is the right next step. A trained eye can tell you whether the floor needs a light refresh or a full rebuild, and that assessment prevents expensive mistakes.
How indoor humidity affects your floors year-round
Wood is a living material that responds to moisture in the air. Solid hardwood expands when humidity rises and contracts when it drops. Over time, unmanaged swings cause gaps in winter and cupping or crowning in summer.
Maintaining indoor relative humidity between 35% and 55% year-round is the standard recommendation for both solid and engineered hardwood. A basic digital hygrometer (available for under $15 at most hardware stores) lets you monitor this without guessing.
In winter, forced-air heating drops indoor humidity fast. A whole-home humidifier or portable room humidifier in the main living areas keeps the wood from shrinking and gapping. In summer, central air conditioning usually handles excess humidity, but in coastal or humid climates, a dehumidifier may be needed in rooms without AC coverage.
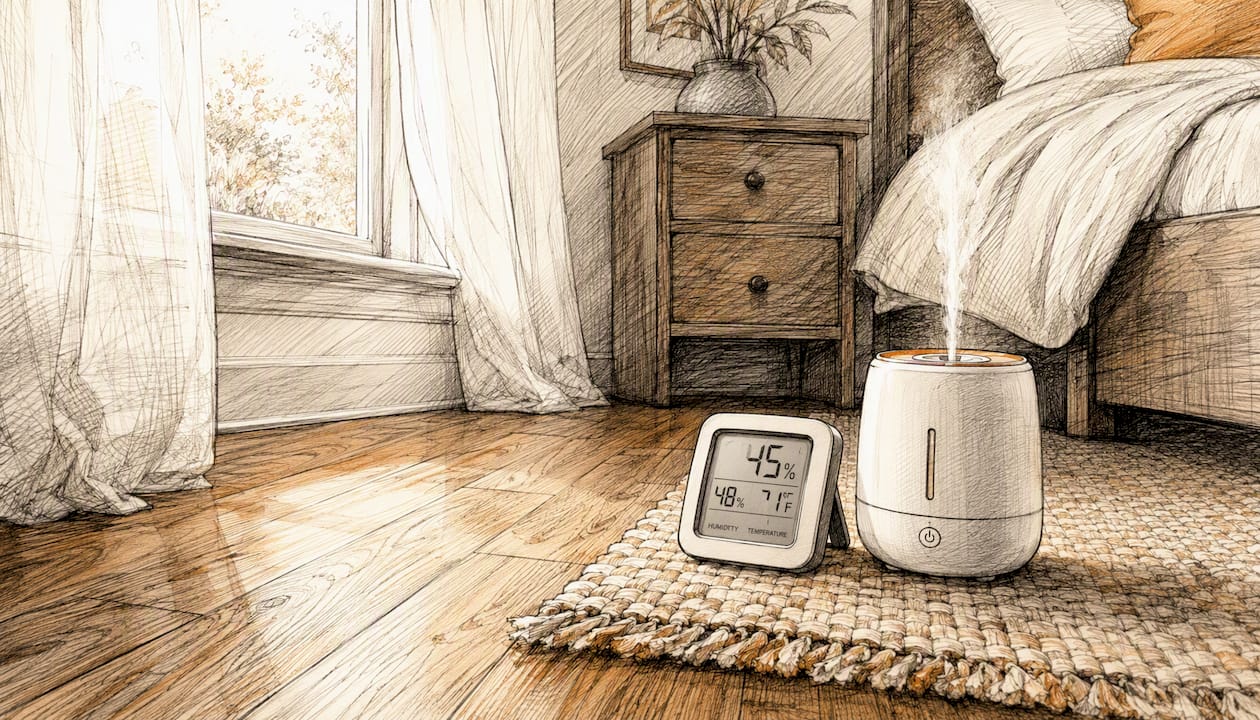
Engineered hardwood handles humidity swings better than solid wood because of its cross-ply construction, but it still benefits from stable conditions. If you’re on Long Island, where summers are humid and winters are dry, seasonal humidity management is especially worth the small investment in monitoring equipment.
Polish and touch-up products that restore sheen between refinishing
When your floors look dull but don’t need sanding, a restorer or polish can bring back the sheen quickly.
Rejuvenate Floor Restorer is one of the most widely used options for polyurethane-finished floors. It fills micro-scratches and adds a protective layer of shine. Apply it with a flat mop pad after cleaning, let it dry, and avoid foot traffic for about 30 minutes.
Minwax Hardwood Floor Reviver works similarly, adding a clear protective layer that refreshes worn poly finishes. It’s a good choice for floors that have lost their sheen in traffic lanes but still have intact finish underneath.
For spot repairs on small scratches, color-matched wood markers and wax fill sticks (available at most hardware stores) can make individual scratches much less visible without any sanding. These are cosmetic fixes, not structural ones, but they work well for maintaining appearance between professional visits.
One important caution: restorer products are not compatible with all finish types. On wax-finished or oil-finished floors, a polyurethane-based restorer can create adhesion problems. If you’re unsure what finish is on your floor, test in an inconspicuous area first, or ask a professional before applying anything.
What we’ve learned from floors that last
The homeowners whose floors hold up best over decades aren’t the ones who spent the most on their finish. They’re the ones who made small habits consistent: a mat at the door, a microfiber sweep every morning, felt pads replaced twice a year, and a damp mop with the right cleaner once a week.
A family with a large dog in a Smithtown colonial can absolutely maintain beautiful hardwood floors. The dog’s nails get trimmed regularly, there’s a runner down the hallway, and the entryway has a boot tray. An apartment renter in a pre-war building can do the same with a no-shoes policy and a $12 microfiber mop. Neither situation requires a perfect floor or a perfect budget.
The one place where habits alone aren’t enough is when the finish has genuinely worn through. At that point, continuing to clean and polish a bare or near-bare surface doesn’t protect the wood. It just delays the inevitable. Scheduling a screen-and-recoat before that point is always cheaper than waiting for a full refinish.
On Long Island, where seasonal humidity swings are real, keeping a hygrometer in your main living area and running a humidifier in winter is one of the most cost-effective things you can do for your floors. It’s not glamorous advice, but it prevents the kind of gapping and cupping that no amount of cleaning will fix.
Savera Wood Floor Refinishing: professional care for Long Island floors
When prevention and DIY products have taken you as far as they can, Saverawoodfloorrefinishing is the professional option built for Long Island homeowners who want results without the disruption.

Our dust-free sanding process uses HEPA-filtered equipment and sectional containment so your home stays clean throughout the job. Our UV-curable finish system cures instantly, meaning furniture goes back the same day in most cases. We handle screen-and-recoat, deep cleaning, wax removal, engineered hardwood refinishing, and full sand-and-refinish for every floor condition from lightly worn to water-damaged. As a veteran-owned, family-operated company, we treat every project with the same care we’d give our own home.
Ready to see what your floors can look like? Call Savera Wood Floor Refinishing at 631-866-1972 or visit Saverawoodfloorrefinishing to schedule your assessment.
Sources
The recommendations in this article draw on guidance from Consumer Reports’ floor care testing, Bona’s professional finish selection guide, the LOBA/Bailey Flooring overview of water-based coatings, D and G Flooring’s coating application guide, D and G Flooring’s finish types comparison, The Spruce’s restorer guidance, Easiklip’s humidity and maintenance guide, and Ned’s Floors’ cleaning safety guide. For Savera-specific service details, visit Saverawoodfloorrefinishing. For homeowners considering low-disruption home updates alongside floor care, One Day Doors & Closets offers a useful perspective on refreshing your space without a full renovation.
- Ways to clean and protect your floors (Consumer Reports)
- Choosing a hardwood floor finish and what to consider (Bona)
- Water-based floor coatings for hardwood floors — the definitive professional guide (Bailey Flooring Supplies / LOBA overview)
- Hardwood floor finishes: types, sheens, and durability (D and G Flooring)
- Before refinishing old hardwood floors (The Spruce)
- How to clean hardwood floors without damaging them (Ned’s Floors)
FAQ
What is the best coating for hardwood floors?
For most households, a 2K water-based polyurethane such as Bona Traffic HD offers the best combination of durability, low VOCs, and fast dry time. UV-curable finishes cure instantly and are the most durable option, but require professional application.
Can you use a steam mop on hardwood floors?
No. Steam mops force heat and moisture into the finish and wood, accelerating finish breakdown and risking board warping or cupping. Use a barely damp microfiber mop with a pH-neutral cleaner instead.
How often should hardwood floors be recoated?
A screen-and-recoat is typically needed every three to five years in a busy household, or sooner if traffic lanes look dull or thin. Full refinishing intervals vary depending on traffic, species, and how well the finish has been maintained.
What should you do about pet scratches on hardwood floors?
For light surface scratches, a restorer product like Rejuvenate or a color-matched wax fill stick can reduce visibility without sanding. Trim pet nails every two to three weeks and place runners in high-traffic pet paths to slow future accumulation.
Does indoor humidity really affect hardwood floors?
Yes, significantly. Solid and engineered hardwood both expand and contract with humidity changes.
Recommended
- How to Protect Wood Floors: A Homeowner’s Guide – Expert Wood Floor Refinishing Company | Savera Hardwood Services
- Wood Floor Protection Techniques for Lasting Durability – Expert Wood Floor Refinishing Company | Savera Hardwood Services
- Best Way to Keep Hard Floors Clean at Home – Expert Wood Floor Refinishing Company | Savera Hardwood Services
- How to Care for Wood Floors: A Long Island Homeowner’s Guide | Savera