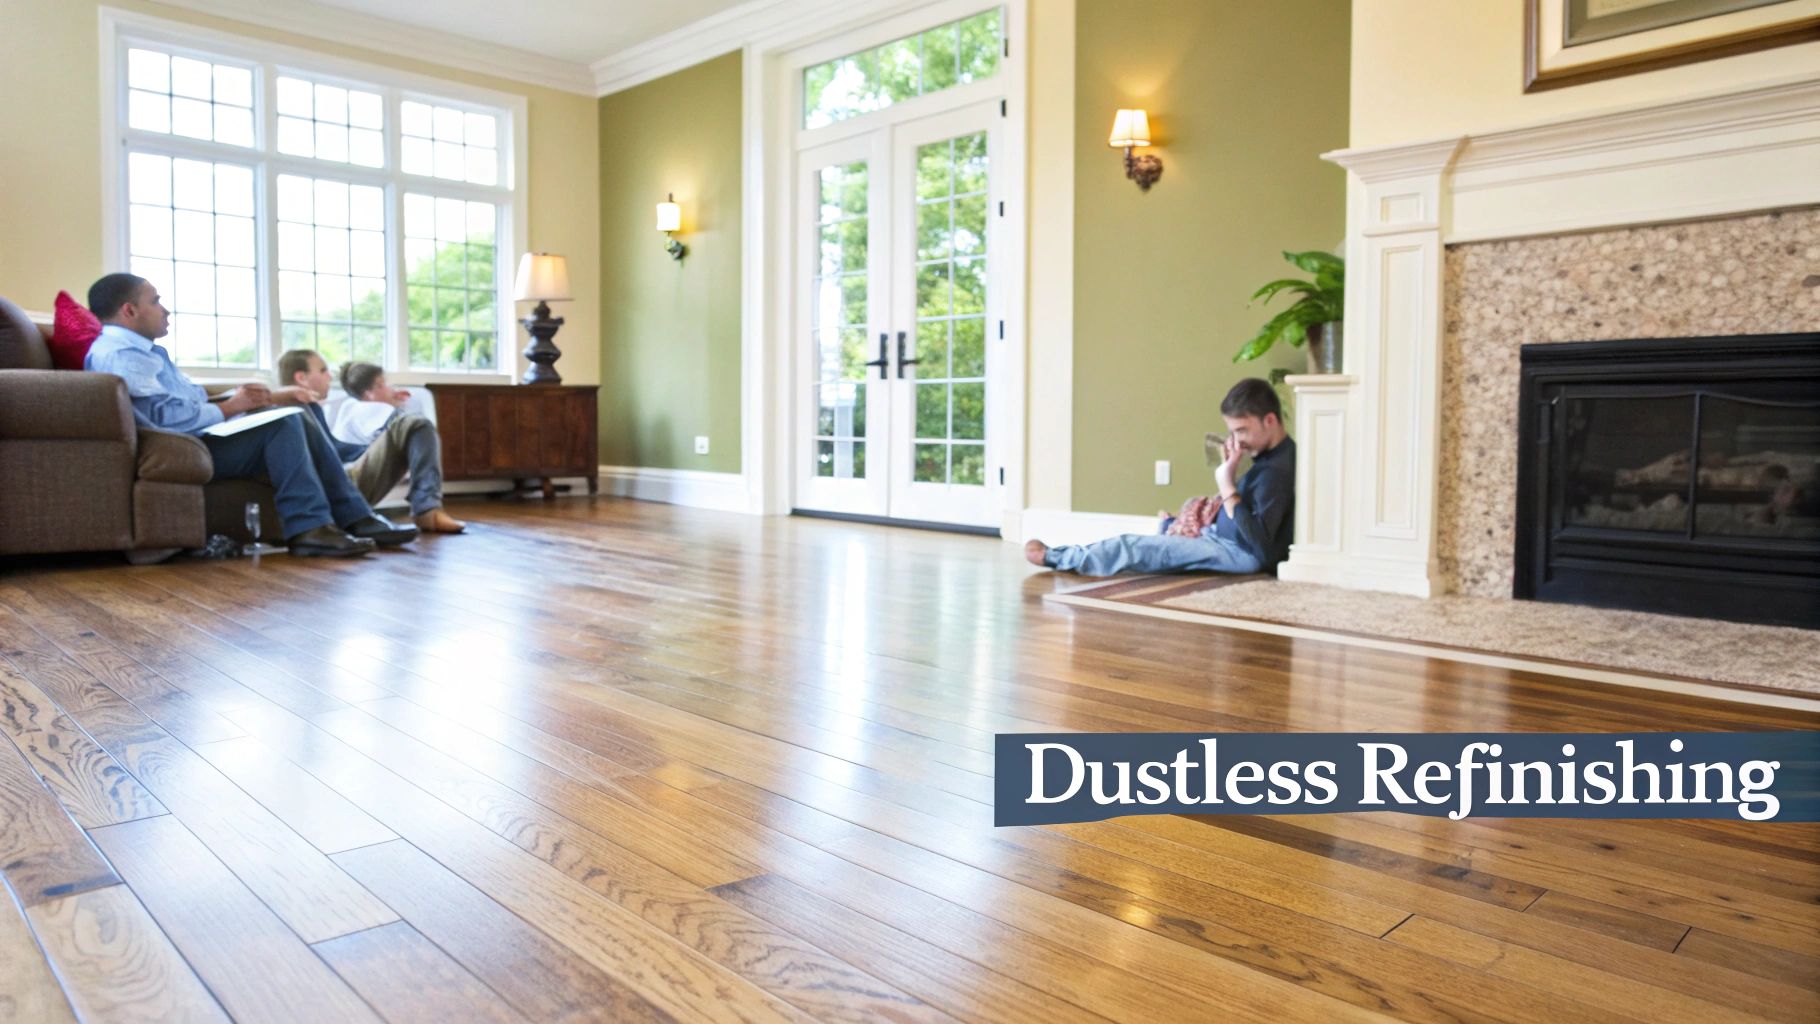
Tag Archives: hardwood floor sanding

Does Peeling Finish Require Full Sanding in Bohemia

Peeling doesn't automatically mean every board needs aggressive sanding, but it does signal likely adhesion failure. A cross-hatch tape test showing more than about 10% finish removal indicates that screening is unsuitable and that full sanding or an approved stripping system is required (Start Woodworking Now).

You're probably looking at the floor in your Bohemia home and wondering whether a few lifted flakes mean the entire room has to be stripped. That reaction is understandable, especially when the finish is peeling around a doorway, bubbling near a sunny window, or lifting in a busy hallway. The practical answer depends on what remains firmly bonded, whether the damage reaches the wood, and how much of the existing coating fails a simple adhesion test.

A sound finish with dullness or light traffic wear may only need a screen and recoat. A loose finish needs a different approach, because a new topcoat can make the floor look better briefly while leaving the failure underneath. The objective isn't to sand as aggressively as possible. It's to remove the minimum amount of material necessary to create a clean, stable surface.

Why Peeling Finish Happens and What It Actually Means

When finish lifts in small islands beside a doorway or along a traffic path, the floor is not just worn. The coating is separating from the surface below, and that changes the repair.

Peeling finish usually points to adhesion failure. That failure can happen between the topcoat and the wood, or between one finish layer and an older one that never bonded properly. A screen-and-recoat only works when the existing coating is still attached well enough to accept a new layer. Once the finish is flaking, bubbling, or peeling at the edges, screening can ride over the loose spots, miss the weak bond, and leave a floor that looks better for a short time but still fails underneath.

A hand peeling away layers of old blue paint from a rustic wooden surface with colorful splashes.

Dullness is different from delamination

A dull floor and a peeling floor are two different jobs.

Normal wear leaves the finish thin, scratched, or cloudy, but still attached. In that case, the surface may be a candidate for abrading and recoating. Delamination shows up differently. You will see curled edges, chips that come off in layers, sections where one coat releases from another, or spots where bare wood starts showing through. Once that edge starts lifting, foot traffic and cleaning keep catching it.

Peeling often starts in predictable places. I see it first at thresholds, in hallways, under dining chairs, and near entry points where moisture gets tracked in. Sun-exposed areas can also fail sooner if the finish has aged unevenly. Those patterns do not prove the cause on their own, but they tell you where to inspect and where a simple touch test is not enough.

Practical rule: A fresh coat can improve sheen. It cannot bond loose finish back down.

Why coating over the problem fails

Coating over peeling finish usually creates a short-lived cosmetic fix. The new finish can bridge over loose edges, then traffic, seasonal movement, and routine cleaning break that bond again. The result is a patchy floor that often needs more correction than it did at the start.

Older Long Island floors add another layer of uncertainty. Some have wax contamination, oily residue, old varnish, or several finish systems stacked over time. Homeowners comparing wood-surface prep methods may find some overlap in this guide by Home Pro's Remodeling & Repairs, but hardwood floors still need an adhesion check before any recoat decision.

That is the meaning of peeling. It is a bond problem first. The smart boundary between a screen-and-recoat and full sanding is whether the existing finish still holds where it counts, and on engineered flooring, whether the wear layer gives you enough margin to sand safely.

How to Test Finish Adhesion Before Choosing Sanding

A floor can fool you. I've seen boards that looked like they needed a full sand, then passed an adhesion check and took a clean recoat. I've also seen small peeling spots turn out to be the edge of a wider bond failure. That is why the cross-hatch tape test is the line between guessing and choosing the right repair.

Use a hidden spot first, under furniture, inside a closet, or at the edge of a low-visibility area. Dry-clean the surface so dust does not interfere, but do not wash it right before testing. Water, residue, and fresh cleaner can change the result.

Then run the test in a controlled way:

  1. Mark a small test area. With a sharp blade, cut a tight cross-hatch grid through the finish. Score the coating fully, but stop short of digging into the wood.
  2. Apply firm tape pressure. Press adhesive tape over the grid and rub it down so it contacts the finish along all the cuts.
  3. Pull at approximately 180 degrees. Remove the tape sharply, then inspect both the tape and the floor surface.
  4. Compare more than one concealed area. If the visible peeling is near an entry, a sunny patch, or a room transition, test a second hidden spot nearby. One solid area does not clear the whole room.

An infographic showing three simple steps to test wood finish adhesion before starting a sanding project.

How to interpret the result

If the tape lifts only a small loose edge and the coating around it stays put, the floor may be a candidate for a localized repair or, in some cases, restoration rather than full removal. That still means real prep. Loose finish gets scraped off, the edge gets feathered smooth, the area gets cleaned properly, and the replacement coating gets tested for compatibility before it goes any farther.

If the tape pulls off multiple squares of finish or the release spreads beyond the visibly damaged spot, screening is a poor bet. In that case, the failed layer needs to come off through full sanding or an approved stripping method before any new finish goes down (screening and sanding decision guidance).

The other side of the decision matters too. Homeowners sometimes see a few flakes and assume the only safe move is aggressive sanding. That is not always true, especially where the surrounding finish is still bonded and the problem is confined. If you want a broader read on floors that may respond to lighter restoration work, review signs your hardwood floors may only need restoration.

Check more than the tape

Adhesion is the first filter, not the only one. Before choosing the repair, identify the existing finish as best you can, note any moisture history, and look for wax, polish buildup, or detergent residue. Those contamination issues can make a recoat fail even when the test area looks decent.

Engineered flooring adds a second limit. Even when the finish has failed, full sanding is only safe if the wear layer gives enough margin. On thin engineered boards, a conservative repair can be the better choice because you do not get unlimited chances to sand.

For a visual demonstration of finish preparation and inspection, use the video below as general context, then rely on the actual condition of your floor rather than copying a procedure blindly.

Screen and Recoat versus Full Sanding and Refinishing

A peeling floor usually gives you one of two repair paths. If the finish is still bonded and the problem stays at the surface, a screen and recoat can save the floor without removing more wood than needed. If the coating is releasing across the area, the wood is exposed, or the damage reaches below the finish, full sanding is the repair that fixes the failure.

Screening is a light abrasion of the existing finish, followed by a compatible new topcoat. It works on floors with worn sheen, minor traffic scratches, and small areas of finish wear, but only when the remaining finish is holding tight. It does not flatten gouges, erase stains that have soaked into the wood, or stop broad peeling from spreading. If the cross-hatch tape test showed weak adhesion, screening is a short-lived cosmetic pass, not a repair.

Full sanding strips off the failed finish and takes the surface back to a sound layer that can accept a new system. In the field, one simple clue matters. If your fingernail catches in the wood itself instead of just catching on a rough edge of finish, a screen and recoat will not correct it, as explained in refinishing and recoating guidance.

Screen and Recoat versus Full Sanding Decision Guide

Floor Condition Screen and Recoat Full Sand and Refinish
Dull but firmly bonded finish Appropriate when the coating remains stable Usually more removal than necessary
Light scratches contained in the finish May refresh sheen and improve appearance Consider if scratches reach the wood
Isolated edge lifting Possible after removing loose material and testing compatibility Appropriate if surrounding finish also releases
Widespread flaking or bubbling Unreliable because screening doesn't repair adhesion failure Remove failed coating before recoating
Bare or gray wood Won't restore missing protection Required where the finish has worn through
Deep gouges, water stains, or dark rings Won't correct damage below the coating Needed when damage reaches the substrate

The cross-hatch tape test is the cleanest decision line. Strong adhesion points toward screening, assuming the floor is clean and the new coat is compatible. Weak adhesion points toward sanding because the old finish has already lost its bond. That distinction saves homeowners money in both directions. It avoids needless sanding on a stable floor, and it avoids wasting a recoat over a finish that is already letting go. For another local comparison of those trade-offs, see screen and recoat versus sanding hardwood floors.

Engineered flooring changes the calculation

Engineered boards add a hard limit. A peeling finish does not automatically mean the floor can handle a full sand. Guidance based on NWFA thresholds says engineered flooring with a wear layer under 2.5 mm, or 3/32 inch, should not be sanded, unfinished products generally require 3.2 mm, or 4/32 inch, a typical full refinish removes about 0.8 mm, or 1/32 inch, and heavy correction can remove as much as 1.6 mm, or 1/16 inch (engineered hardwood sanding thickness thresholds).

That is why board construction matters before anyone starts cutting into a peeling engineered floor. If the wear layer is thin, aggressive sanding can reach the plywood core and raise the chance of delamination. In those cases, the safer choice may be a limited repair, localized board replacement, or accepting that the floor cannot be sanded again. Homeowners weighing those options can also review practical ways to restore worn hardwood surfaces.

Common Causes of Peeling Finish in Bohemia Homes

Peeling is a symptom, not a complete diagnosis. Two floors can look similar while requiring different repairs because one has wax residue, another has moisture exposure, and a third has an incompatible finish layered over an older coating.

A thoughtful woman sits in a room depicting home maintenance issues like mold, wall painting, and flooring wear.

Moisture and incomplete drying

Moisture can interfere with bonding when it enters from below, around a leak, or through repeated damp cleaning. A finish applied before the substrate dries can also lose adhesion. If peeling clusters near a bathroom, exterior door, radiator, or area affected by a leak, investigate the moisture history before selecting a coating.

A new finish applied over a damp or unstable surface may fail again, even after the visible flakes have been removed. Cleaning and drying are part of the repair, not optional finishing touches.

Contamination from wax and cleaning residue

Wax, oil residue, and detergent film can separate a new coating from the layer beneath it. Older Bohemia and Long Island floors may have received products that weren't designed to sit under a modern water-based finish. A floor can look clean while still carrying a bond-breaking residue.

That's why wax removal may be necessary before refinishing. Savera's hardwood floor wax removal service is one example of a targeted preparation option when residue is part of the problem.

Incompatible layers and poor abrasion

A replacement finish needs a compatible surface with enough mechanical tooth. If the earlier coating wasn't abraded properly, or if the new product doesn't bond to the existing layer, peeling can develop across broad areas. Guidance on varnish failures identifies inadequate intercoat abrasion, contamination, moisture, incompatible coatings, and coating applied before the substrate dried as common causes, and recommends removing failed layers before recoating (technical varnish failure guidance).

A small, stable repair may preserve more original wood than full-room sanding. Widespread failure, however, calls for removal of unstable material rather than another topcoat over the top.

DIY Prep Steps and Prevention Tips for Homeowners

Homeowners can do useful preparation without trying to reproduce a professional sanding job. Start by photographing the peeling areas, marking where the finish lifts, and noting whether the damage reaches bare wood. This map helps distinguish a contained repair from a pattern that crosses the room.

Keep water exposure controlled while you investigate. Don't flood the floor, use wax, or apply an untested polish to improve the appearance before the finish type is understood. Those products can make later preparation more difficult.

Safe preparation before an evaluation

  • Remove loose debris carefully. Vacuum with a soft floor attachment and avoid pulling at firmly bonded finish.
  • Pause wax and polish use. These products can leave residues that interfere with a replacement coating.
  • Look for moisture sources. Check nearby doors, plumbing fixtures, radiators, and areas where damp cleaning is common.
  • Mark the boundaries. Use removable painter's tape outside the visible failure so the pattern can be compared after cleaning.
  • Test a hidden area. Perform the cross-hatch procedure only where a small mark won't be obvious, and don't treat one stable test as proof that every room is sound.

Routine maintenance also matters after restoration. Use a dry or carefully damp cleaning method appropriate for the finish, wipe spills promptly, and avoid abrasive pads that scratch the protective layer. For additional homeowner guidance, review Savera's essential hardwood floor cleaning tips.

Know when DIY stops being economical

A spot repair can make sense when the failure is clearly isolated and the surrounding finish passes adhesion testing. It becomes risky when peeling appears in several rooms, continues beyond the visible edges, or returns after a previous coating attempt.

At that point, the problem isn't cosmetic touch-up. Someone needs to identify the coating layers, remove failed material without damaging sound wood, and confirm that the new finish is compatible. Homeowners with pets or sensitive indoor environments may also want to ask about dust containment and low-VOC, water-based finish options before work begins.

When to Call a Professional for Hardwood Floor Restoration

Professional help makes sense when the diagnosis is uncertain, the failure is widespread, or the floor's construction limits sanding. A qualified evaluation should connect three facts: how firmly the coating is bonded, whether the damage reaches the wood, and whether the floor has enough material remaining for the proposed treatment.

For a Bohemia homeowner with a sound, sufficiently thick solid-wood floor, peeling across broad areas commonly means removing the failed finish and refinishing from a properly prepared surface. Isolated topcoat wear without peeling may qualify for screening. On engineered boards below the 2.5 mm wear-layer threshold, sanding can reach the plywood core and create a delamination risk, so removal of loose coating, adhesion testing, and a compatible restoration approach may be safer (engineered-floor refinishing guidance).

An infographic detailing seven key signs indicating when homeowners should hire professional help for hardwood floor restoration.

Use this decision sequence

  1. Map the failure. Identify every peeling, bubbling, gray, or bare area instead of judging only the most visible patch.
  2. Test adhesion. Use the concealed cross-hatch tape test and note whether surrounding coating releases.
  3. Check the cause. Investigate moisture, wax, detergent residue, unknown finishes, and incomplete drying.
  4. Assess the substrate. Determine whether scratches, gouges, stains, or rings reach the wood.
  5. Confirm construction. Identify solid versus engineered flooring and measure the remaining wear layer where necessary.
  6. Choose the minimum effective treatment. Screen stable finish. Remove failed coating where adhesion has broken down.
  7. Plan maintenance. Keep moisture and contamination from undermining the new finish.

Repeated peeling usually means the original cause wasn't corrected. Applying another coat over an unresolved moisture issue, residue, or incompatible layer only postpones the next failure. Savera's full sand hardwood floor refinishing service is one option to discuss when the floor condition supports complete removal and refinishing.

Savera Wood Floor Refinishing uses dust-free containment and low-VOC, water-based finishes, with UV-cured finish options that can make floors ready for same-day use. The correct treatment still depends on the floor's adhesion, damage, and construction, not on the fact that the finish is peeling.


If your Bohemia floor is peeling, contact Savera Wood Floor Refinishing for an evaluation that separates stable finish from failed coating before sanding begins. Visit Savera Wood Floor Refinishing to discuss screen-and-recoat, targeted repair, or complete refinishing for your hardwood floor.

Does Peeling Finish Require Full Sanding in Bohemia

Peeling finish does not automatically require full sanding, but widespread peeling, failed adhesion, bare wood exposure, or moisture damage usually does. Isolated finish failure may only need screening or localized repair after the underlying cause is identified and fixed first.

You notice the problem after a humid stretch in Bohemia, perhaps when a deep cleaning has exposed edges that lift in thin sheets. The floor may look ruined, but the visible peeling is only the symptom. The central question is whether the coating failed while the wood underneath stayed sound, or whether moisture, contamination, movement, or an incompatible finish has affected the floor itself.

What Peeling Finish Actually Requires in Bohemia Homes

You see finish lifting after a humid week or after a heavy cleaning, and the floor can look far worse than it is. Peeling gets treated like a sanding verdict, but in Bohemia homes it is usually a diagnosis problem first. The visible failure may come from moisture, residue, or an incompatible coat sitting on top of a weak layer.

A peeling finish can start several ways. Wax or silicone residue blocks adhesion. Strong solvent or high-pH cleaning products can soften or weaken a film. Seasonal moisture can swell boards enough to stress the coating at edges and joints. On older floors, I often find multiple finish systems stacked over time, with the newest coat bonded to a layer that was already failing.

That is why Does Peeling Finish Require Full Sanding in Bohemia has no honest one-size-fits-all answer. Some floors only have a surface-bond problem. If the finish around the damaged area is still tight and the wood remains sound, a controlled screen and recoat or a localized repair may solve it. If the floor shows broad delamination, bare or gray wood, cupping, deep staining, or unevenness below the coating, full removal is usually the safer route.

Bohemia properties vary a lot. Older homes, rentals, commercial spaces, and recently updated houses do not carry the same refinishing history or the same remaining wear layer. A floor that has already been sanded several times deserves a more conservative approach than a newer solid-wood floor with more material left above the tongue.

Practical rule: Peeling means check adhesion and moisture first, then choose the least aggressive fix that will actually hold.

The Ohio History Connection advises light sanding or screening when the coating is worn but the floor is still structurally sound, and it also notes that wax buildup should be removed with a suitable solvent before rewaxing and buffing The Ohio History Connection's wood-floor maintenance guidance. For localized damage, the same guidance says fine sanding in the approximate 150 to 220 grit range can be followed by refinishing only the affected area.

If you want a field assessment before committing to a full cut, a Bohemia hardwood floor refinishing service can determine whether the problem is failed adhesion, contamination, moisture stress, or wear. That distinction saves money, and it prevents a full sanding that still fails because the underlying cause was never fixed.

How to Diagnose Adhesion Failure Before Choosing Sanding

Start with a room-by-room condition map. Don't judge the floor from one closet or one living-room corner, because coating failure can be distributed unevenly across a property.

Map the failure before touching the finish

Record where you see:

  • Peeling or delamination: Note whether the finish lifts in isolated chips, along board edges, or in broad sheets.
  • Bare or gray wood: These areas suggest that the protective film has worn through or that moisture has affected the surface.
  • Cupping or board movement: Raised edges and depressed centers can point to moisture-related movement below the coating.
  • Stains and scratches: Deep marks may extend into the wood and won't disappear through screening alone.
  • Different-looking areas: A changed sheen or color can indicate a separate coating system, a previous repair, or contamination.
  • Room patterns: Compare kitchens, bathrooms, exterior-wall areas, entries, and rooms above crawlspaces.

Clean carefully without flooding the floor, then let joints, edges, and perimeter areas dry completely. If wax, silicone, or cleaning residue is suspected, plan for contaminant removal before deciding whether a new coating can bond. Savera's hardwood floor deep cleaning and contaminant removal service addresses that preparation issue rather than treating a contaminated floor as a simple recoat surface.

A step-by-step guide on how to diagnose paint adhesion failure instead of immediately sanding the surface.

Use a cross-hatch test in an inconspicuous area

Choose a hidden location, such as inside a closet. Score the coating into a small grid, press tape firmly over the cuts, and remove it at approximately 180 degrees. The test should follow the finish manufacturer's method when one is available.

One technical guide treats loss of more than 10% of the tested coating as evidence of adhesion failure. The cross-hatch resurfacing guidance provides that threshold, but the coating manufacturer's instructions should control the final decision.

A failed test means a new coat may bond to the weak layer instead of to a stable surface. That's why only scuffing a glossy floor and rolling on another finish often produces the same peeling later. When the test is sound, the failure is isolated, and the film is otherwise continuous, controlled screening may be reasonable. When the test fails across representative rooms, the loose or incompatible coating needs removal until the substrate is sound and uniformly prepared.

For floors with extensive scratches, worn finish, and surface imperfections, Hardwood Floor Sanding and Natural Finish Restoration describes a complete sanding process that removes old finishes before applying a protective natural finish. That's a different treatment from a test-area recoat, and the condition map should establish whether it's justified.

Screen and Recoat vs Full Sanding and Refinishing

A screen-and-recoat doesn't remove the floor's finish down to bare wood. It lightly abrades an intact coating to create a mechanical profile, then applies a compatible topcoat. That makes it suitable for dullness and light surface scratches when adhesion remains strong.

Full sanding removes the failed finish through successive sanding passes until the surface reaches bare wood. The U.S. General Services Administration describes conventional full refinishing as using two or three sanding passes to remove the existing finish, but its preservation guidance also makes clear that the approach must suit the floor. Wood floors commonly measure about 3/4 to 1.5 inches thick, and tongue-and-groove construction can leave roughly 1/4 inch or less of usable sanding depth before the groove is breached. The GSA's historic woodwork refinishing guidance explains why sanding is material removal, not merely cosmetic cleaning.

Bohemia floor repair path decision guide

Floor Condition Likely Repair Approach
Dull finish with light scratches and firmly bonded coating Controlled screen-and-recoat
Small peeling area with sound surrounding film Remove loose finish, lightly prepare the edge, and perform localized repair
Widespread peeling or failed adhesion test Full sanding or mechanical removal to a sound substrate
Wax, silicone, or incompatible cleaner contamination Contaminant removal, followed by compatibility testing
Bare wood across broad areas, deep stains, or severe scratches Full sanding and refinishing
Cupping, damp subfloor, or visible moisture damage Correct the moisture source first, then choose the repair
Thin boards or uncertain previous sanding history Conservative preparation after professional inspection

The Screen and Recoat approach is intended for pine, red oak, or white oak floors that still have good life remaining. It lightly abrades the existing finish and applies a fresh protective coat, which can restore shine and improve durability without full sanding when the old film is stable.

For homeowners comparing trade practices, a guide that helps you compare London wood floor sanding firms can provide broader context on how contractors describe sanding and preparation. The local decision still depends on the actual Bohemia floor, its coating history, and the adhesion results.

Savera's Bohemia screen-and-recoat service is relevant only when the existing film is continuous and firmly bonded. It won't correct peeling, deep gouges, finish worn through to wood, or moisture deformation. Choosing it over full sanding to reduce disruption is false economy when the old layer is already failing.

Moisture and Contamination Checks That Prevent Repeat Peeling

A peeling finish often gets blamed on wear, then the conversation jumps straight to sanding. In Bohemia homes, that misses the underlying problem. If moisture or surface contamination caused the bond to fail, a fresh sanding job can look good for a short time and peel again for the same reason. Preservation guidance puts moisture-source correction first for peeling coatings, and that lines up with what shows up in the field. The National Park Service guidance on peeling coatings and moisture supports that moisture-first approach.

A professional inspector uses a moisture meter on a hardwood floor while monitoring humidity and moisture logs.

Check the building conditions, not just the boards

Start with the room, then the floor.

One local flooring guide reports summer indoor relative humidity around 60% to 70% in Long Island conditions. The same guide reports winter levels around 25% to 35% under forced-air heating. The Long Island humidity and hardwood-floor guidance helps explain why a floor can look stable in one season and start failing in another. Separately, commonly used hardwood-care standards aim for roughly 35% to 55% indoor relative humidity year-round.

Before any sanding or recoating decision, inspect the conditions that keep feeding the problem:

  • Plumbing and appliances: Check around kitchens, bathrooms, laundry areas, refrigerators, and dishwashers for slow leaks or repeated dampness.
  • Exterior walls: Pay attention to cold perimeter zones, recurring peel lines, and areas near windows or doors.
  • Crawlspaces and subfloors: Look for damp air, staining, poor ventilation, or water entry. If moisture lingers after the source is corrected, a moisture barrier installation for wood floors may help keep subfloor humidity from reaching the new finish.
  • Floor movement: Cupping, raised edges, and seasonal gaps can point to moisture movement below the coating.
  • HVAC patterns: Forced-air heat, closed-off rooms, and supply vents can create dry and humid pockets in the same house.

If the signs point below the surface, pin down that cause before you touch the finish. When a hidden plumbing issue is suspected, it makes sense to document the affected flooring and find a slab leak specialist who can confirm whether water is traveling up from below.

Remove contamination before testing compatibility

Moisture is only half the puzzle. I also see peeling caused by wax residue, silicone from household products, oily cleaners, and aggressive chemicals that leave the surface looking clean but unable to bond. That kind of failure can fool a homeowner because the finish may lift in patches that look like ordinary wear.

Clean first, but do it carefully. Remove furniture, protect adjacent areas, and avoid flooding the floor. Let joints, board edges, and the surface dry fully. Then dull the finish with the least aggressive approved abrasive that gives a uniform scratch pattern, especially at the edges where contamination often survives routine cleaning.

Coating compatibility matters too. A new finish should not go over an existing oil- or water-based system without written confirmation that the products will bond. The commercial hardwood-care guidance on coating compatibility notes that incompatible layers can fail within six months and warns against treating one successful closet test as proof when peeling is spread across multiple rooms.

The inspection video below shows the type of moisture-focused process homeowners should expect before a coating decision is made.

Quick Homeowner Fixes and When to Call a Bohemia Refinisher

A small peeling patch over a sound, well-bonded finish may allow careful removal of loose film, light hand preparation, and spot recoating. Keep the repair limited to the affected area only when surrounding adhesion is proven, the wood is dry, and the replacement coating is compatible.

Stop and arrange a professional assessment when peeling spreads across rooms, the cross-hatch test fails, bare wood is visible, boards cup, stains extend below the finish, or moisture remains unresolved. Don't recoat over glossy or weak film, and don't mix oil- and water-based products without compatibility confirmation. Rushing a repair on a damp floor usually shifts the failure forward rather than solving it.

A practical local option is Savera Wood Floor Refinishing, which provides both screen-and-recoat work and full sanding and refinishing. Its service approach includes dust-free containment and low-VOC, water-based finishes. For homeowners who need rapid turnaround, Savera also offers a UV-cured finish that gets floors ready the same day. The right choice remains condition-dependent, especially in older Bohemia homes where preserving remaining wood matters.

Before making a sanding decision, review these five signs your hardwood floors only need restoration instead of full sanding. The best repair responds to the actual failure, not the worst-looking symptom.


Savera Wood Floor Refinishing can inspect a peeling Bohemia floor, identify moisture or adhesion problems, and recommend either localized repair, screen-and-recoat, or full sanding and refinishing. Visit Savera Wood Floor Refinishing to discuss a dust-controlled restoration with low-VOC water-based finishes and a same-day UV-cured option when the floor and project schedule are suitable.

Top Dust Free Orbital Sander for Manhasset Homeowners

You're probably staring at floors that still have good bones, but the finish looks tired, scratched, or too orange for the rest of the house. The hesitation usually isn't about whether the wood is worth saving. It's about the mess. A lot of Manhasset homeowners want cleaner, updated floors, but they don't want fine sanding dust drifting into bedrooms, settling on trim, or getting pulled through the HVAC.

That's why the conversation around Manhasset hardwood floor refinishing has changed. People aren't just asking about stain colors anymore. They're asking what “dust free” really means, whether an orbital sander is enough, and what separates a tidy professional setup from a rental machine with a bag attached.

In homes near Plandome Road, around Munsey Park, and in larger Colonials and Tudors where dust can travel farther than expected, that difference matters. If you've been researching a dust free orbital sander for Manhasset homeowners, the key is understanding that the tool matters, but the system around the tool matters even more.

The Modern Solution for Manhasset Hardwood Floor Refinishing

A familiar scene in Manhasset goes like this. The floors still look solid, but the finish near the front door is worn down, the hallway has dull paths, and the whole job feels easy to postpone because no one wants sanding dust drifting through the house.

The modern solution is cleaner planning paired with better equipment. Homeowners looking into Manhasset hardwood floor refinishing services often start by asking about a dust free orbital sander. That is a good question, but it only answers part of the problem.

A consumer tool labeled "dust-free" usually means the sander can collect some of the debris it creates. That helps at the point of contact. It does not mean the room, nearby furniture, return vents, and air in the rest of the home are protected. A professional setup treats dust control as a full jobsite system, not just a feature on one machine.

The difference is similar to using a kitchen exhaust fan versus setting up proper containment during a renovation. One pulls in some particles nearby. The other is built to control where dust goes from start to finish.

Practical rule: Cleaner refinishing starts with containment, hose setup, and room preparation before sanding begins.

That matters in older Manhasset homes with detailed trim, built-ins, stair halls, and adjoining rooms where fine dust can travel farther than expected. A well-prepared refinishing project keeps cleanup smaller, protects indoor air better, and gives homeowners a more realistic picture of what "dust-free" should mean on a professional job.

Understanding the Dust Free Orbital Sander

An orbital sander and a drum sander do different jobs. Homeowners often lump them together because both sand wood, but they behave very differently on a floor.

A gloved hand uses a Festool orbital sander on a wooden surface with a dust collection hose.

How orbital sanding works

Think of a drum sander as the heavy-cutting machine. It removes old finish fast. An orbital floor sander is more like the refining step. It uses vibration and controlled abrasion to smooth the surface without digging in as aggressively.

According to Sunbelt Rentals' floor sander overview, orbital vibrating sanders are specifically designed for stand-up use on hardwood floors, producing a smooth, even finish that is ideal for final smoothing after drum sanding. Their controlled, gentle abrasion avoids the deep gouges common with belt or drum sanders.

That's a big reason homeowners searching for the best dust free orbital sander for Manhasset homeowners keep hearing about orbital machines in finishing discussions. They help refine the surface instead of tearing through it.

You can see more about these tools on this page about a dust-free sanding machine.

Why the motion matters

A triple-head orbital design uses small circular vibrations rather than a simple rotating cut. In a video breakdown of orbital vibrating floor sanders, that motion is described as helping reduce swirl marks and gouges while creating a consistently smooth surface for final preparation.

That matters most when a homeowner wants:

  • A natural raw wood look that won't show chatter marks
  • A darker stain that needs even absorption
  • A low-sheen modern finish where surface flaws are easier to spot

Where homeowners get confused

Many people assume an orbital sander is the whole refinishing process. Usually, it's one part of the process. On some floors, it's the ideal finishing machine after more aggressive sanding. On delicate or lightly worn surfaces, it can also play a gentler role in surface prep.

A good finish starts with flat, even sanding. If the floor isn't prepared correctly, the stain and topcoat won't hide the problem.

The orbital sander is excellent at finesse. It isn't a magic shortcut. That distinction saves homeowners from expecting a rental machine to do the work of a full professional sanding sequence.

The Professional Difference True Dust Containment Systems

A Manhasset homeowner can rent a “dust-free” orbital sander on Saturday, hook up a shop vac, and still find fine powder on the stair rail, inside supply vents, and along closet shelves by Sunday. That happens because visible dust and airborne dust are two different problems.

A five-step infographic showing how professional dust containment systems protect homes during orbital sander projects.

A dust bag is not the same as whole-room dust control

A consumer sander with a bag or a vacuum port can catch a portion of the debris created right at the machine. That helps with cleanup. It does not fully control the finest particles once they escape at hose joints, around doorways, under baseboard gaps, or during bag changes.

That distinction confuses many DIY homeowners.

Fine sanding dust behaves more like smoke than sawdust. If the setup only collects what drops straight down, the lighter particles can still travel through nearby rooms and settle long after the machine is off. In older Manhasset homes with floor registers, radiator covers, room-to-room transitions, and small gaps around trim, those escape paths add up quickly.

What professionals do differently

A professional dust-control setup is a system, not just a tool. The orbital sander is only one piece. Effective protection comes from how the whole work area is prepared, connected, filtered, and maintained during the job.

That usually includes:

  • Tight hose connections that do not leak fine dust at the fittings
  • Vacuums built for wood dust rather than general jobsite debris
  • High-efficiency filtration that captures much smaller particles before air is returned to the room
  • Plastic isolation at openings and gaps to limit migration into adjoining spaces
  • Regular filter and bag checks so suction does not drop halfway through sanding

For homeowners comparing equipment standards, this page on advanced HEPA filtration technology for wood floor sanding explains why filtration quality matters as much as the sander itself.

A good comparison is kitchen cooking. Turning on a small fan near the stove is not the same as using a vent hood that captures smoke and sends it where it belongs. Dust collection works the same way. A homeowner-grade setup may reduce the mess you can see. A professional containment setup is built to control the dust you cannot.

Why this matters in Manhasset homes

Many homes in Manhasset have details that make dust harder to contain than homeowners expect. Wide cased openings, stairs near the main living area, older subfloor gaps, built-ins, and layered trim create places where fine particles drift and settle. Once that dust gets into soft furnishings or HVAC pathways, cleanup becomes a separate project.

If you're comparing service approaches across nearby areas, it's worth seeing how the same standards apply to hardwood floor refinishing in Oyster Bay NY. The best refinishing work protects the floor and the air inside the home.

Health and Home Benefits for Families in Manhasset

For most households, the primary value of a dust free setup isn't just cleaner floors after sanding. It's cleaner living conditions during and after the job.

Better indoor air quality

Some sanders with built-in dustless systems can capture 99% of airborne particulates, according to Magic Wand's dustless floor sander product information. That kind of capture helps prevent fine wood dust from contaminating HVAC systems or settling across the house, and it can reduce post-sanding cleanup time.

That's especially relevant for families with pets, kids, or anyone sensitive to airborne dust. Fine sanding particles don't stay politely near the work area. In a lived-in home, they move.

Fine wood dust isn't just a housekeeping issue. It's an indoor air quality issue.

In Manhasset's classic Colonials, expanded capes, and updated center-hall homes, preserving a clean interior during refinishing is often as important as the finish choice itself.

Less disruption to the rest of the house

A cleaner process changes the feel of the whole project. Homeowners usually notice:

  • Less spread to adjacent rooms
  • Less wiping, vacuuming, and deep cleaning afterward
  • Less concern about dust settling onto furnishings and trim
  • A more controlled work zone from start to finish

If you're interested in broader low-mess maintenance habits, this page on eco-friendly floor cleaning is a helpful next read.

DIY dust collection vs professional dust containment

Feature DIY Rental Sander with Bag Professional System (e.g., Savera)
Dust capture approach Basic onboard bag or improvised vacuum connection Integrated containment approach with dedicated extraction and room protection
Fine dust control Often incomplete in real homes Designed to control dust at the source
Hose and fitting quality Can be loose or mismatched Typically sealed and purpose-built
Room isolation Often minimal Uses plastic sheeting and containment practices
Cleanup afterward Usually heavier Usually lighter and faster
Indoor air protection Limited Stronger protection for occupied homes

Refinishing vs replacing

A lot of homeowners jump too quickly to replacement because they assume refinishing will be messy and outdated. If the floor still has life left in it, refinishing can preserve original material and character that new boards often can't match.

UV-cure finishes, screen and recoat services, deep cleaning, and wax removal also widen the options. Not every floor needs a full sand. Some only need the right maintenance path and a cleaner process.

What to Expect from Your Manhasset Hardwood Floor Refinishing Project

A professional Manhasset hardwood floor refinishing project should feel organized, not chaotic. Homeowners usually relax once they know the sequence.

Screenshot from https://saverawoodfloorrefinishing.com

The first conversation and floor check

The process starts with the condition of the floor, not with a sales pitch. A lightly worn floor may be a better candidate for screen and recoat. A floor with buildup might need deep cleaning or wax removal first. A heavily scratched surface may need a full sanding sequence followed by stain and finish.

For timing questions, this guide on how long it takes to refinish hardwood floors gives helpful context.

A realistic project example

One representative project could be a worn red oak floor in a Tudor-style home near the Miracle Mile area. The entry and dining room show the heaviest wear. The owners want to tone down an older amber look and move toward a cleaner, more natural finish.

The work might unfold like this:

  1. Assessment first
    The floor is checked for previous coatings, wax residue, damaged boards, and how much sanding the wood can safely handle.

  2. Containment and prep
    Adjacent areas are protected. The sanding setup is prepared before work begins.

  3. Sanding and refinement
    Heavier sanding removes the old finish where needed. Orbital sanding refines the surface for a more even final appearance.

  4. Finish selection
    The homeowner chooses between a traditional water-based system or an instant UV-cure finish for faster return to use.

Service choices homeowners should know

Not every project looks the same. The right scope depends on wear level and goals.

  • Screen and recoat starting at $2.00/sq. ft.
  • Screen and recoat with color correction starting at $2.50/sq. ft.
  • Wood floor cleaning starting at $1.50/sq. ft.
  • Wax removal starting at $2.50/sq. ft.
  • Instant UV-curable finish at $1.00/sq. ft.
  • Silver Traffic Plus at $4.00 per sqft, a 1K water-based finish
  • Diamond Traffic Plus at $5.00 per sqft, with UV-curing + Nano Wear

Those options help homeowners decide between a refresh, a full visual change, or a faster-turnaround finish system.

A good contractor should also be able to explain when refinishing makes sense and when replacement is the smarter choice. Floors that are structurally sound often deserve another life before anyone talks about tearing them out.

Frequently Asked Questions About Dust-Free Sanding

Is dust-free sanding completely dust free

No sanding process should be described as producing zero dust in real-world conditions. Professional dust-free sanding systems for floor refinishing use extraction technology that captures over 95% of airborne dust particles directly into disposable bags, according to DES dust-free sanding equipment information. That's a major improvement over older sanding methods, but honest expectations matter.

Can I use a consumer dust-free orbital sander indoors and get the same result

Usually not. The main gap is containment, filtration, and sealing. A consumer tool may help reduce visible dust, but it usually doesn't match a full professional system designed to protect indoor air and prevent dust migration through the house.

Are orbital sanders better than drum sanders

They're better for different tasks. Orbital sanders are excellent for controlled finishing and smoothing. Drum sanders are more aggressive and better suited to heavier stock removal. Many quality refinishing jobs use each tool where it performs best.

What if my floors aren't badly damaged

You may not need full sanding. A screen and recoat, deep cleaning, or wax removal can be the better option when the finish is dull but the wood itself is still in decent condition.

Is UV-cure worth considering

For many homes, yes. UV-cure finishes are appealing when fast turnaround matters and you want to reduce downtime. Traditional water-based finishes are also a strong option, especially when low odor is a priority.


If you're planning a floor update and want a cleaner process from start to finish, Savera Wood Floor Refinishing serves Manhasset and nearby communities with dust-free sanding, screen and recoat services, deep cleaning, wax removal, and modern finish options. Homeowners in Manhasset, Plandome, Port Washington, and surrounding areas can call 631-866-1972 or visit saverawoodfloorrefinishing.com to discuss the right solution for their floors.

Homeowners on Long Island trust Savera Wood Floor Refinishing to restore the natural beauty of their hardwood floors. Our dust-free sanding system and advanced UV-curable finishes provide a modern alternative to traditional refinishing methods. With UV technology that cures instantly, you can move your furniture back the same day, no lingering odors, no downtime.
Whether you're looking for a Scandinavian whitewash, a natural raw wood look, a soft warm amber tone, or a custom stain to complement your home, we have the perfect refinishing solution for your style and home traffic.
All our services include dust-free containment and low-VOC, water-based finishes for a healthier, cleaner home environment. For homeowners seeking fast results, our UV-cured finish gets your floors ready the same day, so
you can enjoy your beautifully restored hardwood floors immediately.
Transform your hardwood floors with Savera Wood Floor Refinishing, clean, modern, and stunning every time! 🌟

📞 Phone: 631-866-1972
🌐 Website: saverawoodfloorrefinishing.com
📍 Service Area: Manhasset + nearby towns.

Dustless Wood Floor Refinishing: Cleaner, Safer, and Faster with Savera in Saint James, NY

For homeowners in Saint James, NY, the very thought of refinishing hardwood floors often brings one thing to mind: dust. It’s a huge concern, and for good reason. Traditional sanding methods can blanket your entire home in a fine layer of wood particles, creating a massive cleanup and wrecking your indoor air quality.

But there's a much cleaner, more modern way to do things. Dustless wood floor refinishing uses highly advanced sanding equipment hooked up to powerful, HEPA-filtered vacuum systems. This setup captures up to 99% of dust right at the source, making the whole project cleaner, faster, and healthier for your family. This is the new standard for professional Saint James hardwood floor refinishing, and it's the only way we work.

Problems with Traditional Sanding

When you're staring at worn-out hardwood floors, it's easy to hesitate. The thought of invasive, choking dust from old-school sanding is enough to make anyone put off the project. Here, we'll walk through why dustless wood floor refinishing has become the go-to standard, turning a messy chore into a clean and efficient home upgrade. This is about more than just dodging a big cleanup; it’s about protecting your home's air and getting a far better final product.

Newly refinished light hardwood floors in a modern living room, showcasing a clean, dust-free environment.

We'll break down how modern dust containment technology completely removes the biggest headache in floor restoration, making it a stress-free option for any busy household. You'll see why this method is perfect for preserving the unique character of Saint James homes—from historic colonials near the harbor to contemporary family houses—giving you a beautiful result without turning your home into a hazard zone. We've built our reputation on this clean and effective approach, a commitment you can learn more about by discovering the story behind our team.

Airborne Dust and Debris

Old-school sanding equipment without proper containment creates a relentless cloud of fine wood and finish particles. This dust is incredibly invasive, leading to a chain of problems that stick around long after the refinishing crew has left.

  • HVAC System Contamination: Dust gets sucked right into your air returns, circulating through your HVAC system and coating your filters and ductwork. This not only tanks your system's efficiency but also pumps dust back into your home every time the heat or AC kicks on.
  • Settling on Every Surface: From your drapes and furniture to electronics and kitchen counters, no surface is safe. The cleanup is a nightmare, often requiring professional help and weeks of dusting to finally get rid of it all.
  • Flawed Final Finishes: Maybe the most frustrating part is when this airborne dust settles back down onto your freshly applied, wet polyurethane. This creates a gritty, imperfect texture, completely undermining the goal of a smooth, flawless finish.

Allergens and Indoor Air Quality Issues

Beyond the mess, the health risks of airborne sanding dust are a major concern for any household. This dust isn't just wood; it's a mix of old finishes, chemicals, and potential allergens that have been sealed in your floors for years.

When these particles go airborne, they seriously degrade your indoor air quality. For family members with allergies, asthma, or other respiratory issues, this can trigger reactions and make for a very uncomfortable living situation. Children and pets, who are closer to the floor, are especially vulnerable to inhaling these contaminants. You can learn more about the entire process of sanding and refinishing hardwood flooring to see why dust containment is so critical.

Long Cleanup Times

The old method meant sealing off rooms with plastic sheeting and often leaving your home entirely. Even then, that fine dust would find its way through any tiny gap, making the environment unhealthy for days and requiring hours of cleanup. This is a world away from the clean, safe, and efficient reality of professional floor refinishing with modern dust containment. By choosing a dustless approach, you're not just getting a cleaner result—you're protecting the well-being of everyone in your Saint James home.

How Dustless Refinishing Works

The term "dustless" might sound a bit like a sales pitch, but it’s really just an accurate way to describe a smart, effective process. Our approach to dustless wood floor refinishing here in Saint James isn’t magic—it’s a carefully designed system that captures wood dust the very second it’s created, stopping it from ever going airborne in your home. This technology is what truly separates a modern, clean restoration from a messy, outdated one.

At the heart of our Dust-Free Sanding Service is the direct link between our commercial-grade sanding equipment and powerful, truck-mounted vacuum systems. As our team guides the sander across your floors to strip away the old finish, a powerful suction is created right at the sanding head. This creates a pocket of negative pressure, immediately pulling away up to 99% of dust particles before they even have a chance to escape.

HEPA Vacuum Sanding Systems

What really takes our system to the next level is the use of HEPA (High-Efficiency Particulate Air) filtration. Your standard vacuum might pick up bigger debris, but it often just spits microscopic particles right back into the air. HEPA filters are built to a much higher standard.

  • Capturing Microscopic Particles: A genuine HEPA filter is certified to trap 99.97% of particles as small as 0.3 microns. For a little perspective, a single human hair is about 50-70 microns thick. We're talking about the tiny stuff you can't even see.
  • Protecting Indoor Air Quality: By capturing these invisible particles—which include allergens and trace remnants of old chemical finishes—our system ensures the air inside your home stays clean and safe for your family to breathe.
  • Preventing Contamination: This level of filtration is also key to getting a perfect finish. When there’s no dust floating around to settle onto the wet polyurethane, the final coat comes out perfectly smooth and incredibly durable.

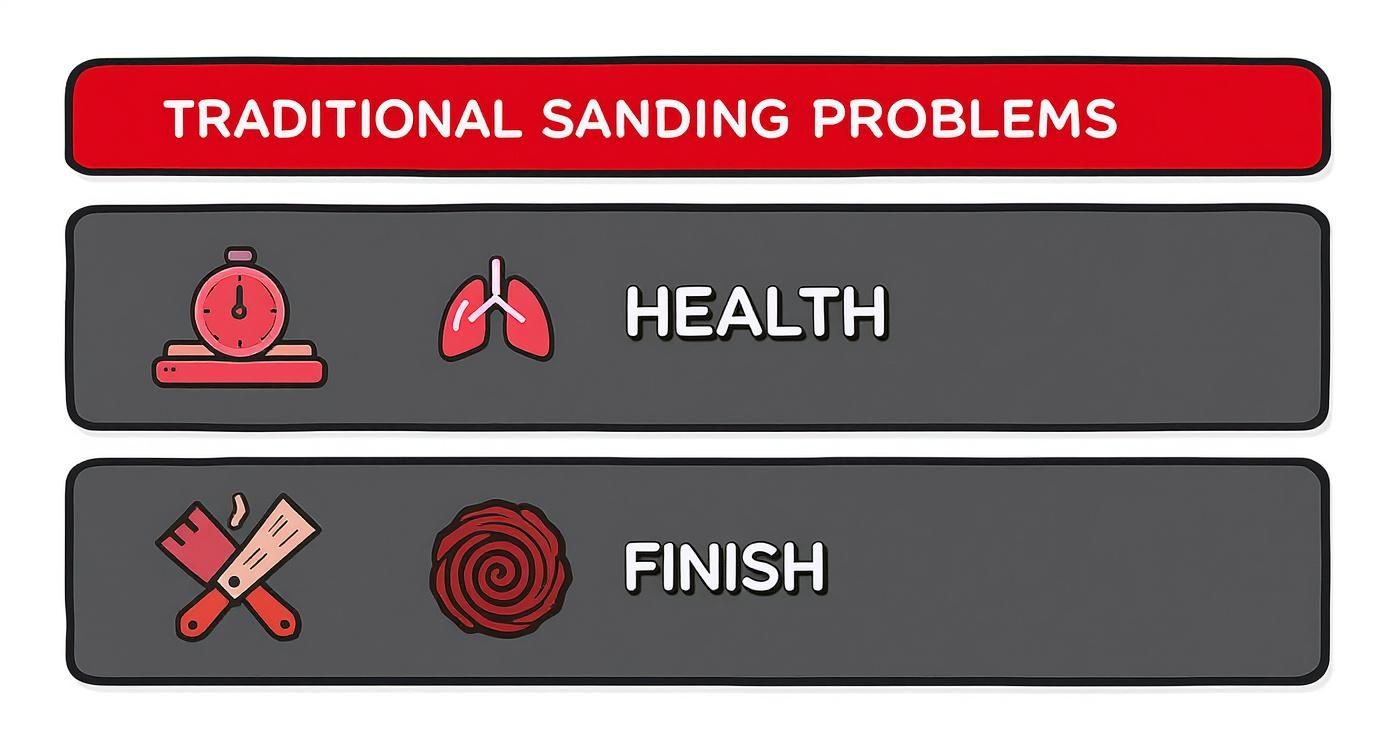
This infographic really drives home the common headaches of traditional sanding that our technology is designed to eliminate.

Infographic displaying icons for cleanup time, health risks, and finish quality associated with traditional sanding methods.

As you can see, our dustless approach directly tackles the biggest worries homeowners have: the endless cleanup, poor air quality, and finishes that just don't look quite right.

Contained Sanding Equipment for Minimal Dust

Our dust containment system is essential for minimizing the mess, much like how careful planning is critical for maintaining cleanliness during construction projects. By investing in top-of-the-line equipment, we give Saint James homeowners not just a superior result, but genuine peace of mind. To see how this fits into our complete process, learn more about our Hardwood Floor Refinishing Service. For those interested in the nitty-gritty of our gear, you can learn more about our advanced HEPA filtration technology. It’s this dedication to doing things the right way that defines the Savera experience.

Benefits for Saint James Homeowners

So, we've talked about the impressive technology, but what does dustless wood floor refinishing really mean for you and your family in Saint James? It’s simple: the technical perks translate directly into real-world benefits that make the whole project smoother, safer, and far more convenient. We're talking about transforming your floors without turning your life upside down.

The biggest immediate difference is the air you breathe. Traditional sanding floods your home with microscopic dust particles, but our system keeps your indoor air quality clean from start to finish. This is a game-changer for any household, especially if you have kids, pets, or family members with allergies or respiratory issues.

Cleaner Home Environment

The first thing you'll notice is what’s missing: that pervasive, gritty layer of dust that covers everything. With old-school methods, homeowners can spend weeks finding and cleaning fine dust that has crept into cabinets, settled on furniture, and clogged up HVAC systems. Our dustless process completely sidesteps that exhausting cleanup.

You can forget about sealing off rooms with plastic sheets and bracing for a deep clean. Instead, you can trust that your home will stay clean. This means:

  • No Lingering Dust: Your countertops, curtains, and collectibles stay clean.
  • Protected HVAC System: We prevent wood particles from clogging your air filters and ductwork, which keeps your system running efficiently and stops dust from recirculating for weeks.
  • A Safer Breathing Environment: By capturing dust at the source, we protect the air your family breathes. This makes the Saint James hardwood floor refinishing process safer for everyone.

Faster Project Completion

Another huge win is a much faster project timeline. The old way of doing things required a ton of prep work—like hanging plastic sheets everywhere—and then significant downtime just to let the airborne dust settle before any finish could be applied.

Our dust-free hardwood sanding process cuts out these time-consuming steps entirely. We can move straight from sanding to applying the finish, which means you get to enjoy your beautifully restored floors that much sooner. For busy Saint James families who can't afford to have their living room or kitchen out of commission for days on end, this efficiency is everything. This is especially helpful for homeowners planning a major transition, as detailed in this expert guide on preparing your home for a move.

Safer for Kids, Pets, and Sensitive Occupants

At the end of the day, any professional floor refinishing project is about getting a beautiful, durable result. A clean workspace is absolutely essential to achieving that. When there are no airborne dust particles to settle onto the wet coats of polyurethane or our advanced UV-cure finish, the final surface is perfectly smooth and free of tiny bumps and imperfections. This clean application process also helps the finish bond properly with the wood, creating a stronger, more resilient barrier against scratches, scuffs, and daily life. The result is a floor that doesn't just look incredible on day one but continues to protect your investment for years.

Savera’s Dustless Refinishing Advantage in Saint James

Let's be clear: a dust-free process is the bare minimum for any modern hardwood floor restoration on Long Island. It's the essential first step, but it's only the beginning. Achieving a truly exceptional result—a finish that's not just beautiful but built to last—comes from combining that clean foundation with deep expertise and top-tier products. At Savera, our commitment to a perfect finish goes way beyond just clean sanding.

This dedication really starts with our technicians. They aren't just machine operators; they're craftsmen trained in dust-free methods who genuinely understand the nuances of different wood species and the unique challenges each floor presents. They have a feel for the wood, ensuring every single board is perfectly prepped to receive its new protective coat.

High-Quality Finishes Applied After Sanding

This meticulous preparation is what allows our curated selection of high-performance finishes to truly shine. We don't believe in a one-size-fits-all solution. Instead, we offer a range of options designed to meet the specific needs of your Saint James household, from high-traffic family rooms to spaces that demand a specific look. Our services range from a simple Screen & Recoat Service to a full refinish.

Optional UV-Cure for Same-Day Durability

One of our standout offerings is our advanced UV-Cure finish. This isn't your standard polyurethane that forces you to tiptoe around for days while it dries and cures. It's a significant leap forward in flooring technology, bringing benefits that traditional methods just can't touch.

  • Instant Hardening: The finish is cured instantly with a specialized UV light machine.
  • Zero Downtime: You can walk on your floors and move furniture back the very same day.
  • Odor-Free Process: Once cured, the finish is completely free of those lingering chemical smells.
  • Unmatched Durability: This process creates an incredibly hard, scratch-resistant surface.

You can dive deeper into how this amazing technology works and why it's a game-changer for homeowners in our guide to instant UV-curable finishes.

Before & After Examples: Showcase Long Island Homes Transformed

Reading about dustless wood floor refinishing is one thing, but seeing the real-world impact is another. The true test of our work is in the stunning transformations we deliver to homeowners across Long Island. These projects show how we tackle unique challenges while protecting the integrity of each home.

Restoring Oak in a Smithtown Colonial

We recently worked on a classic colonial in a quiet Smithtown neighborhood. The family loved their red oak floors, but years of kids, pets, and everyday life had left them looking dull, scratched, and just plain tired. Their biggest fear? The invasive dust cloud that comes with traditional refinishing disrupting their already busy household.

Our team came in with our advanced dust containment system. As we sanded away the old, worn finish, the powerful HEPA vacuums captured virtually every particle right at the source. The family was amazed they could comfortably stay in their home without breathing in airborne dust. In just a couple of days, we erased years of wear, applied a durable new finish, and brought back that warm, inviting glow to their oak floors—all without the mess.

Preserving History in Stony Brook

Another memorable project took us to a historic property near Stony Brook Village. This home featured delicate, antique wide-plank flooring—an irreplaceable part of its architectural character. The owner was rightfully concerned that a traditional sanding job would create a massive cleanup and potentially damage the home’s original millwork and details.

This job required a delicate touch. Our technicians meticulously refinished the antique flooring, using precise equipment to protect the home’s history. The dustless system was absolutely critical, ensuring no abrasive particles settled into the crevices of the old woodwork or coated the nearby plaster walls. We successfully preserved the floor's unique patina while giving it a new, protective finish that will last for decades. It's a perfect example of how modern technology can be used to care for and maintain historic treasures.

This preference for cleaner, more efficient home improvement is a trend we're seeing everywhere. The global market for floor refinishing services, including dustless technology, was valued at $4.47 billion in 2024 and is expected to nearly double by 2034. It's North American homeowners who are driving a huge part of that investment. You can read more about the growth of eco-friendly flooring solutions.

These are just a couple of examples of the work we do. To see more transformations from homes just like yours, we invite you to browse our project gallery and see the Savera difference for yourself.

FAQ: Your Dustless Refinishing Questions Answered

We get it. You've heard the horror stories about traditional floor refinishing—the endless dust, the chemical smells, the waiting for days to get your house back. To give you peace of mind, we've answered some of the most common questions Saint James homeowners ask about our modern dustless wood floor refinishing approach.

Is the process truly 100% dust-free?

While claiming 100% is impossible for any process, we get incredibly close. Our advanced HEPA-filtered vacuums capture over 99% of dust right at the source—the sanding machine. This isn't just a minor improvement; it's a completely different experience for your Saint James hardwood floor refinishing project. There are no dust clouds billowing through your home, no gritty film coating your furniture, and absolutely no need for a massive post-project cleanup.

Is dustless refinishing more expensive?

Yes, there's a slight premium for dustless wood floor refinishing, and for a good reason: the specialized equipment represents a significant investment. However, most Saint James homeowners quickly see the incredible value when they look at the whole picture. You won't need to hire a professional cleaning service afterward. You're preventing fine dust from clogging your HVAC system filters. And you're avoiding the sheer hassle and stress of living in a construction zone. When you factor all that in, the small extra cost is a wise investment for a superior result and a headache-free experience.

How quickly can I use my floors again?

Much faster than you'd think. The dustless process itself shaves time off the project because we don't have to hang plastic sheeting or wait for dust to settle. An average professional floor refinishing job is often wrapped up in just 1-3 days. For the ultimate in convenience, our innovative Instant UV-Cure finishing takes it a step further. Your floors are 100% cured and ready for furniture and regular foot traffic the moment we walk out the door.

Will my home smell like chemicals?

This is a big one for us. We almost exclusively use low-VOC (Volatile Organic Compound) and water-based finishes, which have a minimal odor compared to the harsh, lingering smell of old-school oil-based products. Our top-tier UV-Cure finish is the best option for sensitive households, as it's completely odor-free once cured. We ensure your Saint James home is not just beautiful, but safe and healthy, too.

Experience the difference of dustless wood floor refinishing — contact Savera Wood Floor Refinishing for a free consultation today. Homeowners on Long Island trust Savera Wood Floor Refinishing to restore the natural beauty of their hardwood floors with our dust-free sanding system and advanced UV-curable finishes. Unlike traditional methods, our UV technology cures instantly, so you can move furniture back the same day with no lingering odor or downtime. Choose the perfect refinishing service to match your needs and home traffic. Our dust-free process ensures a clean, beautiful finish every time.

📞 Phone: 631-866-1972
🌐 Website: saverawoodfloorrefinishing.com
📍 Service Area: Saint James, Smithtown, Stony Brook, Head of the Harbor, and surrounding Long Island towns.