Tag Archives: Long Island floors

Repair Hardwood Floor Dents Old Field: DIY Guide 2026

A dropped cast-iron pan. A chair leg that shifted during dinner. An old television cable hole patched badly decades ago. In Old Field homes, floor dents rarely happen in a vacuum. They sit right in the middle of original oak, pine, or other aged boards that carry the whole room.

That’s why homeowners searching for repair hardwood floor dents Old Field usually aren’t just trying to hide one mark. They’re trying to protect the character of the house without making the floor worse. In older Long Island homes near the harbor, along winding lanes, and in classic Colonials and capes, that matters. Once an old floor has been overworked, there’s no easy reset.

If you’re dealing with a dent in an original floor, the safest approach is usually the least aggressive one. A lot of online advice treats every dent the same. Old Field floors aren’t all the same. Some can take a careful local repair. Some need filler and finish work. Some should never see a hot iron and water at all.

A Dent in Your Old Field Home’s Charm

A homeowner in Old Field called after finding a dent near a living room window where a heavy plant stand had sat for years. The floor looked solid overall, but the boards had the soft wear pattern you often see in older Long Island houses. The dent itself seemed small. The risk wasn’t.

A close-up view of a small dent on a polished hardwood floor in a home living area.

On older floors, especially in historic homes, you can’t assume you can just sand the whole area flat and move on. Older hardwood floors can typically only be fully sanded 3 to 5 times before the planks become too thin, which is why targeted repair matters so much for structural life and preservation, as noted in this Old Field hardwood floor refinishing reference and supported by this historic floor sanding limit source.

Why Old Field floors need a different mindset

A newer prefinished floor in a recent renovation gives you more room for experimentation. An old field floor in a classic home doesn’t. If that floor has already been refinished before, the wear layer may be thinner than it looks.

That’s where homeowners get into trouble. They see one dent, then try to “blend it out” by sanding a wider and wider area. Soon the repair isn’t local anymore.

Practical rule: If the floor is original, aged, or part of the home’s character, treat dent repair like conservation first and cosmetics second.

What usually caused the dent

In older Long Island homes, I often see dents from:

  • Furniture pressure: Heavy hutches, pianos, and planters compress fibers slowly over time.
  • Dropped objects: Fireplace tools, hand weights, and kitchen items leave sudden impact dents.
  • Legacy utility holes: Old antenna and cable work often left drilled spots or crude patches in mid-century updates.
  • Moving damage: One quick drag across a room can leave a mark deeper than homeowners expect.

Prevention matters too. If you’re rearranging furniture or bringing in a new dining set, this guide on how to prevent furniture floor damage is worth reading before the next dent happens.

For Old Field homeowners, the right question isn’t “How do I make this disappear fast?” It’s “How do I repair this without shortening the life of the floor?”

First Steps Identifying the Type of Dent

Before you pick up sandpaper, an iron, or filler, inspect the mark closely. The repair method depends on whether the wood fibers are compressed, broken, or untouched beneath a damaged finish.

A flowchart infographic titled Identifying Hardwood Floor Dents showing three types of floor damage: shallow dent, deep dent, and surface scratch.

If you want examples of how patching is handled on real floors, this collection of hardwood floor patching projects is useful for seeing what counts as surface damage versus true wood loss.

Look at the finish first

Start with light from the side, not overhead. Side light shows depth better.

Ask yourself:

  • Is the finish intact? If yes, the wood may only be compressed.
  • Is there a sharp edge or splinter? That points to broken fibers, not a simple dent.
  • Does the mark change color? Dark exposed wood often means the finish has been breached.
  • Can you feel a valley with your fingernail? If yes, it’s more than a superficial scuff.

Three common categories

Shallow dent

This is compressed wood. The fibers were pushed down, but the wood wasn’t torn away. You’ll often see this from chair legs, a dropped remote, or a blunt object.

Good candidates for a cautious lift tend to have:

  • no splintering
  • no missing wood
  • a smooth depression
  • limited finish damage

Deep dent or gouge

This is a different animal. The impact broke fibers or removed material. You may see ragged edges, a chip, or a dark line where the finish is gone.

This kind of damage usually needs filling and finish work. Steam won’t rebuild missing wood.

Surface scratch

Some marks look like dents but aren’t. They only affect the top finish layer. The board itself remains flat.

If the wood is level and only the sheen is disrupted, you’re dealing with finish damage, not a dent.

Check location before choosing a method

A dent in a closet gives you more room to accept a visible repair. A dent in the center of a sunlit living room does not. Old Field homes with large front rooms, formal dining spaces, and long sightlines make color mismatch much easier to spot.

That location test matters. A repair that’s acceptable under a console table may look unfinished in open traffic lanes.

The DIY Steam Method for Shallow Dents A Word of Caution

The steam trick is the most common DIY advice for a compressed dent. The idea is simple. Add controlled moisture, apply brief heat, and try to swell the compressed fibers upward.

A person using an iron and a damp cloth to steam out a dent on a wooden floor.

On the right floor, and on a shallow dent, it can help. The usual process is to remove the finish over the dent with 120-grit sandpaper, place a damp tea towel over the area, and touch it with a warmed iron for 1 to 2 seconds at a time, repeating carefully until the grain rises, based on this steam dent repair method walkthrough.

Why old floors are the danger zone

Here, internet advice becomes risky. The steam method is often presented as universal. It isn’t.

For at-risk hardwoods, the numbers are a warning sign. The iron-and-water method has a 60 to 70 percent success rate on shallow dents, but a professional survey found a 68 percent failure rate on floors over 15 years old, and only 12 percent of pros endorsed it for those at-risk floors, according to this survey and dent-repair discussion.

That tracks with what many older Long Island floors need. Old finish systems, prior sanding, sun fading, and thinner wear surfaces make moisture and heat much less forgiving.

If you still want to try it

Use the steam method only when all of these are true:

  • The dent is shallow: No missing wood, no chip, no splinter.
  • The floor is solid hardwood: Not engineered with a delicate veneer.
  • The area is low-risk: Somewhere less visible if the finish changes.
  • You accept partial improvement: You may lessen the dent, not erase it.

Common mistakes are predictable:

  • soaking the spot
  • holding the iron too long
  • skipping finish removal first
  • failing to reseal the area afterward

A small dent is easier to live with than a scorched board or a pale water mark in the middle of an old floor.

Here’s a visual demonstration of the concept. Watch it as a technique example, not a green light for every old floor.

Where DIY steam makes sense

In my view, this is the most reasonable DIY use case: a minor compression near a wall, on solid wood, in a home where the floor is not historically sensitive and not already worn thin. In Old Field, that’s not the majority of original floors people call about.

If the dent sits on a central board in a prominent room, caution usually beats experimentation.

Handling Deeper Gouges with Wood Filler

When the dent is deep, steam is the wrong tool. If wood fibers are broken or material is missing, the repair shifts from lifting to rebuilding. That means filler, sanding, stain work, and finish blending.

Professionals commonly use wood filler for deeper dents. For dents deeper than 1.5mm, wood filler repairs have a 90 to 95 percent success rate, while DIY attempts often show a 40 percent visible mismatch rate because matching aged wood and finish is hard, based on this discussion of filler repair outcomes.

If you’ve never tried to tint filler to match sun-aged oak or ambered pine, that mismatch rate makes sense.

What filler repair actually involves

This is more than pressing putty into a hole.

A proper deeper repair usually means:

  • removing any loose material
  • sanding the area level
  • filling the void
  • re-sanding smooth
  • toning the patch to the surrounding floor
  • matching the sheen of the existing finish

For reference on related repairs, this page on wood filler for hardwood floor gaps shows the kind of detail work that affects whether a patch blends or stands out.

Hardwood Dent Repair Method Comparison

Method Best For DIY Success Rate Risk Level
Steam and moisture Shallow compression dents 60 to 70 percent on shallow dents High on aged floors
Wood filler Dents deeper than 1.5mm or gouges with missing wood Qualitatively lower for DIY color matching Moderate to high
Professional localized repair Visible areas, aged floors, deep dents, historic boards 90 to 95 percent success for deeper filler-based repair Lower when matched correctly

Why filler repairs go visibly wrong

The patch itself is usually not the problem. The surrounding floor is.

Old Field floors often have:

  • sun fade near windows
  • ambering from older finishes
  • board-to-board color variation
  • wear patterns that a fresh patch doesn't naturally copy

That's why a repair can be technically sound and still look obvious. The filler may be level, but the color is off, the pore pattern is different, or the sheen reflects light differently.

Match the finish, not just the color. Homeowners often get close on stain and miss badly on gloss.

For determined DIYers, test your color on scrap wood or an out-of-sight area first. If the dent is in a formal room, near a picture window, or in the center of a traffic lane, professional blending is usually the more practical route.

When to Call for Professional Hardwood Floor Refinishing in Old Field

Some repairs are small enough to attempt. Others are too visible, too risky, or too tied to the value of the home to leave to trial and error. That's especially true in Old Field, where original floors are often part of what buyers, appraisers, and homeowners notice first.

A comparison chart showing the risks of DIY hardwood floor repair versus the benefits of professional restoration services.

Signs the floor needs professional help

Call for Old Field hardwood floor refinishing when you're dealing with any of these:

  • Multiple dents across a room: Spot fixes won't restore a uniform look.
  • Historic or original flooring: Thin boards and older finishes need a conservative approach.
  • Deep damage in a focal area: Living rooms, entry halls, and dining rooms expose every mismatch.
  • Previous failed DIY repair: Water marks, scorch shadows, and over-sanded spots are harder to hide than the original dent.
  • General wear beyond the dent: Dull finish, traffic patterns, and scattered scratches often justify a broader treatment.

What professional options look like

Not every damaged floor needs full sanding. That's where homeowners often spend more than they need to.

A practical path can include:

  • Targeted dent repair for isolated damage
  • Screen and recoat when the finish is worn but the wood itself is largely intact
  • Deep cleaning for ground-in residue before deciding on bigger work
  • Wax removal when old maintenance products are interfering with adhesion
  • Dust-free sanding when the floor requires restoration to bare wood
  • UV-cure finishes when same-day usability matters

If you're comparing processes, this explanation of hardwood floor refinishing vs resurfacing helps clarify when a lighter treatment is enough and when true refinishing is warranted.

One option homeowners in the area consider is screen and recoat in Old Field, which fits floors with surface wear but not major structural loss.

Why modern equipment changes the equation

A lot of people still picture refinishing as a dust storm that spreads through the whole house. Modern systems are different. Dust-free sanding captures about 99 percent of airborne dust at the source using HEPA-filtered vacuum systems, which reduces indoor contamination and cleanup compared with traditional sanding, according to this dust-free sanding explanation.

That matters in furnished homes, houses with kids or pets, and older properties where cleanup becomes part of the stress.

For homeowners in Setauket and nearby North Shore areas, pricing is often part of the decision too:

  • Diamond Traffic Plus $5.00 per sqft with UV-curing + Nano Wear
  • Silver Traffic Plus $4.00 per sqft with 1K water-based finish
  • Screen & Recoat starts at $2.00/sq. ft.
  • Screen & Recoat with color correction starts at $2.50/sq. ft.
  • Wood Floor Cleaning starts at $1.50/sq. ft.
  • Wax Removal starts at $2.50/sq. ft.
  • Instant UV-Curable Finish $1.00/sq. ft.

I've seen similar decision points in nearby homes, including an oak floor in a Setauket colonial where the owner first thought replacement was the only answer. Once the loose finish, dents, and old surface contamination were addressed properly, the floor kept its original character without losing more wood than necessary. That's usually the right goal in older Long Island houses.

Frequently Asked Questions About Floor Dent Repair

Homeowners usually ask the same few questions once they realize a dent repair can either preserve the floor or create a much bigger cosmetic problem. For Old Field hardwood floor refinishing decisions, these are the ones that matter most.

How can I prevent dents in my hardwood floors

Use felt pads under furniture legs and replace them when they flatten or collect grit. Put rugs in entry zones and under chairs that move often. Don't drag appliances, sofas, or bookcases across the floor.

In older homes, prevention matters more because the floor may not have many full sandings left.

Can dents be repaired in engineered hardwood

Sometimes, but carefully. Engineered boards have a thinner real-wood top layer than solid hardwood. That makes aggressive sanding risky, and moisture-based repairs can create problems around the adhesive layer or veneer.

If the dent is shallow, a conservative repair may help. If the top veneer is broken, board replacement is often the cleaner fix.

Will a screen and recoat fix dents

No. A screen and recoat refreshes the finish layer. It won't lift or fill a dent because the wood itself is still compressed or missing.

It can, however, help blend the overall appearance after a dent repair if the rest of the finish is worn.

When should I stop trying DIY fixes

Stop when the dent sits in a high-visibility area, when the floor is old enough that you're unsure of its thickness, or when a first attempt has already changed the finish color. If you're guessing, that's usually the point to get a professional opinion.

Where can I get answers about other floor problems

If you have questions beyond dents, this hardwood floor refinishing FAQ covers common concerns about finishes, maintenance, and repair options.


If you're dealing with a dent in an original floor and want a repair plan that fits the age and condition of the wood, Savera Wood Floor Refinishing is one local option for homeowners in Old Field, Setauket, Stony Brook, Head of the Harbor, Poquott, and nearby Long Island communities. Homeowners on Long Island trust Savera Wood Floor Refinishing to restore the natural beauty of their hardwood floors. Our dust-free sanding system and advanced UV-curable finishes provide a modern alternative to traditional refinishing methods. With UV technology that cures instantly, you can move your furniture back the same day, no lingering odors, no downtime.
Whether you're looking for a Scandinavian whitewash, a natural raw wood look, a soft warm amber tone, or a custom stain to complement your home, we have the perfect refinishing solution for your style and home traffic.
All our services include dust-free containment and low-VOC, water-based finishes for a healthier, cleaner home environment. For homeowners seeking fast results, our UV-cured finish gets your floors ready the same day, so
you can enjoy your beautifully restored hardwood floors immediately.
Transform your hardwood floors with Savera Wood Floor Refinishing, clean, modern, and stunning every time! 🌟

📞 Phone: 631-866-1972
🌐 Website: saverawoodfloorrefinishing.com
📍 Service Area: Setauket + nearby towns.

How to Disinfect Wood Floors Safely and Effectively

Disinfecting a hardwood floor is a delicate balancing act. You need to get rid of germs, but you absolutely cannot risk damaging that beautiful finish. The secret lies in using a pH-neutral disinfectant made for hardwoods, applying it with a mop that’s just damp—never soaking wet—and staying far away from harsh chemicals like bleach or ammonia, which can strip the protective seal right off. This is how you get a floor that’s truly clean without sacrificing its warmth and beauty. For homeowners seeking hardwood floor refinishing in Setauket, understanding these basics is key to long-term floor health.

Why You Should Rethink Your Floor Cleaning Routine in Setauket

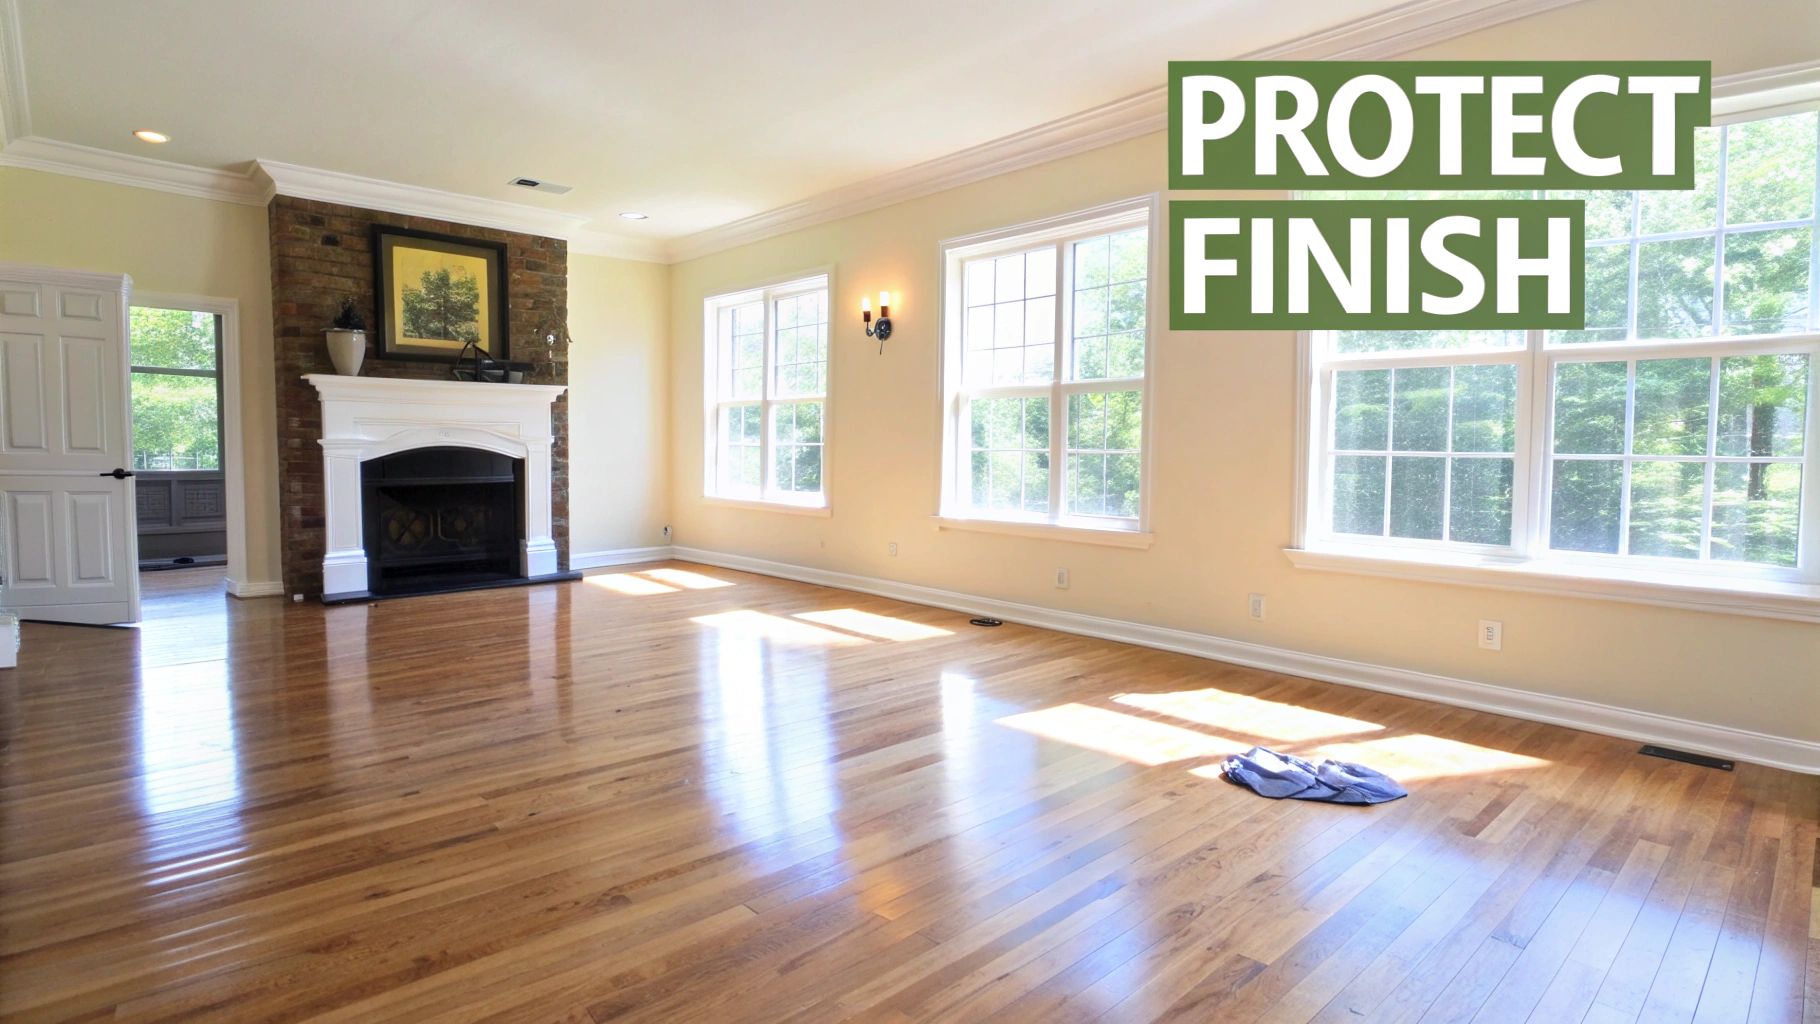
A spacious living room with gleaming hardwood floors, a brick fireplace, and large windows letting in sunlight.

From historic colonials in Stony Brook to modern homes in Great Neck, hardwood floors are the heart of so many Long Island residences. But as we’ve all become more health-conscious, a tough question has emerged: how do you properly disinfect these floors without causing irreversible damage? It’s all about finding that sweet spot between killing germs and preserving the finish that protects your investment.

So many homeowners make the mistake of reaching for the wrong cleaner, and the consequences can be costly. Harsh chemicals can strip the finish, dull the shine, and even lead to warping or discoloration. Here at Savera Wood Floor Refinishing, our expertise in hardwood floor refinishing in Setauket comes from years of seeing what works and what doesn’t. This guide is all about giving you actionable, expert advice to keep your floors both hygienic and stunning.

Why the Right Disinfectant Matters for Your Hardwood Floor Refinishing in Setauket

It’s no secret that people are cleaning more than ever. The global market for surface disinfectants was already at $2.7 billion in 2022 and is expected to hit $5.6 billion by 2032. This isn’t just a statistic; it reflects a real shift in how Long Island families think about home hygiene, especially post-pandemic.

But here’s the critical part for wood floors: they need a pH-neutral disinfectant. Using the wrong stuff is a common pitfall that damages an estimated 15-25% of refinished surfaces every year.

Choosing the right product isn’t just about cleaning; it’s about preservation. Here’s what we see happen when the wrong products are used:

  • Finish Degradation: Cleaners that are too acidic or alkaline will slowly eat away at polyurethane finishes, leaving your wood vulnerable to scratches and stains.
  • Moisture Damage: Drenching a floor with any liquid is a recipe for disaster. It can cause the boards to swell, cup, or buckle over time.
  • Residue Buildup: Many common cleaners leave behind a sticky, filmy residue that actually attracts more dirt and completely dulls your floor’s natural luster.

A Professional Perspective on Floor Hygiene

With our experience providing hardwood floor refinishing across Long Island, we can tell you one thing for sure: a truly clean floor starts with a solid finish. When that protective seal is strong and intact, it creates a non-porous barrier that’s not only beautiful but also much easier to clean and disinfect.

Once that finish is compromised, dirt, grime, and germs can seep into the wood grain itself. At that point, getting the floor truly sanitized becomes almost impossible without professional intervention like our dust-free sanding process.

Our goal is to give you the knowledge you need to maintain your floors properly between refinishing services. For a great starting point, check out our essential hardwood floor cleaning tips for homeowners. Mastering these basics is the first step toward a healthier and more beautiful home.

Choosing a Wood-Safe Disinfectant That Actually Works

Walking down the cleaning aisle at a Setauket grocery store can be overwhelming, especially when your beautiful hardwood floors are on the line. The secret to disinfecting wood floors isn’t just about what you use—it’s also about what you absolutely don’t use. Making the right call protects your floor’s finish, keeping it the durable, stunning centerpiece of your home and preserving the value of your hardwood floor refinishing in Setauket.

When you’re trying to kill germs on a hardwood floor, the most critical factor is the product’s pH level. Your floor’s finish, particularly modern polyurethane, is engineered to handle a neutral pH of around 7.0. Anything too acidic (like vinegar) or too alkaline (like ammonia or bleach) will slowly eat away at this protective barrier. Over time, that leads to a dull, cloudy look and makes the floor far more vulnerable to scratches.

How to Read a Product Label Like a Pro

Before you grab a bottle off the shelf, take a second to actually read the label. Look for a few key phrases that signal you’re on the right track for your specific floor.

  • “pH-Neutral”: This is the gold standard for anything you put on your hardwood. It’s a clear sign the cleaner won’t cause a chemical reaction that damages your floor’s finish.
  • “Formulated for Hardwood Floors”: Products made specifically for wood have been tested to clean effectively without stripping the sealant.
  • “Safe for Polyurethane Finishes”: Since polyurethane is the go-to finish for most homes on Long Island, from classic Commack ranches to new builds in Hauppauge, this is a must-have.

On the flip side, there are some ingredients you need to avoid like the plague. These are the main culprits behind the DIY floor damage we’re called in to fix all the time.

A Word from Experience: We see so many floors that have been permanently clouded by years of mopping with a simple vinegar-and-water mix. It’s a popular tip online, but vinegar’s acidity is like a slow-acting poison to a polyurethane finish. It breaks it down bit by bit, making the wood more susceptible to dirt and damage. This is a common issue we address with our screen & recoat services.

The “Never Use” List for Hardwood Floors

To keep your floors looking their best, stay far away from these common but destructive agents:

  • Ammonia: This is an incredibly aggressive, high-alkaline chemical that will strip the finish right off your wood.
  • Bleach: Just like ammonia, bleach is far too harsh. It can demolish the finish and might even discolor the wood itself.
  • Vinegar: As I mentioned, its acidic nature degrades the finish over time, even when you dilute it.
  • Oil-Based Soaps or Waxes: These don’t really clean. Instead, they leave behind a sticky residue that builds up, attracts dirt like a magnet, and is a nightmare to remove. Our wax removal service is often needed to correct this.
  • Abrasive Cleaners: Any powders or creams with grit will etch thousands of micro-scratches into your finish, permanently dulling its shine.

For a more detailed look, Savera Wood Floor Refinishing has put together a great list of the best cleaning products for hardwood floors that can make your next shopping trip a lot easier.

A Quick DIY Disinfectant for Small Messes

If you just need to disinfect a small spot—maybe after a pet accident or a kitchen spill—a simple DIY solution can work in a pinch. But I have to stress: this is for spot-treatment only, not for mopping your entire floor.

Mix a solution of one part 70% isopropyl (rubbing) alcohol to four parts water in a spray bottle. Lightly mist the contaminated area, let it sit for about 30 seconds to do its job, and then immediately wipe it completely dry with a clean microfiber cloth. Never, ever let any liquid, even this diluted mix, pool on your floor’s surface.

Wood Floor Disinfectant Safety Checklist

Choosing the right cleaner often comes down to knowing what’s safe for your specific floor finish. This quick checklist breaks down the most common options and shows why some are great choices while others are definite no-gos.

Disinfectant Type Safe for Polyurethane Finish? Safe for Waxed/Oiled Finish? Key Precaution
pH-Neutral Hardwood Cleaner Yes Yes Always follow dilution instructions; do not oversaturate the floor.
Diluted Rubbing Alcohol Yes (for spot treatment) No (can strip oil/wax) Use sparingly and wipe dry immediately; never for whole-floor cleaning.
Vinegar (Diluted) No No Highly acidic; will dull and degrade the finish over time.
Bleach or Ammonia No No Extremely harsh; will strip the finish and can discolor the wood.

At the end of the day, picking the right disinfectant is all about respecting the material you’re cleaning. Your hardwood floors are a major investment. Using a product designed to work with their protective finish, not against it, is the only reliable way to keep them clean, healthy, and beautiful for years to come.

A Practical Guide to Disinfecting Hardwood Floors in Setauket

Alright, you’ve picked out a disinfectant that won’t harm your wood floors. Now comes the important part: applying it correctly. Disinfecting wood is much more about careful technique than it is about elbow grease. This is the same methodical process we use on projects from hardwood floor refinishing in Setauket to homes across Long Island to get a truly sanitary surface without damaging the finish.

First things first: forget about a sopping wet mop and a bucket full of suds. When it comes to hardwood, control and precision are everything.

Preparing Your Floor for Disinfection

You can’t disinfect a dirty floor. If you try, you’re just pushing around dirt and grit, which is a surefire way to create tiny scratches in the finish.

  • Clear the Area: Get all the furniture, rugs, and anything else off the floor. You need a completely open space to work efficiently.
  • Remove Loose Debris: Grab a vacuum with a soft-bristle head and go over the entire floor. Pay attention to the gaps between boards where dust loves to hide. A soft broom works in a pinch, but a vacuum is far better at picking up all the fine particles.

This simple prep work ensures your disinfectant is making direct contact with the wood’s surface, where the germs are, instead of getting neutralized by a layer of dust.

The Art of the Damp-Mop Technique

If you take only one piece of advice from this guide, let it be this: use minimal moisture. We call it the “damp-mop” method, and it’s non-negotiable for wood.

Your mop head should be wrung out so thoroughly that it feels almost dry to the touch. If it’s dripping, you need to wring it out again.

Excess water is the number one enemy of hardwood floors. It can seep between the planks, causing the wood to swell, warp, or cup over time. A mop that is merely damp cleans and disinfects effectively without introducing this risk.

Globally, homeowners use a staggering 420 million liters of floor cleaner, but using too much water is a common mistake. Improper techniques like oversaturation can actually create moisture issues, potentially cutting a floor’s lifespan by 20-30%. This is especially true in busy Long Island homes, where professional care can make all the difference. You can discover more insights about the floor cleaner market and its impact.

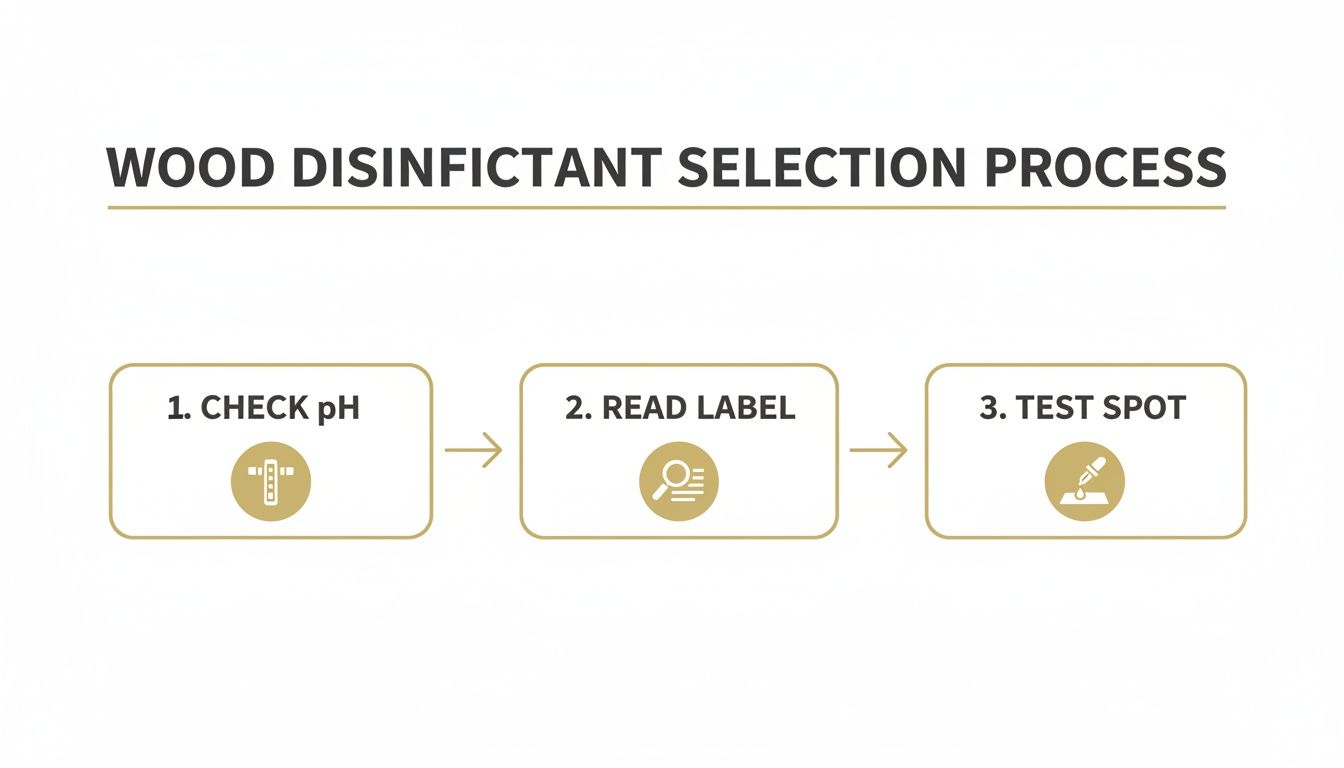
This flowchart breaks down those crucial first steps of picking the right product before you even think about mopping.

Flowchart illustrating the three-step wood disinfectant selection process: check pH, read label, and test spot.

The process is built around safety: checking the pH level protects the finish, reading the label helps you avoid harsh chemicals, and doing a spot test is your final insurance against widespread damage.

Applying the Disinfectant Correctly

Once your mop is properly dampened with your disinfectant, the rest is about being systematic.

  • Work in Small Sections: Don’t try to tackle the whole room at once. Mentally divide the floor into manageable squares, maybe 4×4 feet. This keeps you in control and ensures you get even coverage.
  • Follow the Grain: Always mop parallel to the direction of the floorboards. This simple habit makes a huge difference in preventing streaks and leaves a much cleaner, more uniform look when the floor dries.
  • Respect Contact Time: Your disinfectant needs a certain amount of time to sit on the surface to actually kill germs—this is called “contact time.” Check the label; it’s usually anywhere from 30 seconds to a few minutes. Because you’re using a lightly damp mop, the thin film of moisture is just enough to do the job without creating puddles.
  • Dry Immediately: This is key. Once the contact time is up, go back over the section with a completely dry, clean microfiber cloth or mop head. Buff away any leftover moisture. A properly disinfected floor should be totally dry within a minute or two. If it’s staying wet longer than that, you’re still using too much water.

By following these steps, you can disinfect your floors with confidence, leaving them both sanitized and looking their best. For more practical advice, check out our other articles on how to clean hardwood floors. This careful approach protects your investment and keeps your home a healthy, beautiful space.

Common Disinfecting Mistakes That Can Ruin Your Floors

Even when you have the best intentions, it’s alarmingly easy to damage your beautiful hardwood floors while just trying to get them clean. Here at Savera, we’ve seen countless well-meaning attempts end in costly repairs. Knowing what not to do is just as critical as knowing the right way to disinfect.

Most of the mistakes we see come from old cleaning myths that simply don’t hold up with modern hardwood finishes. This advice isn’t just theory; it comes from our team’s hands-on experience providing hardwood floor refinishing in Setauket and seeing firsthand what causes permanent damage.

The Number One Enemy: Excessive Water

Let’s be clear: water is the arch-nemesis of wood flooring. While a damp mop is exactly what you need, a sopping wet one is a recipe for disaster. When too much moisture soaks into the seams between boards, it can cause the wood to swell, warp, or “cup,” leaving you with a buckled, uneven surface.

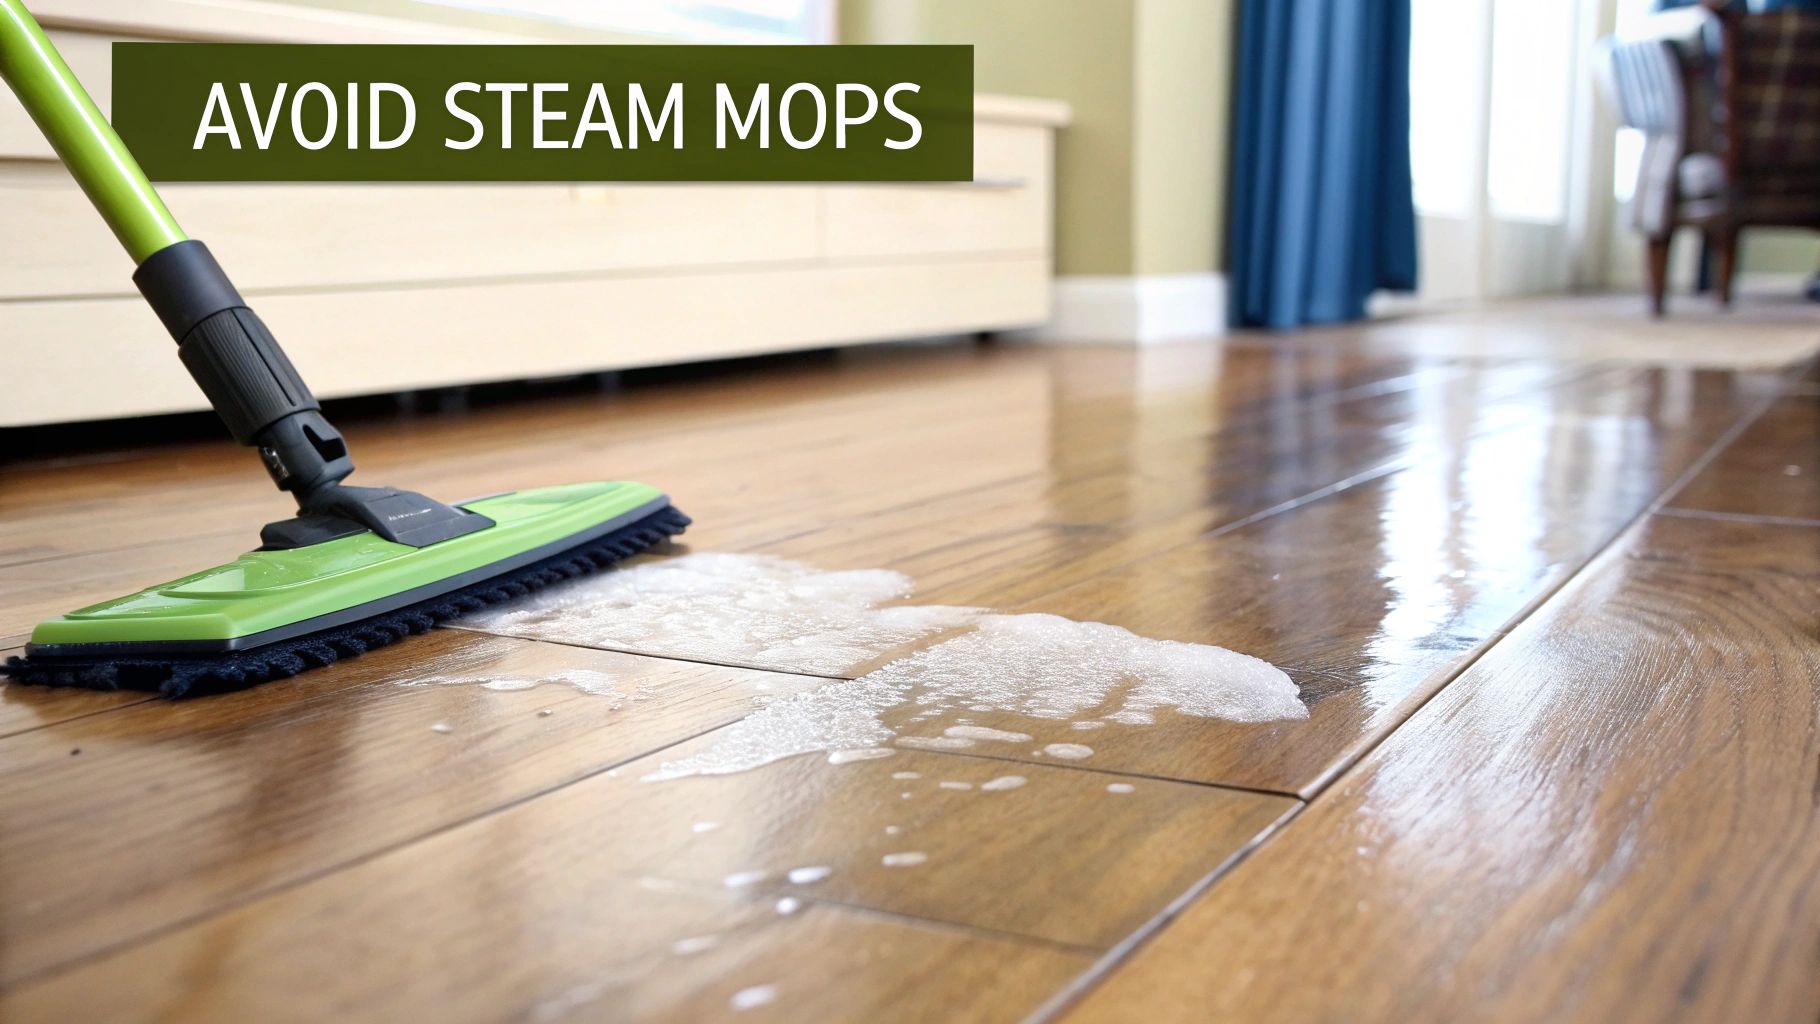
This is exactly why we tell everyone to stay away from steam mops. Those machines blast hot vapor deep into the wood’s pores and between the planks, which can literally peel the finish away and cause the wood to buckle. Not long ago, we helped a homeowner in Old Westbury whose gorgeous oak floors were severely damaged after just a few months of using a steam cleaner. It was a tough lesson that required a full wood floor refinishing service to restore.

Expert Takeaway: Never let water or any cleaning solution pool or puddle on your floor. A properly damp-mopped floor should be completely dry within a minute. If it’s staying wet longer than that, you’re using way too much liquid.

Acidic Cleaners and Abrasive Tools

Another common myth we hear all the time is that a simple mix of vinegar and water is a safe, natural cleaner for hardwood. It might seem harmless, but vinegar is acidic. Over time, that acid will slowly but surely eat away at your floor’s protective polyurethane finish, making it look dull and cloudy. Once that finish is gone, the raw wood is left vulnerable to dirt, stains, and deeper damage. Knowing the ins and outs of finishing a wood floor with polyurethane makes it obvious why you need to protect that top layer at all costs.

Abrasive tools are just as bad. Keep these far away from your hardwood:

  • Scrub Brushes: Stiff bristles will create thousands of tiny micro-scratches that permanently ruin your floor’s beautiful sheen.
  • Steel Wool or Scouring Pads: These are way too aggressive. They will instantly scratch and gouge the finish.
  • Beater Bars on Vacuums: The rotating brush on your vacuum is great for carpets but terrible for wood. Always switch to a soft-bristle attachment or the bare-floor setting.

Why a DIY Approach Can Be Risky

The hard truth is that many products on store shelves labeled “wood cleaners” are full of oils, waxes, or silicones that don’t really clean. What they do is leave behind a sticky, hazy residue that builds up, attracts even more dirt, and makes your floors impossible to get truly clean. This gunk can also cause major problems down the road if you ever want to do a simple screen and recoat.

If your floors look persistently dull or feel tacky no matter what you do, you’re likely dealing with product buildup or a finish that’s worn out. This is where a DIY approach can do more harm than good. Instead of grabbing yet another bottle from the store, it’s time to call in a professional. We can properly assess the floor and tell you if a deep cleaning, a simple recoat, or a full refinishing is the right move to safely restore your floor’s beauty.

When Your Floors Need More Than Just a Deep Clean

Green flat mop cleaning a wet, shiny wood floor with foamy liquid, advising to avoid steam mops.

Sometimes, the real reason you can’t get your floors to shine has nothing to do with your cleaning technique. If your hardwood looks persistently dull, grimy, or streaky even after you disinfect wood floors the right way, it’s a huge sign of a deeper issue: the protective finish is wearing out.

It’s a common and frustrating problem. Homeowners spend time and money trying different cleaners, only to find the floor’s appearance never really improves. Once the finish is gone, no amount of cleaning can bring back that original luster. Recognizing the signs is the first step toward getting the right help and avoiding the need for a premature hardwood floor refinishing in Setauket.

How to Tell It’s Time for Professional Help

So, how do you know if your floor just needs a better cleaning versus professional intervention? Here are the tell-tale signs our team at Savera Wood Floor Refinishing sees all over Long Island when a finish has failed:

  • A Stubborn Dullness: The floor has lost its sheen and looks flat or cloudy, especially in high-traffic zones like hallways, kitchens, and entryways.
  • Deep Scratches You Can Feel: We’re not talking about minor surface scuffs. These are scratches that have clearly penetrated the finish and exposed the raw wood underneath. Cleaning can’t fix these.
  • “Graying” Patches: If you see areas of the floor turning a washed-out grayish color, it’s a sure sign the finish has been completely worn away by foot traffic.
  • Water Spots or Stains: Dark spots or rings that don’t budge with cleaning mean moisture has seeped through a compromised finish and stained the wood itself.

When you start noticing these issues, it’s time to stop the DIY cleaning efforts. Continuing to scrub or use even approved chemicals on a worn finish will only cause more harm to the now-unprotected wood.

Understanding Your Professional Options

When a deep clean just won’t cut it, we offer a range of services based on your floor’s specific condition. It’s not always a choice between a simple cleaning and a full-blown refinishing. You can explore the nuances of hardwood floor resurfacing vs. refinishing to get a better sense of the possibilities, but here’s a quick breakdown:

  • Professional Deep Cleaning: For floors with a solid finish but a heavy buildup of old cleaners or caked-on grime, our specialized equipment can safely lift residue that household mops just can’t touch. When your own efforts aren’t enough, it’s wise to consider professional deep cleaning services.
  • Screen and Recoat: This is a fantastic middle-ground solution for floors with minor surface scratches and general dullness where the finish is still intact. We lightly abrade (or “screen”) the existing top layer and apply a fresh coat of durable finish. This restores the protective seal and shine without the dust and time of a full sanding.
  • Dust-Free Sanding and Refinishing: For floors with deep gouges, extensive wear, water damage, or graying areas, this is the ultimate fix. Our dust-free system sands the floor down to the raw wood, completely removing the old, damaged finish and any imperfections.

North America accounts for over 30% of the $5.49 billion global floor cleaner market. Yet, improperly treated wood floors can harbor 40% more bacterial growth. It’s a fact real estate agents know well—professionally restored floors can increase a home’s appeal by 15%, giving sellers a major edge.

With a full refinish, we can apply a brand-new, seamless finish from scratch. Our advanced UV-curable finishes cure instantly, creating an incredibly tough, non-porous barrier. This new surface isn’t just beautiful—it’s far easier to clean and more resistant to germs, giving you the perfect foundation for a truly healthy home.

Frequently Asked Questions About Disinfecting Your Wood Floors

Even with a solid plan, it’s smart to have questions. Over the years, we’ve heard just about everything from homeowners across Long Island. Here are some of the most common questions we get at Savera Wood Floor Refinishing, with straightforward answers drawn from our experience with countless hardwood floor refinishing in Setauket projects.

How Often Should I Actually Be Disinfecting My Floors?

For a typical home, a full disinfection every one to two months is more than enough to keep things healthy. But, life isn’t always typical, so you might need to adjust.

  • Busy Homes: If you’ve got a full house with kids, pets, and friends always stopping by, you’ll want to hit high-traffic spots like the kitchen and entryway more often—maybe every week or two.
  • When Someone’s Sick: If a cold or flu is making its way through your family, disinfecting more frequently is a good move to help stop germs from spreading.

Don’t forget, this is separate from your regular cleaning. A quick sweep or vacuum (with a soft brush!) should still happen every few days. For a clean that truly gets the deep-down grime and helps renew the floor’s protective coat, a professional deep cleaning once a year is a game-changer. It’s the best way to tackle what daily mopping leaves behind.

Is It Really That Bad to Use Bleach or Vinegar?

Yes, it really is. If you take away only one thing, let it be this: never use undiluted bleach or vinegar on your hardwood floors. It’s a recipe for disaster.

Bleach is a powerful alkaline chemical that doesn’t just clean—it strips the finish right off your floor and can even bleach the wood itself. Vinegar is the opposite problem; it’s an acid. Over time, that acid will slowly but surely degrade your polyurethane finish, leaving it dull, cloudy, and sometimes even sticky to the touch.

Some DIY blogs suggest heavily diluted vinegar, but at that point, it’s not strong enough to be an effective disinfectant, and you’re still putting your floor’s finish at risk. Your safest bet is always a pH-neutral cleaner made specifically for wood.

Using the wrong chemicals is a fast track to needing professional hardwood floor refinishing in Setauket. We’ve seen beautiful floors in historic Northport homes lose their character due to years of improper cleaning with acidic solutions. Sticking to wood-safe products is the best insurance for your floor’s longevity.

Can I Just Use My Steam Mop?

We strongly, strongly advise against it. Using a steam mop on hardwood is one of the quickest ways to cause irreversible damage.

Steam cleaners work by blasting hot, pressurized vapor into a surface. For wood, that’s a nightmare. The intense moisture and heat can get past the finish, creep into the seams between boards, and make the wood warp, cup, or swell. It can also make the finish itself bubble up and peel away. The only truly safe method is the damp-mop technique we’ve talked about, using as little water as possible.

I Disinfected, but My Floors Still Look Dull. What Gives?

It’s frustrating when you put in the work and your floors still look blah. If you’re dealing with a dull, streaky, or tacky finish after cleaning, it usually boils down to one of three culprits:

  1. Wrong Cleaner: An all-purpose cleaner that isn’t pH-neutral will almost always leave a filmy residue behind.
  2. Too Much Cleaner: Even the right product can cause buildup if you use more than the bottle recommends. A little goes a long way.
  3. Worn-Out Finish: If the protective top coat is simply worn away, no amount of cleaning is going to bring back that shine.

As a first step, try mopping a small, out-of-the-way spot with a fresh mop pad dampened with nothing but plain water. If that clears up the film, you know residue is the problem. If the dullness sticks around, it’s a sure sign the finish has reached the end of its life.

At that point, it’s time to stop trying to scrub it back to life. A screen and recoat service can be the perfect solution, restoring that protective sheen without the time and expense of a full sanding. We can take a look and help you figure out the best path forward.


Homeowners on Long Island trust Savera Wood Floor Refinishing to restore the natural beauty of their hardwood floors with our dust-free sanding system and advanced UV-curable finishes. Unlike traditional methods, our UV technology cures instantly, so you can move furniture back the same day with no lingering odor or downtime. Choose the perfect refinishing service to match your needs and home traffic. Our dust-free process ensures a clean, beautiful finish every time.

📞 Phone: 631-866-1972
🌐 Website: saverawoodfloorrefinishing.com
📍 Service Area: Setauket, Stony Brook, Port Jefferson, Saint James, and surrounding Long Island towns.

A Homeowners Guide to Refinishing of Hardwood Floors

The refinishing of hardwood floors is a complete restoration for your home's wood surfaces. The process involves sanding away the top layer to eliminate years of scratches, dings, and the worn-out finish. Afterward, we apply a fresh stain and several new, durable topcoats. For homeowners in Head of the Harbor, it's the most effective way to bring tired, old floors back to their original glory without the significant expense and disruption of a full replacement.

When to Consider Hardwood Floor Refinishing in Head of the Harbor

Your hardwood floors are part of your Long Island home's story, a backdrop for everything from hectic family mornings in Stony Brook to cozy evenings in historic Head of the Harbor. But life leaves its mark. The time for professional refinishing of hardwood floors arrives when you start noticing wear and tear that a simple cleaning just can't touch anymore.

It’s not always about a dramatic gouge or a deep scratch. More often, the signs are subtle. You might see a general dullness that has settled over the floors; they seem to absorb light instead of reflecting it. This is a classic sign that the protective finish has worn thin, leaving the bare wood vulnerable to dirt, spills, and humidity.

Key Signs Your Floors Need Attention

Catching these issues early can save you money and prevent bigger problems down the road. Keep an eye out for these tell-tale signs that your floors are ready for a refresh:

  • Dullness and Lack of Shine: Does mopping and polishing fail to bring back that beautiful sheen? That’s a clear signal the original finish is gone. Millions of tiny scratches are scattering the light, making the surface look flat and lifeless.
  • Surface Scratches and Scuffs: A few light scuffs are normal, but when your floors are covered in a network of scratches from pet claws, dragged furniture, or daily foot traffic, the protective shield is officially broken. If you can see scratches that have cut through the color and into the light-colored wood beneath, it's definitely time.
  • Fading and Discoloration: We love our sunny Long Island homes, but all that sunlight can be tough on floors. Areas constantly exposed to UV rays will fade over time, creating an uneven, patchy look that can only be fixed by sanding and restaining.
  • Water Damage Marks: Black or grayish stains on the wood are usually a sign of water damage. As long as the moisture hasn't caused the boards to cup, warp, or rot, Head of the Harbor hardwood floor refinishing can often sand these ugly spots right out and restore the wood's natural, uniform color.
  • Worn-Out High-Traffic Areas: Look closely at your hallways, entryways, and the floor in front of the kitchen sink. These spots take a beating. You'll often see visible "lanes" where the finish has been completely worn away, leaving the wood exposed.

Think of your floor's finish as its shield. Once that shield is breached, the wood itself is vulnerable. Refinishing isn't just a cosmetic fix; it's a crucial maintenance step that restores this protective barrier, extending the life of your investment for years to come.

Deciding when to refinish hardwood floors is all about knowing when that shield has failed. By being proactive, you stop small issues from becoming big, expensive ones that might force you into a full replacement. It’s a smart move that revives your floor’s beauty and toughness, making sure it remains a stunning foundation for your home.

Our Step-by-Step Head of the Harbor Hardwood Floor Refinishing Process

The thought of any home renovation can be a bit daunting, but when it comes to the refinishing of hardwood floors, we believe in total transparency. Our process is a craft we’ve perfected to be as clear and efficient as possible, causing the least amount of disruption to your life.

We've been doing this for years, from reviving the gorgeous, time-worn red oak floors in historic Setauket colonials to giving sleek, modern floors a fresh look in newer Head of the Harbor homes. Each project has taught us something, and we bring that experience to your floor. From the first chat to the final walk-through, you'll always know what's happening.

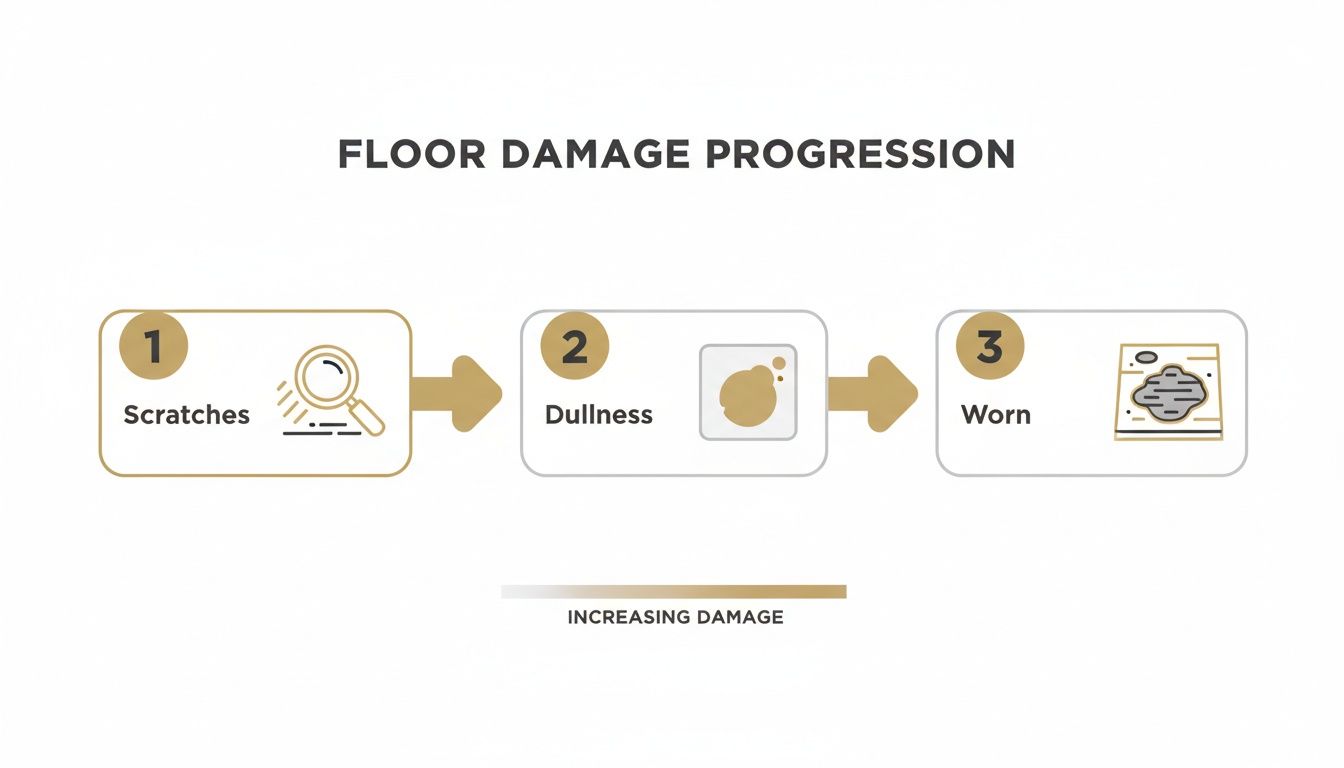
Often, homeowners call us when they start noticing the progression of wear and tear, which usually looks something like this.

Infographic illustrating the progression of floor damage from scratches to dullness to a worn state.

As you can see, what begins as a few surface-level issues can eventually break down the floor's entire protective coat. That’s the point where a professional refinish becomes a necessity, not just a cosmetic fix.

Step 1: Home Preparation and Consultation

Every great refinishing job starts with a solid plan. It all begins when we visit your home to get a good look at your floors, listen to what you're hoping to achieve, and answer all your questions. This is also when we map out how to prepare the space for the work.

This means carefully moving furniture, rolling up rugs, and clearing out any decor from the rooms we'll be working on. Sometimes, previous coatings like wax need to be addressed before we can even start sanding; our wax removal service is designed for this exact situation. We also take the time to seal off doorways and protect adjacent areas to keep the rest of your home just as you left it.

Step 2: Dust-Free Sanding

This is where the magic really starts. We have to completely remove the old, worn-out finish—along with all the scratches, scuffs, and dings that have built up over the years. Anyone who's seen a traditional sanding job knows it’s famous for one thing: a massive cloud of fine dust that gets everywhere and sticks around for weeks.

That’s why our advanced dust-free sanding system is such a game-changer for Head of the Harbor hardwood floor refinishing. We hook up our powerful, industrial-grade sanders directly to HEPA vacuum systems. This setup captures up to 99% of dust right at the source, before it ever has a chance to go airborne. This means a much cleaner, healthier home for your family and zero tedious cleanup for you later.

We don't just sand once. It's a careful, multi-stage process where we use progressively finer grits of sandpaper. This method creates a perfectly smooth, raw wood surface—the ideal canvas for a beautiful, even stain and finish.

Step 3: Custom Staining and Finishing

Now that the wood is back to its natural, beautiful state, it's time for color. We can apply your chosen stain, creating custom blends to perfectly match existing woodwork or to give your home an entirely new vibe. The stain soaks into the wood grain, highlighting its unique character.

After the stain is just right, we apply several coats of a high-quality, durable water-based finish. These modern finishes are low in VOCs (Volatile Organic Compounds), making them a much safer and more eco-friendly choice than the old-school, oil-based polyurethanes. A huge plus? They don’t "amber" or turn yellow over time, so the color you choose is the color that stays. You can dive deeper into our complete refinishing hardwood floors process over on our blog.

Step 4: Instant UV Curing

This final step is what really sets our process apart. Traditionally, you’d have to wait days for a new finish to dry and fully cure. We use cutting-edge UV technology instead. Right after we apply the final coat, we bring in a special UV light machine that instantly cures the finish, hardening it to its maximum durability in a matter of seconds.

This incredible technology offers some serious advantages:

  • No Downtime: You can walk on your floors and start moving furniture back in the very same day. No more tiptoeing around for a week.
  • Maximum Durability: A UV-cured finish is significantly stronger and more resistant to scratches and scuffs than a finish left to air-dry.
  • Zero Odor: The instant cure means no lingering chemical smells. Your home just smells like home.

This incredibly efficient system allows us to complete most Head of the Harbor hardwood floor refinishing projects in just one to two days. You get to skip the long wait and get right back to enjoying your beautiful, revitalized home.

Refinishing Versus Replacing Your Hardwood Floors in Head of the Harbor

So, your hardwood floors have seen better days. You're now at a classic homeowner crossroads: do you refinish them, or is it time to tear them out and start over? It can feel like a huge decision, but once you understand the key differences in cost, time, and overall impact, the best path for your Head of the Harbor home becomes much clearer.

Think of refinishing as a restoration project. It’s all about breathing new life into the beautiful wood you already have, preserving the very material that gives your home its unique character. This is almost always the right call for floors with surface-level problems—think scratches from pets, scuffs from moving furniture, or that dull, faded look you see in a sun-drenched Setauket kitchen. It's a true testament to how durable real hardwood can be.

Full replacement, on the other hand, is a complete overhaul. This route is really reserved for floors with deep, structural problems that can't be fixed by sanding. We're talking about issues like termite damage, severe warping from a major water leak, or floors that have already been sanded down to their absolute limit over the decades.

When Refinishing Is The Smart Choice

In the vast majority of homes we work on across Long Island, from historic colonials in Head of the Harbor to modern new builds, refinishing is the superior option by a long shot. If your floorboards are solid but just look tired and worn out, a proper refinish will deliver a jaw-dropping transformation without the chaos of a full replacement.

Refinishing is the perfect solution for these common situations:

  • Everyday Wear and Tear: Those countless little scratches, a finish that has lost its sheen, and worn-down paths in hallways are exactly what refinishing of hardwood floors is designed to fix.
  • A Fresh New Look: Maybe you're tired of that old orange-toned oak and want a modern, dark walnut stain. Refinishing lets you completely change the color and style of your floors for a fraction of what new wood would cost.
  • Saving Original Character: Older homes often feature unique, irreplaceable hardwood. Refinishing is all about preserving that history and charm, not throwing it away.

A Clear Comparison: Refinishing vs Replacing

To make it even clearer, let's put the two options head-to-head. When you see the key factors lined up side-by-side, the differences are pretty stark. For an even more detailed breakdown, you can check out our guide on hardwood floor resurfacing vs refinishing.

Here’s a simple table to help you weigh the pros and cons for your own home.

Hardwood Floor Refinishing vs Full Replacement

Factor Refinishing of Hardwood Floors in Head of the Harbor Replacing Hardwood Floors in Head of the Harbor
Cost Significantly lower. You’re working with the material you already own, not buying all new lumber. Very high. You're paying for demolition, waste disposal, new wood, underlayment, and installation.
Project Time Much faster. With modern UV-curing finishes, we can often complete the job in 1-2 days. Lengthy. This can easily take a week or more, especially when you factor in acclimation time for the new wood.
Environmental Impact Eco-friendly. You save trees by reusing your existing floors and keep old wood out of the landfill. High impact. It requires harvesting new timber and creates a mountain of construction waste.
Home Disruption Minimal. Dust-free sanding systems contain the mess, and the short timeline means less hassle for your family. Major disruption. Expect loud demolition, a lot of dust, and rooms being completely unusable for an extended period.
Value & ROI Excellent. Restores your home’s beauty and adds significant value for a much lower upfront investment. Good, but the high cost means it takes longer to see a return on your investment.

At the end of the day, the right choice really boils down to the actual condition of your floors. But unless you’re facing catastrophic structural damage, the refinishing of hardwood floors is almost always the smarter, faster, and more responsible way to bring back the beauty your Head of the Harbor home deserves.

The Modern Advantage of Dust-Free and UV-Cure Technology for Head of the Harbor Hardwood Floor Refinishing

When you think about the refinishing of hardwood floors, what comes to mind? For many, it’s a chaotic scene: plastic sheets everywhere, a fine layer of dust coating every single surface, and a chemical smell that hangs in the air for days, forcing you to find somewhere else to be.

Thankfully, that’s an outdated picture. Technology has completely changed the game, making the entire process cleaner, healthier, and unbelievably fast. At Savera, we've focused our craft on two key breakthroughs: dust-free sanding and instant UV-curing. These aren't just small tweaks—they're a whole new way of doing things, especially for busy households in Head of the Harbor and Saint James that can't just press pause on life.

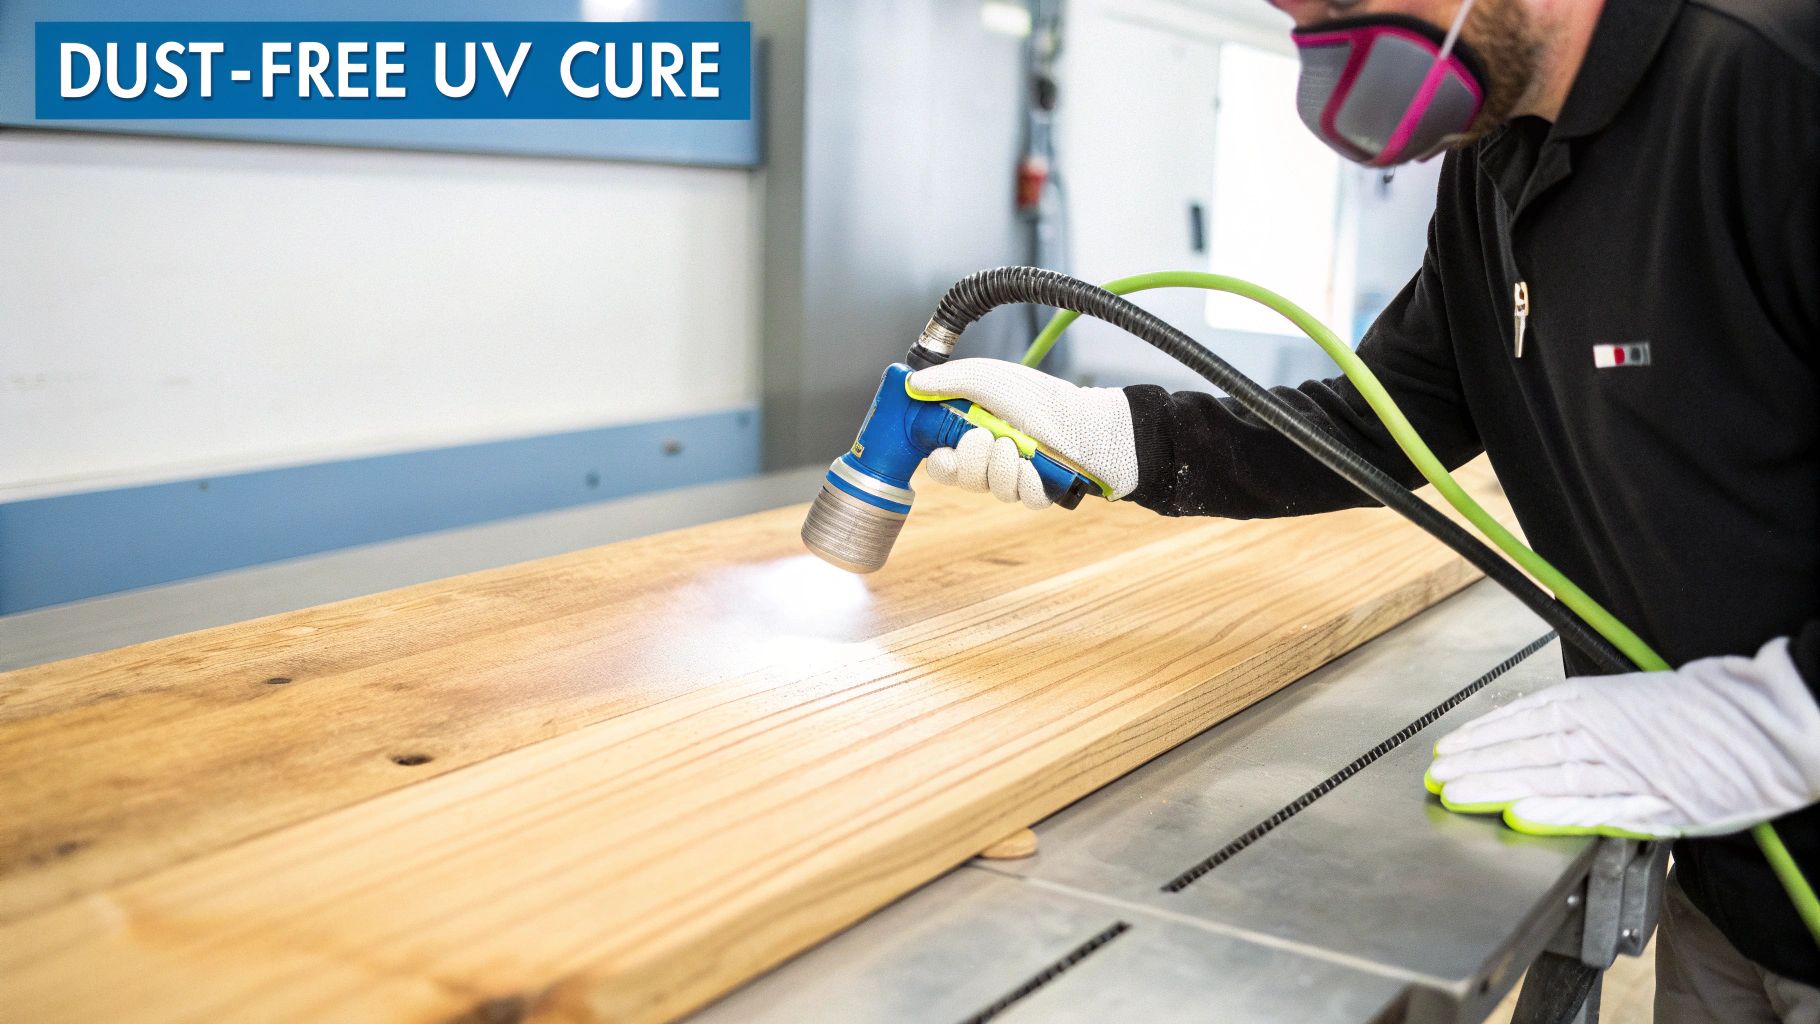
A person in a mask and gloves uses a handheld UV light to cure a wooden board, ensuring a dust-free finish.

A Healthier Home with Dust-Free Sanding

Sanding is the make-or-break step in refinishing. It’s what removes the old, worn-out finish and preps the bare wood for something new. It’s also, traditionally, the messiest part of the job. Our dust containment systems change all that.

We hook up our professional-grade sanders directly to powerful vacuums equipped with HEPA filters. This setup captures up to 99% of airborne particles right at the source, before they ever get a chance to float through your home.

The difference this makes is immediate and massive:

  • Better Air Quality: This is a huge benefit for your family’s health, especially for kids, pets, or anyone with allergies or asthma. No fine wood dust to breathe in.
  • No Lingering Mess: Forget about finding dust on your countertops, inside cabinets, and on your electronics weeks later. When we leave, the dust leaves with us.
  • A Flawless Finish: Keeping the wood surface perfectly clean means no stray dust particles can get trapped in the new finish, giving you that glass-smooth look you want.

The Instant Gratification of UV-Cure Finishes

The other half of our modern approach is all about the finish itself. Old-school, oil-based polyurethanes can take 3-5 days to dry and weeks to fully cure. All the while, they're releasing high levels of VOCs (Volatile Organic Compounds), which is what creates that strong, lingering chemical smell.

We use a completely different, far superior method: UV-curing.

Think of it like getting a filling at the dentist. The dentist applies the bonding material, then uses a special light to harden it instantly. Our UV-cure technology does the exact same thing for your floors. We apply our tough, water-based finish, then roll a portable UV light machine over it to cure it on the spot.

This process totally transforms the timeline and the quality of the final product:

  • Walk on Your Floors the Same Day: The finish is 100% cured and hardened the second we're done. You can walk on it and even move furniture back into the room immediately. No more waiting around.
  • Zero VOCs and No Odor: Our water-based finishes are eco-friendly and contain zero VOCs. The instant cure means there are no chemical smells left behind, so it’s perfectly safe for your family and pets.
  • Unmatched Durability: A UV-cured finish is significantly harder and more resistant to scratches, scuffs, and chemicals than any traditional finish that air-dries. It’s a powerful protective shield built for real life.

This advanced technique allows us to provide top-tier Head of the Harbor hardwood floor refinishing services that fit into your life, not disrupt it. If you're curious about the science, you can learn more about how instant UV-curable finishes work on our blog. By combining dust-free sanding with instant curing, we deliver a superior result that is cleaner, safer, and ready for you to enjoy without the wait.

Choosing The Right Finish For Your Head of the Harbor Lifestyle

Every home on Long Island has its own story. A busy family with kids and a golden retriever in Saint James is going to put their floors through a completely different kind of stress than a retiree in a quiet, historic home in Head of the Harbor. That’s why a great refinishing of hardwood floors is about so much more than picking a color—it’s about choosing a protective finish that can actually stand up to your life.

This is exactly why we've laid out a clear, tiered system of finishing packages. It’s designed to perfectly match how you use your home and what you’ve budgeted for the project.

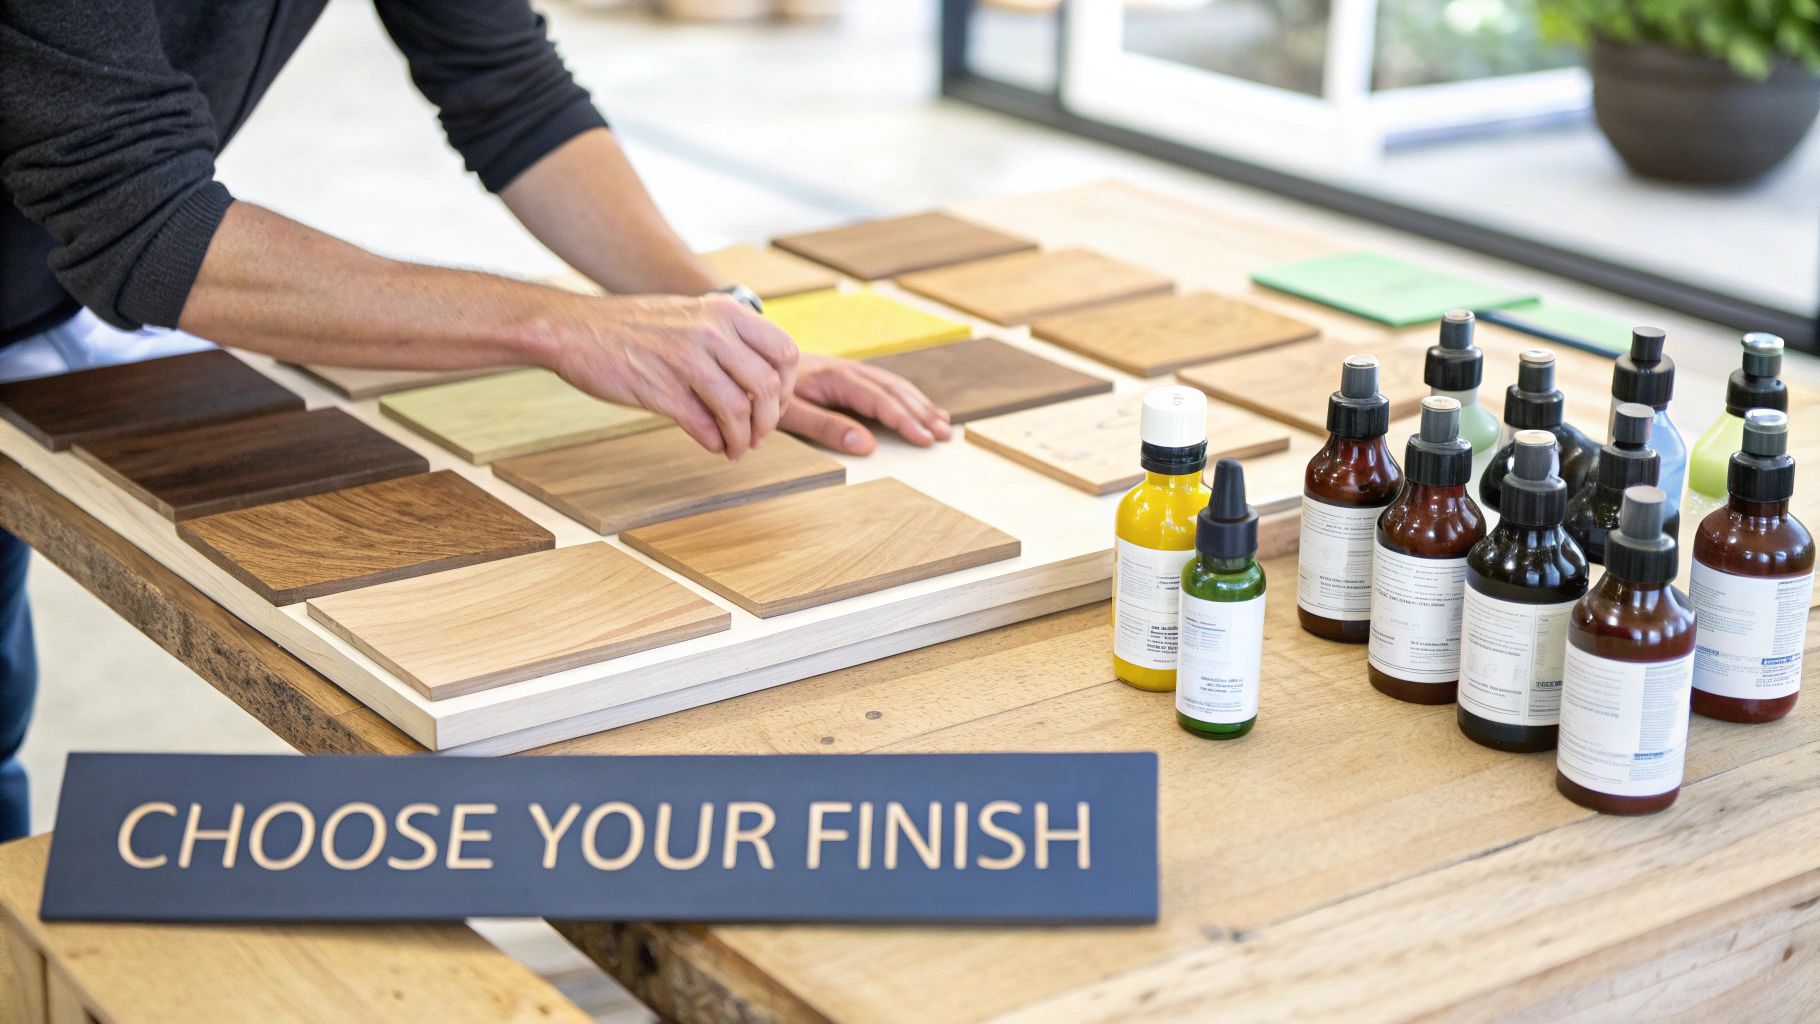
Person choosing from various wood finish samples and bottles on a table with a 'Choose Your Finish' sign.

Honestly, picking the right topcoat is the single most important decision you'll make for the long-term beauty of your floors. Think of it as an invisible shield, the first line of defense against everything from dragged chairs and spilled juice to everyday foot traffic.

Our packages all feature modern, water-based finishes that are tough, environmentally friendly, and won't yellow over time like old-school, oil-based products. If you want to dive deeper into the science behind it all, we've put together a helpful comparison of water-based vs. oil-based floor finishes.

Our Hardwood Floor Finishing Tiers

We’ve simplified the whole process by creating four distinct packages, each one offering a different level of durability. Whether you need an ironclad finish for a chaotic entryway or solid, standard protection for a quiet bedroom, we have you covered for your Head of the Harbor hardwood floor refinishing project.

Savera Wood Floor Refinishing Service Tiers

Here’s a simple breakdown of our finishing packages, features, and pricing to help you choose the right level of protection for your floors.

Tier Price Per Sq. Ft. Key Features Ideal For
Diamond $5.00 Unmatched Wear & Scratch Resistance
UV-curing + Nano Wear technology for ultimate durability.
Homes with large dogs, active kids, and very high-traffic areas like kitchens and hallways.
Platinum $4.50 Premium Durability
2K Water-Based Finish with a Nano Wear Oxide Additive for superior protection.
Busy households with pets and regular foot traffic. A great choice for main living areas.
Gold $4.25 Enhanced Scratch Resistance
A durable 2K Water-Based Finish that provides excellent protection against daily scuffs and marks.
Moderately busy homes, dining rooms, and home offices that see consistent use.
Silver $4.00 Excellent Wear Resistance
A high-quality 1K Water-Based Finish perfect for standard residential use.
Low-traffic areas like guest rooms, formal living rooms, and adult bedrooms.

Choosing the right package really comes down to an honest assessment of your home's traffic. This way, you invest in the right level of protection from the start.

Maintenance Services For Lasting Beauty

Sometimes, your floors don't need a full-blown refinishing. To keep them looking fantastic between major projects, we offer targeted maintenance services that are quick, affordable, and incredibly effective.

  • Screen & Recoat: This is like a mini-refinish, starting at $2.00/sq. ft. We lightly abrade (or "screen") the existing topcoat to rough it up just enough for a new coat to bond perfectly. It’s the best way to erase minor surface scuffs and bring back that brand-new shine without the dust and time of a full sanding.
  • Wood Floor Cleaning: For $1.50/sq. ft. and up, our professional deep-cleaning service gets rid of the stubborn, ground-in grime that your mop just can't touch. We safely lift away the dirt to revive your floor's natural luster.
  • Wax Removal: If you're dealing with an old, sticky wax buildup that’s making your floors look dull and hazy, this service is a lifesaver. Starting at $2.50/sq. ft., we safely strip away the old wax, giving you a clean slate.

By understanding all your options for your Head of the Harbor hardwood floor refinishing project, you can make a smart decision that protects your investment and keeps your hardwood floors looking incredible for years.

FAQs: Head of the Harbor Hardwood Floor Refinishing

Deciding to refinish your hardwood floors is a big step, and you probably have a lot of questions. We get it. Over the years, we've heard just about every question you can imagine from homeowners here in Head of the Harbor. To help you feel completely confident in your decision, we’ve put together honest, straightforward answers to the things we’re asked most often.

How long does the refinishing process take?

Thanks to our advanced UV-curing system, we can have the entire project wrapped up in just 1-2 days for a typical 800-1,000 sq. ft. space. On Day 1, we handle prep, dust-free sanding, staining, and initial finish coats. On Day 2, we apply the final topcoat and use our specialized UV light to cure it instantly. The moment we’re done, your floors are 100% cured and ready for you to walk on and move furniture back.

Will my house be a dusty, smelly mess?

Absolutely not. Our dust-free sanding equipment is a game-changer. We connect our industrial sanders directly to powerful HEPA vacuum systems that capture up to 99% of the dust right at the source. For the finish, we exclusively use premium water-based and UV-curable finishes that are zero-VOC (Volatile Organic Compounds), meaning there are no harsh chemical odors and it's a much safer choice for your family and pets.

What is the cost for hardwood floor refinishing in Head of the Harbor?

Every floor is unique, so we provide a precise, in-home quote. The final cost depends on the total square footage, the current condition of the floors, and your choice of our finish packages (Silver, Gold, Platinum, or Diamond). To give you a starting point, our services are priced as follows:

  • Full Refinishing (Silver Tier): Starts at $4.00/sq. ft.
  • Screen & Recoat: Starts at $2.00/sq. ft.
  • Wood Floor Cleaning: Starts at $1.50/sq. ft.

Can my specific type of wood floor be refinished?

This is a critical question. Solid hardwood floors can almost always be refinished multiple times over their long lifespan. Engineered hardwood floors, which have a thin top layer of real wood, can only be refinished if that veneer is thick enough (typically 3mm or more). During our free consultation in your Head of the Harbor home, we will carefully inspect your floors to identify the type and measure the wear layer, letting you know exactly what your options are. Once your floors are beautifully restored, you'll want to keep them that way. A common question we get is about day-to-day wear and tear, and we often point people to great resources on how to protect your floors from furniture.

Homeowners on Long Island trust Savera Wood Floor Refinishing to restore the natural beauty of their hardwood floors with our dust-free sanding system and advanced UV-curable finishes. Unlike traditional methods, our UV technology cures instantly, so you can move furniture back the same day with no lingering odor or downtime. Choose the perfect refinishing service to match your needs and home traffic. Our dust-free process ensures a clean, beautiful finish every time.

📞 Phone: 631-866-1972
🌐 Website: saverawoodfloorrefinishing.com
📍 Service Area: Head of the Harbor, Saint James, Stony Brook, Setauket, and surrounding communities.

Hardwood Floor Sanding and Refinishing in Roslyn, NY: Restore Beauty and Value with Savera

Hardwood floors are the heart of any Roslyn home, providing a timeless warmth and character that’s hard to beat. But over time, daily life can leave those beautiful surfaces looking tired, scratched, and dull. The best way to erase years of wear and bring back their original elegance is with professional hardwood floor sanding and refinishing. It's a transformative investment that boosts your home's value and curb appeal.

Why Sanding and Refinishing is the Ideal Solution for Roslyn Homes

From classic Colonials near the Roslyn Grist Mill to modern estates overlooking the harbor, hardwood floors are a defining feature. However, constant foot traffic, spills, and sunlight can wear down the protective finish, leaving the wood exposed to damage. This is where professional hardwood floor sanding and refinishing in Roslyn, NY, becomes more than a simple repair—it's a complete restoration. We strip away the old, damaged layer to reveal the pristine, beautiful wood underneath.

It’s tempting to consider a DIY approach to save money, but this path is often paved with disappointing—and expensive—results. Common DIY mistakes include:

  • Uneven sanding that creates noticeable dips and waves in the floor.
  • Missed spots and ugly swirl marks from improper equipment handling.
  • Lingering dust that gets trapped in the new finish and spreads throughout your home.
  • A final coat that peels, bubbles, or wears out prematurely.

Choosing a professional service for hardwood floor restoration in Roslyn eliminates these risks. We use specialized equipment and proven techniques to deliver a flawless, durable finish that protects your investment and restores your home’s welcoming atmosphere.

An Investment in Your Home’s Value

Investing in professional floor refinishing pays dividends in both daily enjoyment and long-term property value. The demand for well-maintained homes in Roslyn is strong, and beautifully restored hardwood floors are a significant selling point.

The market for these services is growing for a reason. Valued at roughly $3.1 billion in 2023, it's projected to hit around $5.2 billion by 2032. Sanding and refinishing make up a huge piece of that pie because it’s the single best way to extend the life and beauty of wood floors. You can read the full research about the growing wood floor renovation market to get a better sense of its impact.

The Problem with Worn-Out Finishes

Think of the finish on your hardwood floor as its first line of defense. Once it’s gone, the raw wood is left exposed to moisture, dirt, and physical damage. That's when you start seeing stains, splintering, and that dreaded graying of the wood.

A full sanding and refinishing project doesn’t just fix the damage; it gives you a chance to update the entire look of your home. You could go with a completely new stain color or maybe a modern, low-sheen finish that’s better at hiding minor imperfections than a high-gloss one.

A professional refinishing project does more than just fix scratches; it resets the clock on your floors, giving them a fresh start with superior protection that can last for another decade or more.

Our process always starts with a careful look at your floors. We pinpoint any areas that need special attention, like deep gouges or old pet stains, and map out a custom plan. It’s this attention to detail that really separates a professional job from a weekend DIY attempt. For a great example of what goes into a high-end renovation, check out the Abstract Floors Ocean Beach Road Renovation project.

When you choose Savera, you’re choosing a dust-free, efficient, and expert solution that will truly bring out the best in your Roslyn home's floors.

The Sanding Process: Removing Imperfections for Hardwood Floor Sanding and Refinishing in Roslyn

When it comes to hardwood floor sanding and refinishing in Roslyn, we follow a proven, methodical process to get superior, lasting results. We don’t just show up and start sanding. Every project is carefully planned and executed to make sure your floors look nothing short of spectacular. It's this commitment to doing things the right way that guarantees a finish that protects your investment for years.

It all starts with our advanced dust-free sanding in Roslyn. We hook up our powerful sanding equipment to high-efficiency vacuums fitted with HEPA filters. This setup is a game-changer, capturing over 99% of the dust right at the source before it has a chance to spread through your home. This crucial first pass strips away the old, worn-out finish, erasing scratches, scuffs, and other blemishes to give us a perfect canvas.

Once we're down to the bare wood, our technicians give the floor a thorough inspection. This is when we often find underlying issues that were hiding just beneath the old finish.

Preparing the Perfect Surface

Before a single drop of new finish goes down, we handle any necessary repairs to ensure a flawless final look. This is a critical stage where our craftsmanship really comes into play, especially in the beautiful, older homes you find all over Roslyn.

  • Gap Filling: We meticulously fill any gaps and cracks that have appeared between planks due to seasonal expansion and contraction over the years.
  • Board Replacement: If we find any boards that are cracked, water-damaged, or too deeply gouged to save, we seamlessly replace them with perfectly matched wood.
  • Final Smoothing: After all the repairs are done, we do one last, fine-grit sanding run to make sure the entire surface is perfectly smooth and uniform.

With a flawless, clean surface ready to go, the floor is now ready for the most exciting part: staining and finishing. This is where you get to customize the final look.

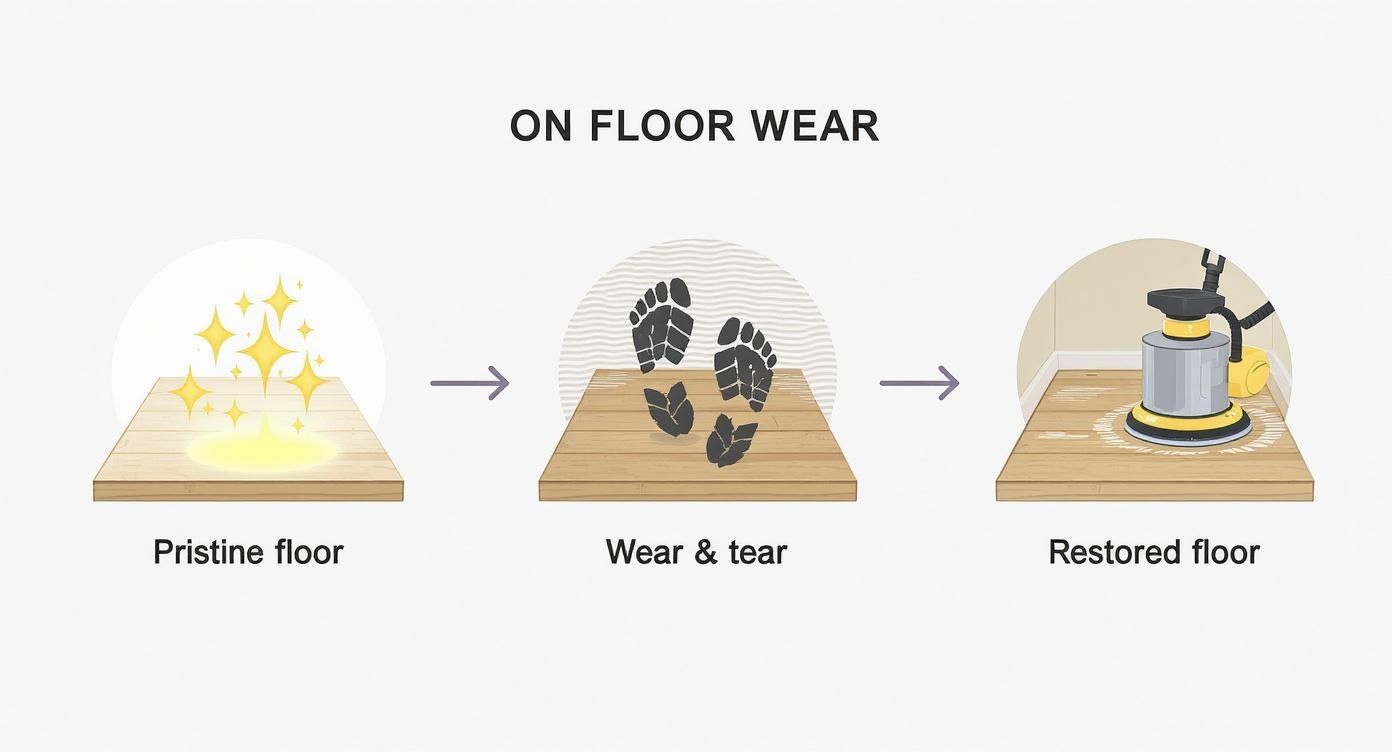
This next visual gives you a great idea of a hardwood floor's journey—from its pristine beginnings, through the wear and tear of daily life, and back to its full glory after our professional restoration.

Infographic showing the process of a hardwood floor from pristine, to worn, to restored.

As you can see, professional sanding and refinishing literally turns back the clock on your floors, reversing the signs of aging and bringing back their original beauty.

Refinishing for Longevity and Aesthetics in Roslyn

The final step is where the magic happens. We apply your chosen stain and a tough protective finish. We’ll work with you to pick a color that perfectly complements your Roslyn home’s decor and a finish that can handle your lifestyle. We offer a range of durable finishes, including water-based, oil-based, and our popular UV-cure finish.

A UV-cure finish is a game-changer for homeowners. Unlike traditional finishes that need days to cure, our UV coating cures instantly with a special light. This means incredible durability and the ability to move your furniture back and use your floors the very same day.

This proven system for hardwood floor sanding and refinishing guarantees a stunning result every time. If you want to dive deeper into the nuts and bolts, you can explore more about the refinishing hardwood floors process and see exactly how we bring Roslyn floors back to life. Our meticulous process ensures a beautiful, durable, and long-lasting finish that you will enjoy for years.

Benefits of Professional Dust-Free Sanding in Roslyn

Let's be honest, the old way of sanding floors brings one image to mind: a massive, unavoidable cloud of fine wood dust. It settles on every surface, gets into your air ducts, and lingers for weeks. For homeowners in Roslyn, that outdated method meant a huge cleanup job and potential health concerns.

Our modern approach to hardwood floor sanding and refinishing in Roslyn, NY, is a complete game-changer.

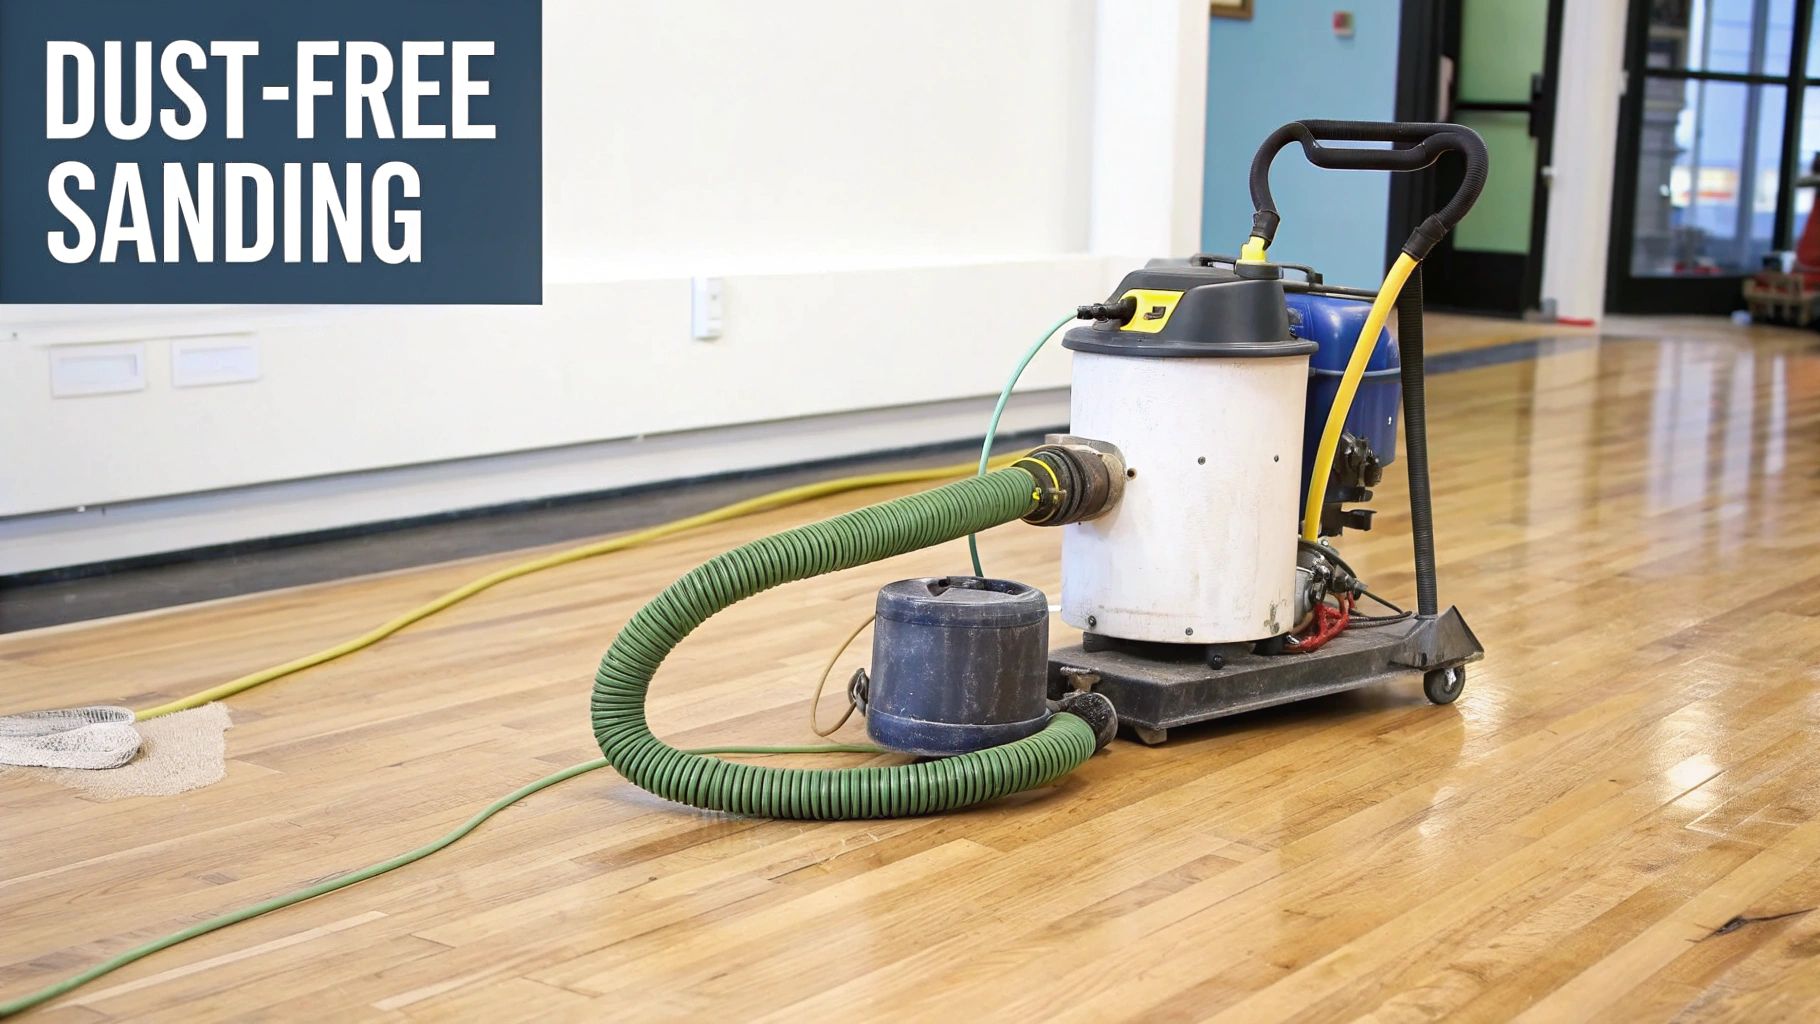
A hardwood floor technician using a dust-free sanding machine, showing a clean work environment.

We don't just sand your floors; we use a state-of-the-art dust-free sanding Roslyn system. Our powerful sanding equipment is hooked directly to an industrial-grade containment unit packed with HEPA filtration. This setup is designed to capture over 99% of dust particles the second they’re created, stopping them before they ever have a chance to become airborne.

Benefits For Your Home and Family

Choosing a dustless system goes far beyond simple cleanliness. It’s about creating a healthier, safer environment while we work in your home.

  • Protects Indoor Air Quality: By capturing that fine dust at the source, we keep it from circulating through your HVAC system. This is a huge deal for households with kids, elderly family members, or anyone dealing with allergies and asthma.
  • Your Furnishings Stay Protected: Forget spending hours draping plastic over every piece of furniture and covering up your electronics. Our system keeps your home clean from the start, protecting your decor, artwork, and valuables from that gritty film of dust.
  • Faster and More Even Results: A clean environment allows our technicians to work more efficiently and achieve a smoother, more even surface, which is the foundation for a flawless finish.

This clean, efficient method is now a cornerstone of modern professional floor refinishing on Long Island. It also allows our technicians to do a smoother, more precise sanding job, which is the foundation for a flawless final finish.

A Growing Standard In The Industry

The entire floor care industry is shifting toward these cleaner, more efficient methods. The global market for these services, valued at USD 4.47 billion in 2024, is expected to nearly double by 2034. This isn't just a trend; it's driven by homeowners who demand better technology.

In fact, 55% of contractors now use advanced dustless systems, and 41% of customers specifically ask for premium, durable finishes. You can discover more insights about floor refinishing market trends and see how technology is pushing results to a higher standard.

By choosing our dust-free sanding system, you are opting for a method that is not only cleaner and healthier but also more efficient. It ensures a flawless surface ready for staining and finishing, without the disruptive mess of traditional techniques.

Our commitment is to give Roslyn homeowners a seamless, stress-free experience. The technology we use is a key part of that promise, delivering a stunning final product while respecting your home and your health. To see exactly how this advanced system works, check out our detailed guide on our Dust-Free Sanding Service. It's how we complete projects with minimal disruption and maximum satisfaction.

Custom Floor Solutions for Roslyn Homes

Refinished hardwood floors in a beautifully styled Roslyn living room.

No two hardwood floors are the same, especially in a place like Roslyn with such a rich variety of homes. That's why every hardwood floor sanding and refinishing Roslyn NY project needs a custom game plan. Your floors have their own history, character, and wear patterns—they deserve a solution that’s made just for them.

We get it. A full, down-to-the-wood sanding and refinishing job isn't always the answer. For floors that just have light surface scuffs and minor scratches, a less invasive approach can work wonders.

When a Full Sanding Isn't Needed

In many Roslyn homes, the wood itself is still in great shape, but the protective topcoat has just lost its shine. This is where our Screen & Recoat Service is the perfect fit. The process lightly abrades, or "screens," the existing finish, creating the perfect surface for a new topcoat to bond to.

This service is ideal for:

  • Restoring the protective layer and shine on floors with minor surface wear.
  • Refreshing the look without changing the floor's color.
  • Serving as a quick and affordable maintenance step between full refinishing projects.

Tackling Stubborn Buildup

Sometimes, the real enemy isn't wear and tear—it's the sticky residue from years of using the wrong cleaning products. Wax-based polishes, oil soaps, and acrylic floor restorers can leave a hazy, stubborn film that attracts dirt and makes floors impossible to get clean.

Our specialized hardwood floor wax removal service is designed to safely strip away this buildup without harming the wood. Once that residue is gone, we can see what we're really working with and apply a fresh, durable finish that's actually easy to maintain.

Experience Across Long Island's Diverse Homes

Our team has worked on just about every type of home you can find across Long Island. That hands-on experience is what lets us tailor our hardwood floor restoration Roslyn services so perfectly to your home's unique style.

We’ve brought back the original charm of historic oak in classic Old Westbury properties and applied sleek, modern UV-cure finishes in contemporary Greenvale new builds. Every project requires a different touch, from picking the right stain to complement vintage woodwork to choosing a finish that can handle a busy family's lifestyle. To learn more, you can read our guide on the different hardwood floor finish types to see what might work for you.

We don’t believe in one-size-fits-all solutions. Our process begins with a detailed consultation where we discuss your home's traffic patterns, your personal style preferences, and your long-term goals for your floors.

Based on that conversation, we’ll map out the perfect combination of services to give you beautiful, durable floors that truly elevate your home. Whether it’s a simple buff and clean or a complete color transformation, our goal is to deliver a custom solution that restores the value and beauty of your Roslyn residence.

When it comes to smart home upgrades in Roslyn, refinishing your hardwood floors is one of the best investments you can make. This isn't just about buffing out a few scuffs—it's a strategic move that seriously boosts your property's value and makes your entire home feel more inviting. In a competitive market like Roslyn, floors that pop are a huge selling point that immediately grab a buyer's attention.

A Smart and Sustainable Investment

Beyond the beautiful new look, choosing to refinish is also the smarter, more eco-friendly option compared to a full replacement. We're not tearing out perfectly good wood; we're expertly sanding away the years of wear and tear and sealing it with a fresh, high-quality finish. This simple act can add decades to the life of your original floors.

You get to keep the character of your home, avoid the massive expense and headache of a tear-out, and do something good for the planet. It’s a win-win that improves your day-to-day life while protecting your home's long-term value.

Understanding the Cost and Value

So, what does it cost? You’d be surprised how affordable a professional hardwood floor sanding and refinishing project is, especially when you weigh it against the value it adds. Recent industry data shows most homeowners spend somewhere between $1,107 and $2,680, with the national average hovering around $1,889.

The price typically lands between $3 and $8 per square foot, and a good chunk of that is for the skilled labor required to do the job right. To get a better sense of how this stacks up against a full replacement, you can discover more insights about hardwood floor refinishing costs on Angi.com.

Investing in your floors is investing in your home's future. A professionally refinished floor not only looks spectacular but also signals to potential buyers that the home has been well-maintained, which can lead to faster offers and a higher final sale price.

Long-Term Benefits for Roslyn Homeowners

The payoff doesn't stop when the project is done. By restoring that protective topcoat, you make your floors incredibly easy to clean and maintain, which saves you a ton of time and effort down the road. This is especially true if you opt for a modern, durable UV-cure finish, which offers fantastic resistance to scratches and daily wear.

Choosing professional floor refinishing in Long Island also gives you the perfect chance to update your home’s style without a full-blown renovation. A simple change in stain color can completely transform the vibe of a room. At the end of the day, hardwood floor restoration in Roslyn is one of the most powerful tools you have to boost your home’s appeal, whether you’re planning to sell or just want to enjoy beautiful floors for another generation.

Why Roslyn Homeowners Trust Savera

Picking the right local team for your hardwood floor sanding and refinishing Roslyn NY project is the single most important decision you'll make. It’s not just about how the floors look at the end—it's about the entire experience. It's about feeling respected in your own home and having complete trust that the job will be done right, the first time.

At Savera Wood Floor Refinishing, we're a family-owned business built on a simple foundation: craftsmanship, reliability, and fantastic customer service.

Our roots in the Long Island community run deep. We live here, we work here, and we understand the distinct character of homes in Roslyn, Manhasset, and Glen Cove. This isn't just a job for us; it's our neighborhood. That local insight helps us deliver solutions that truly fit the style of your home. You can learn a bit more about our family and our commitment on our about us page.

Our Unwavering Commitment to Quality

We've learned over the years that exceptional results only happen when you combine skilled hands with the industry's best tools and materials. There are no shortcuts.

  • Experienced Technicians: Our team is fully trained and insured. We bring years of real-world, hands-on experience to every project, guaranteeing precision from the first sanding pass to the final coat of finish.
  • Advanced Equipment: We’ve invested in state-of-the-art, dust-free sanding systems. This isn’t a gimmick—it’s about protecting your indoor air quality and keeping your home clean while we work.
  • Eco-Friendly Finishes: Your family's health is our priority. That's why we use top-tier, low-VOC finishes, including our game-changing UV-cure finish that delivers instant, rock-solid durability.

We treat every home as if it were our own. That means keeping the work site clean and organized and doing everything we can to minimize the disruption to your life. From the first phone call to the final walk-through, you can expect clear communication and total transparency. Our goal is simple: to make sure you're absolutely thrilled with your beautifully restored floors.

Choosing Savera means partnering with a team that values integrity and craftsmanship above all else. We’re not just refinishing floors; we're helping you invest in the beauty and longevity of your Roslyn home.

Building trust in the community is everything. It's about being visible, reliable, and easy to find when homeowners need you. In fact, solid local SEO strategies for contractors are a big part of how businesses like ours connect effectively with our neighbors in Roslyn. Our dedication to local service and unmatched quality is why so many of your neighbors have trusted us to bring their hardwood floors back to life.

Common Questions We Hear About Floor Refinishing in Roslyn

If you're considering a project in Roslyn, you probably have a few questions. That's a good thing. Here are some of the most common ones we answer for homeowners just like you.

How Long Will the Floor Refinishing Process Take?

Most residential projects we handle in the Roslyn area, around 1,000 square feet, typically wrap up in about 2 to 4 days.

Of course, this timeline can shift a bit. If your floors need some extra TLC with repairs, that adds time. The type of finish you choose is the other big factor. Our UV-cure finishes are a game-changer here—they cure instantly, which means you can walk on your floors and get your furniture back in place the very same day we pack up our tools.

Is the Sanding Process Completely Dust-Free?

Our dust containment systems are about as close as you can get. They're incredibly efficient, capturing over 99% of all airborne particles that sanding kicks up.

While no system is 100% perfect, the difference between our method and traditional sanding is night and day. We manage that tiny bit of residual dust, leaving your home clean and your air quality healthy.

The whole point of our dust-free system is to make the hardwood floor sanding and refinishing process as painless as possible. We want to protect your family, your home, and your health from start to finish.

Can I Change the Color of My Hardwood Floors?

Absolutely! This is one of the best parts of the process. When we sand the floors, we're taking off everything—the old finish, the scratches, and the existing color. What’s left is beautiful, raw wood.

This gives you a blank canvas. It’s the perfect time to choose a new stain that better fits your style or updated decor. We have a huge range of options, from light and airy natural tones to deep, rich walnuts, and we’re happy to help you find the perfect match for your Roslyn home.

Should I Refinish or Completely Replace My Floors?

For most floors, refinishing is the way to go. If you're dealing with surface-level issues like scratches, scuffs, fading, or just a finish that’s seen better days, refinishing is the ideal fix. Solid hardwood has a long life and can be sanded and refinished multiple times.

Replacement is really reserved for more severe problems. We’re talking about deep water damage, warped boards, or floors that have already been sanded down to their last life.

Have more questions? You can always check out our comprehensive hardwood flooring FAQs page.

Restore the beauty and value of your hardwood floors with Savera Wood Floor Refinishing in Roslyn, NY. Schedule your dust-free sanding and refinishing consultation today at saverawoodfloorrefinishing.com

Homeowners on Long Island trust Savera Wood Floor Refinishing to restore the natural beauty of their hardwood floors with our dust-free sanding system and advanced UV-curable finishes. Unlike traditional methods, our UV technology cures instantly, so you can move furniture back the same day with no lingering odor or downtime. Choose the perfect refinishing service to match your needs and home traffic. Our dust-free process ensures a clean, beautiful finish every time.

📞 Phone: 631-866-1972
🌐 Website: saverawoodfloorrefinishing.com
📍 Service Area: Roslyn, Roslyn Heights, Greenvale, Old Westbury, and surrounding areas.