Tag Archives: Savera Wood Floors

How to Apply Urethane to Wood Floors in Syosset, NY: What Homeowners Should Know Before Starting

Applying urethane is, without a doubt, the most critical part of finishing a wood floor. It's what gives you that durable, gorgeous surface that stands up to real life. Think of it as the clear armor for your hardwood, protecting it from scuffs, spills, and daily wear and tear. For homeowners all over Syosset—from the split-levels in South Grove to the classic colonials near the high school—a proper finish is what truly makes the floor. For expert Syosset hardwood floor refinishing, understanding this final step is key.

Your Guide to a Perfect Urethane Floor Finish in Syosset

A bright, empty room featuring newly finished shiny hardwood floors, light yellow walls, a fireplace, and large windows.

So, what is urethane? It’s a specific type of polyurethane, a plastic polymer that cures into a tough, protective layer right on top of your wood. This topcoat is what delivers that beautiful sheen and resilience we all associate with hardwood. It's the non-negotiable final step in any professional hardwood floor refinishing in Syosset.

But getting it right involves more than just sloshing some liquid on the floor. It’s a craft. You have to balance meticulous prep work with the right application technique and a whole lot of patience for drying times. Let's break down what that really looks like.

Understanding the Basics of a Quality Finish

Before a single drop of urethane is applied, the foundation has to be perfect. A great finish can't hide a poorly prepared floor or low-quality wood. If you're starting a new project, sourcing premium hardwood flooring is the best first step you can take. For floors you already have, everything hinges on the quality of the sanding and prep work underneath.

We'll walk through the essentials every Syosset homeowner should know:

  • Choosing the Right Urethane: We’ll look at the real-world differences between water-based, oil-based, and the newer UV-cured finishes.
  • The Application Process: A peek into how the pros get it done, from dust-free wood floor finishing to laying down a flawless final coat.
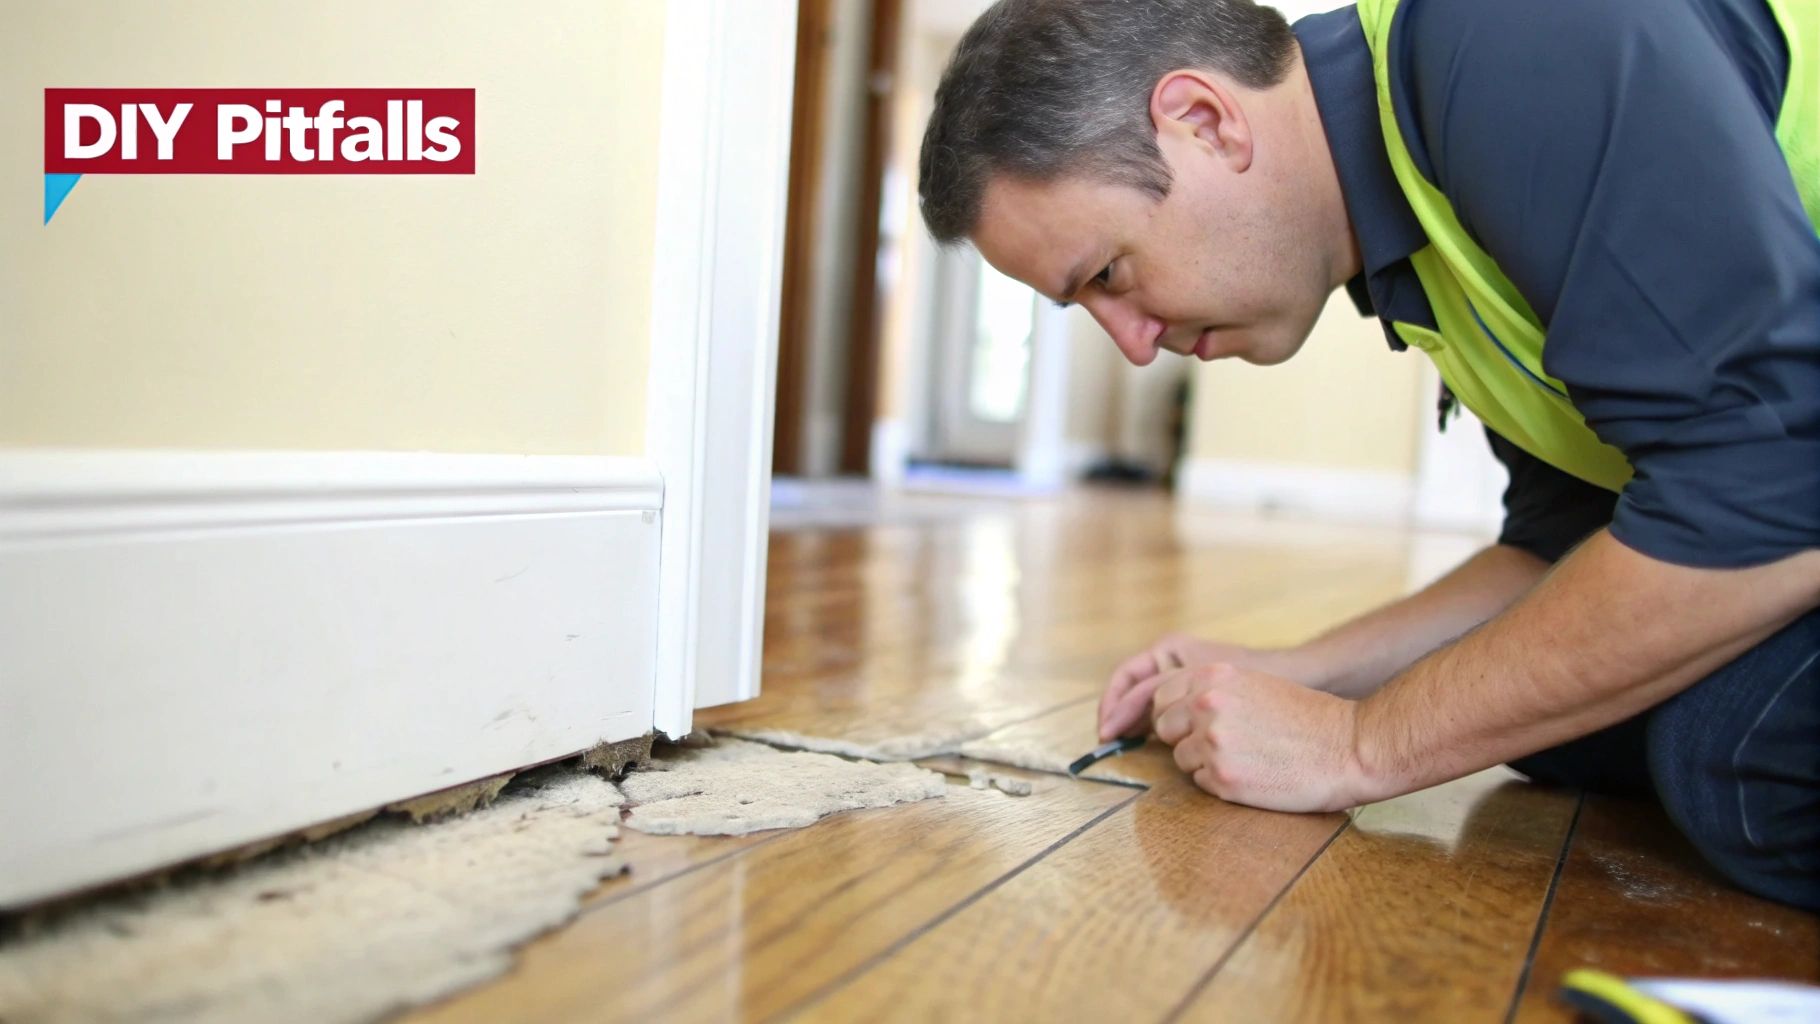
  • Common DIY Pitfalls: I'll point out the frequent mistakes I've seen that can ruin the look and longevity of a floor.
  • Professional vs. DIY: An honest comparison to help you figure out what makes the most sense for your home and your expectations for Syosset hardwood floor refinishing.

A professional finish isn’t just for looks—it’s about longevity. When urethane is applied correctly, it can add years to the life of your hardwood floors, protecting your investment and keeping your home looking its best.

This guide will give you the knowledge to make a smart decision. Whether you're thinking about tackling this yourself or bringing in an expert, understanding how to apply urethane to wood floors is your first step toward a beautiful result you’ll love for years to come.

Choosing the Right Urethane: Water-Based, Oil-Based, or UV-Cured for Syosset Hardwood Floor Refinishing

Picking the right finish is probably the most critical decision you'll make for your hardwood floor refinishing in Syosset. This isn't just a technical choice—it directly impacts how your floors will look, how they'll hold up to daily life, and how long your family might be displaced during the project. It's all about finding the perfect match for your home's aesthetic, your lifestyle, and your timeline.

You've basically got three main players in the game: the classic oil-based, the modern water-based, and the cutting-edge UV-cured urethane. Each one has its own personality, and understanding the real-world differences will ensure you get a result you'll be happy with for years. We've applied all types, from restoring a classic red oak floor in a Setauket colonial to giving a modern look to a home in Jericho.

The Traditional Choice: Oil-Based Urethane

For decades, oil-based urethane was the gold standard. It’s known for being incredibly tough and for giving floors that rich, warm amber glow that deepens with age. If you have red oak and want that classic, cozy look, an oil-based finish will bring out that warmth beautifully.

But that classic look comes with a few significant drawbacks. Oil-based finishes are loaded with Volatile Organic Compounds (VOCs), which translates to powerful, lingering fumes that demand serious ventilation. The biggest headache for most families, though, is the cure time. Sure, it might be dry enough to walk on in about 12 hours, but it takes a full 30 days to completely harden. That’s a month of babying your floors and carefully placing furniture.

The Modern Alternative: Water-Based Urethane

These days, water-based urethane is what most homeowners are choosing for a clean, modern, and hassle-free finish. Its biggest selling point? It dries perfectly clear and doesn't yellow over time. This means the true, natural color of your wood shines through, which is perfect for lighter woods like maple or for achieving those trendy Scandinavian-inspired looks.

The practical benefits are huge, too:

  • Low VOCs: You get a much milder odor, which makes for better indoor air quality.
  • Quick Drying: Floors are usually ready for socks-only foot traffic in just a few hours.
  • Fast Curing: Instead of a month, most water-based finishes are fully cured in about 7 days.

Some people remember older water-based products not being very durable, but the technology has come a long way. Modern two-component formulas offer incredible scratch and wear resistance, which is why we recommend it so often for urethane finish hardwood floors in Syosset NY homes with active kids and pets. To see how different finishes can transform a space, check out our guide on how to restore old wood floors.

The Instant-Cure Option: UV-Cured Urethane

What if you can't afford to wait days or weeks for your floors to cure? For busy Syosset families or commercial projects, UV-cured urethane is a game-changer. This is a specialized, professional-grade finish that doesn't "dry" like the others. It’s cured instantly with a high-powered ultraviolet (UV) light machine.

The moment our UV machine passes over the floor, that section of urethane is 100% cured and hardened. You can literally start moving your furniture back in right after we pack up our tools.

This technology gives you the best of everything: the highest level of durability on the market, absolutely zero downtime, and a very low-VOC process. It completely takes the waiting game out of the equation, offering ultimate convenience without a single compromise on protection. It’s an eco-friendly option that delivers superior results.

Comparing Urethane Floor Finishes for Your Syosset Home

Choosing between these options can feel overwhelming, so I've put together a simple chart to help you compare them side-by-side. Think about what matters most to you—is it the final look, the durability, or how quickly you can get your life back to normal?

Feature Water-Based Urethane Oil-Based Urethane UV-Cured Urethane
Appearance Crystal Clear, Non-Yellowing Adds a Warm, Amber Tone Crystal Clear, Non-Yellowing
Dry/Cure Time Dry in 2-4 hours; Cure in 7 days Dry in 8-12 hours; Cure in 30 days Cures Instantly with UV Light
Odor (VOCs) Low to Very Low High Very Low
Durability Good to Excellent Excellent Superior
Best For Natural wood looks, fast projects Traditional, ambered aesthetics Maximum durability, zero downtime

Ultimately, the best finish depends entirely on your specific needs. Hopefully, this breakdown gives you a clearer picture of your options and helps you make a confident decision for your Syosset home.

Getting That Flawless Urethane Finish: A Pro's Perspective on Syosset Hardwood Floor Refinishing

Laying down that final, glass-smooth coat of urethane is what truly brings a hardwood floor to life. It’s the last step in any hardwood floor refinishing Syosset project, and honestly, it's where all the meticulous prep work pays off. This isn't just about slapping on a finish; it's a careful, systematic process where every detail counts.

It really all begins before we even think about opening a can of urethane. The foundation for a perfect finish is, without a doubt, a perfectly prepared floor.

It All Starts with Sanding and a Spotless Surface

The first thing we do, and it’s non-negotiable, is sanding. We bring in commercial-grade sanding equipment hooked up to a powerful HEPA vacuum system. This isn’t just for show or to minimize cleanup—dust-free wood floor finishing is absolutely essential. Even a single speck of dust or a stray hair can get trapped under the urethane, creating a permanent blemish on your beautiful new floor.

Once we’ve sanded the floor down to its raw, uniform state, the real cleaning begins. This is a multi-step process.

  • First, a thorough vacuuming of every square inch, paying close attention to the corners and edges.
  • Next, we go over the entire floor with specialized tack cloths to pick up any microscopic dust particles the vacuum missed.
  • Finally, depending on the wood species and the environment, a quick wipe with a specific solvent can remove any lingering oils or contaminants.

Only when the floor is practically sterile do we move on to application. This fanatical focus on a clean surface is one of the biggest things that separates a professional job from a weekend DIY project. You can see how this fits into the bigger picture in our deep dive on the process of wood floor refinishing.

The Art of Applying an Even Coat

When you're applying urethane, you're in a race against time, especially with the quicker-drying water-based products. The whole game is about maintaining a "wet edge." This means you have to work in a way that prevents the applicator from passing over a section that has already started to dry, which is what causes those ugly lap marks.

We rely on specialized tools like T-bars, weighted applicators, and rollers designed specifically for floor finishes. For the absolute best results, though, nothing beats a high-quality sprayer. A professional system like the Qtech Qt190 Airless Sprayer lays down an incredibly fine, even mist. It creates a perfectly uniform coat and dramatically reduces the risk of human error like drips or uneven thickness.

A key takeaway from the pros: Thin, even coats are always better. You'll get a smoother, more durable, and far more beautiful result with multiple thin coats than you ever will by trying to glob on one or two heavy ones.

Our standard process is to apply a sealer coat first, followed by two or three topcoats of urethane. In between each of these coats, we lightly abrade—or "screen"—the floor with a very fine grit sanding screen. This scuffs the surface just enough to give the next coat something to really grab onto, creating a super strong bond between the layers.

Drying vs. Curing: There's a Big Difference

One of the most common points of confusion when it comes to urethane finish hardwood floors in Syosset NY is the difference between drying and curing. They are not the same thing.

  • Drying is just the evaporation of the solvents (either water or mineral spirits) from the finish. The floor will feel dry to the touch. This can take a few hours for a water-based finish or up to 12 hours for an oil-based one.
  • Curing is the invisible chemical process where all the urethane molecules cross-link and harden, reaching their maximum strength and durability. This takes a lot longer.

This timeline gives you a great visual of how your choice of urethane impacts the project from start to finish.

A urethane choice timeline showing three steps: oil-based, water-based, and UV-cured.

As you can see, modern finishes offer huge time savings. A traditional oil-based finish can take a full 30 days to completely cure. That means you have to be extra careful with heavy furniture for a whole month to avoid scratches. A water-based finish cuts that down to about a week.

This is exactly why UV-curing technology has become such a game-changer. It completely eliminates that long curing window, giving you a fully hardened, ready-to-use floor the second we pack up our gear.

Common DIY Mistakes That Can Ruin Your Floors

The DIY spirit in Syosset is fantastic, and it’s always great to see homeowners roll up their sleeves. But let's be honest: applying urethane isn't like painting a wall. It’s a high-stakes job where a tiny mistake becomes a permanent, glaring flaw that's incredibly difficult to fix. Knowing what can go wrong will help you decide if this is a battle you really want to fight.

One of the most common—and heartbreaking—issues is debris getting trapped in the finish. A single speck of dust, a stray pet hair, even a tiny fiber from a cheap roller can get locked into the wet urethane. Once it cures, it's there for good, staring back at you every time the light hits the floor just right. This is exactly why dust-free wood floor finishing isn't just a fancy add-on; it's essential for getting that perfectly smooth, professional look.

Another classic DIY pitfall is an uneven application. This usually happens when you use the wrong tools or fail to keep a "wet edge" as you work across the floor. You end up with a streaky, blotchy mess with bubbles that looks amateurish. All that hard work you put into sanding is completely undermined by distracting lap marks and spots that are shinier or duller than the rest of the floor.

The Perils of Poor Preparation

Beyond what's floating in the air, what’s on the floor before you even open the can of urethane is a massive factor. Bad prep is the number one reason finishes fail, though you might not see the problem for months. If the urethane can't get a good grip on the wood, it will eventually start to peel, flake, or chip, especially in your busiest walkways. This is called poor adhesion.

This usually comes down to a few critical errors:

  • Skipping Sanding Grits: It's tempting to jump from a coarse grit right to a fine one to save time. Don't do it. You'll leave microscopic scratches that the finish can't properly fill, creating a weak bond.
  • Leaving Residue Behind: Any leftover wax, oil soap, or old cleaning products will act as a barrier, preventing the new urethane from adhering to the wood.
  • Not Using a Tack Cloth: A quick vacuum just doesn't cut it. You have to meticulously wipe down the entire floor with a tack cloth to pick up the fine dust that will ruin your finish and cause adhesion problems.

A professional finish isn't just about the final coat; it's about the cumulative effect of dozens of small, correct steps. Skipping just one can compromise the entire project, leading to a finish that fails prematurely and requires a complete re-sanding.

Application Errors and Environmental Factors

Even if your floor is perfectly prepped, the application process itself is full of traps. A common mistake is laying the urethane on too thick, thinking "more is better." It isn't. Thick coats take forever to cure properly, are notorious for trapping air bubbles, and can result in a soft surface that dents easily.

Ventilation is another thing people get wrong. It’s not just about fumes. You need proper air circulation and a consistent temperature for the urethane to cure correctly. If the room is too hot, too cold, or too humid, you can throw off the chemical reaction. This can leave you with a finish that stays tacky for days or develops a cloudy, hazy look. Getting the environment right is a huge part of learning how to apply urethane to wood floors and achieving a great result. You can dive deeper into the methods professionals use in our guide to floor refinishing services on Long Island.

These are just a few of the hurdles that can turn a rewarding project into a costly headache. The precision, specialized equipment, and controlled environment a professional brings to urethane finish hardwood floors in Syosset NY are what stand between a good-enough job and a stunning, durable floor.

Why a Professional Finish Makes All the Difference in Syosset Hardwood Floor Refinishing

It’s easy to spot the difference between a DIY floor finish and a professional one. You see it right away in the evenness of the sheen, but the real test is how it holds up over the months and years. Hiring a specialist for your hardwood floor refinishing in Syosset isn't just a purchase; it's a long-term investment in your home.

The secret isn't just in the technique—it's in the equipment. We bring in commercial-grade tools that you simply can't rent from the local hardware store. The real game-changer is our advanced dust-free sanding system.

I'm not talking about a shop vac taped to a sander. This is a powerful, integrated system that captures over 99% of the dust before it ever gets into the air. This step is non-negotiable for a flawless finish, as it keeps tiny particles from settling into the wet urethane and ruining the surface.

The Nuance of Expert Application

Knowing how to apply urethane to wood floors is a craft learned through years of hands-on work, not just from watching a video. Our technicians have a feel for how different finishes will react to the specific humidity and temperature of your home on application day. We know precisely how to maintain a wet edge to prevent those dreaded lap marks, applying each coat thinly and evenly so it cures into a rock-solid protective layer.

Beyond skill, we also have access to far better products. The finishes you find at big-box stores are made for the average DIYer. We work with commercial-grade, two-component water-based urethanes and cutting-edge UV-cured finishes. These products create a significantly harder and more scratch-resistant surface than anything available off the shelf.

The whole point of a professional job is to build a seamless, monolithic shield over your wood. It’s this complete, unbroken layer of protection that gives your floors the strength to stand up to daily life, from foot traffic to moisture.

We recently saw this firsthand on a tired red oak floor in a Woodbury home just over the Syosset line. The owner was tempted to try it himself but was rightly worried about the mess and the final result. Our dust-free system and meticulous application gave him a perfectly smooth, durable floor he never could have achieved on his own.

The Value of Getting It Right the First Time

Going with a pro helps you sidestep the common mistakes that cause a finish to fail. Problems like peeling, bubbling, or stickiness can almost always be traced back to a mistake in prep or application. These aren't simple fixes, either—they often mean sanding the whole floor back down to bare wood and starting over. Refinishing is a better value than replacing your floors when done correctly.

When you hire a team that lives and breathes urethane finish hardwood floors in Syosset NY, you’re paying for a predictable, guaranteed result. You get a stunning floor that adds real value to your home and the confidence of knowing it was done properly from the start. To get a better sense of what the process involves, take a look at our detailed floor refinishing preparation guide.

Ultimately, the investment pays for itself through a finish that lasts for years and looks absolutely flawless.

Keeping Your Refinished Floors Looking Brand New After a Syosset Hardwood Floor Refinishing

A person uses a green flat mop to clean a shiny wooden floor, emphasizing floor maintenance.

You’ve done the hard work, and your floors look incredible. The next chapter is all about protecting that beautiful new finish. While modern urethane is tough, the right care routine is what truly preserves your investment for the long haul. A proper maintenance plan after a hardwood floor refinishing in Syosset is surprisingly simple, but it makes all the difference.

The secret is to be proactive. Think of fine dust and grit as tiny pieces of sandpaper—your goal is to get them off the floor before they can do any damage.

Your Go-To Cleaning Routine

For day-to-day tidying, a quick sweep with a soft-bristle broom or a microfiber dust mop is all you need. This simple step lifts away the daily dust and debris that can cause those pesky micro-scratches.

When it's time for a deeper clean, grab a microfiber mop and a dedicated, pH-neutral hardwood floor cleaner. Lightly dampen the mop—you never want to soak your floors—and give it a once-over.

Knowing what to avoid is just as critical. Many common household cleaners can actually ruin a new urethane finish, leaving it dull, hazy, or even stripped. Steer clear of these:

  • Vinegar and water: The acidity will eat away at the finish over time.
  • Oil soaps or wax polishes: These leave a residue that builds up and dulls the shine. Our wax removal service can fix this, but it's best to avoid it.
  • Ammonia-based cleaners: Far too aggressive for urethane coatings.
  • Steam mops: Intense heat and moisture can damage both the finish and the wood beneath it.

Key Takeaway: Your cleaning habits should work with the finish, not against it. The single most important thing you can do? Wipe up spills the moment they happen with a soft, dry cloth. Preventing moisture from sitting on the surface is your best defense.

Long-Term Care: The Screen and Recoat

Down the road, even with perfect care, you’ll start to see signs of life in high-traffic zones like hallways and entryways. That doesn't mean you have to go through a full sanding job again. The professional solution is a service called a Screen and Recoat.

Think of it as a preventative tune-up for your floors. We gently abrade (or "screen") the top layer of the existing urethane, which creates a mechanical bond for a new coat. We then apply a fresh layer of finish, restoring that day-one protection and luster without touching the wood itself.

For a typical home in Syosset, a Screen and Recoat every 3 to 5 years is a smart move. It’s much more affordable than a complete refinish and is the key to dramatically extending the life of your beautifully finished floors. If you're dealing with floors that have seen better days, you might find our guide on how to clean hardwood floors that have been neglected helpful. By following these straightforward tips, you can ensure your floors remain a stunning feature of your home for years to come.

FAQs on Applying Urethane for Syosset Hardwood Floor Refinishing

When it comes to urethane finishes, homeowners in Syosset always have great questions. Drawing on years of hands-on experience, we've put together some straightforward answers to the things we get asked most often.

How Long Does Urethane Really Take to Dry and Cure?

This is a big one, and the answer completely depends on the product you're using. A water-based urethane might feel dry to the touch in just a few hours, but don't be fooled—it still needs about a week to fully harden and cure.

Oil-based urethanes are a different story altogether. You're looking at 8-12 hours just for them to feel dry, and they can take a full 30 days to completely cure. You have to be incredibly careful with them during that first month.

Then there’s our UV-cured finish, which is a total game-changer. It cures instantly with UV light. The moment we're done, you can bring your furniture back in and get back to your life. For a busy Syosset household, that convenience is everything.

Can I Put a New Coat of Urethane Over My Old Finish?

Absolutely. In the industry, we call this a "Screen and Recoat," and it’s a fantastic option if your floors are just looking a little tired. If the finish is dull or has some light surface scratches, but the wood itself is still in great shape, this is the way to go.

We lightly abrade—or "screen"—the existing finish to give the new coat something to grip onto, then apply a fresh layer of urethane. It’s a cost-effective way to bring back the shine without the full sanding process of a complete hardwood floor refinishing in Syosset.

What’s the Real Difference Between Water-Based and Oil-Based Urethane?

Beyond the technical specs, the main things you'll notice are the look, the smell, and the downtime. Oil-based urethane has that classic, strong solvent odor and takes a while to dry. It imparts a warm, amber hue to the wood that gets deeper and richer over the years.

Water-based urethane, on the other hand, has a very low odor and dries incredibly fast. The biggest draw for many is that it goes on crystal clear and stays that way. It lets the natural color and beauty of the wood shine through without altering it, which is why it’s become so popular for our hardwood floor refinishing projects in East Hills.

Here at Savera, we've leaned into the advanced water-based and UV systems. They just can't be beaten for their clarity, durability, and the healthier air quality they provide in your home.


Applying urethane correctly makes all the difference in how long your hardwood floors last. Savera Wood Floor Refinishing provides professional urethane application in Syosset, NY using dust-free preparation and advanced finishing systems. Visit saverawoodfloorrefinishing.com to schedule your free consultation.

Homeowners on Long Island trust Savera Wood Floor Refinishing to restore the natural beauty of their hardwood floors. Our dust-free sanding system and advanced UV-curable finishes provide a modern alternative to traditional refinishing methods. With UV technology that cures instantly, you can move your furniture back the same day—no lingering odors, no downtime.
Whether you’re looking for a Scandinavian whitewash, a natural raw wood look, a soft warm amber tone, or a custom stain to complement your home, we have the perfect refinishing solution for your style and home traffic.
All our services include dust-free containment and low-VOC, water-based finishes for a healthier, cleaner home environment. For homeowners seeking fast results, our UV-cured finish gets your floors ready the same day, so
you can enjoy your beautifully restored hardwood floors immediately.
Transform your hardwood floors with Savera Wood Floor Refinishing — clean, modern, and stunning every time! 🌟

📞 Phone: 631-866-1972
🌐 Website: saverawoodfloorrefinishing.com
📍 Service Area: Syosset, Woodbury, Jericho, Muttontown, East Norwich, and surrounding Long Island towns.


The Real Cost to Refinish Wood Floors in East Rockaway

For homeowners in East Rockaway, NY, understanding the cost to refinish wood floors is the first step toward restoring their home's natural charm. Typically, you can expect the cost to range between $4.00 and $5.00+ per square foot. This investment removes years of wear and tear, bringing back the original warmth and strength of your hardwood, with the final price tag depending on your specific needs and the level of durability you choose.

Understanding the Cost for East Rockaway Hardwood Floor Refinishing

When your hardwood floors lose their luster and start showing scratches, scuffs, and dull spots from daily life, professional refinishing is the most effective way to make them look new again. It’s a powerful method to boost your home's value and visual appeal, especially in a community like East Rockaway with its beautiful mix of classic Colonials and stunning waterfront homes along the South Shore.

So, what factors contribute to the final price of East Rockaway hardwood floor refinishing?

Nationally, the average cost to refinish hardwood floors falls between $3 and $8 per square foot, with a typical project totaling around $1,889. This wide range often depends on the type of wood; standard red oak is more straightforward and less expensive to refinish than a dense, exotic wood like Brazilian Cherry.

At Savera Wood Floor Refinishing, we believe in clear, straightforward pricing. We've structured our services into packages so you know exactly what you’re paying for. Whether you need a simple refresh for a bedroom or a bomb-proof finish for a busy family home near Bay Park, we have a dust-free solution that makes sense for you.

Savera's Hardwood Floor Refinishing Packages

To help East Rockaway homeowners choose the best option for their budget and lifestyle, we’ve created a clear comparison of our refinishing packages. Each one is designed to deliver exceptional results using our signature dust-free process, guaranteeing a clean, beautiful outcome for your home.

This table breaks down the cost to refinish wood floors based on the level of protection you want. You can dive deeper into our pricing by exploring our guides on the cost to refininsh hardwood floors.

Package Tier Price Per Sq. Ft. Key Features Ideal For
Diamond Traffic Plus From $5.00 UV-Curing + Nano Wear technology for unmatched scratch resistance. High-traffic areas, homes with pets and kids, and homeowners wanting the best durability available.
Platinum Traffic Plus From $4.50 2-component water-based finish with Nano Wear Oxide for superior durability. Busy households and commercial spaces that need high-performance protection against wear.
Gold Traffic Plus From $4.25 Scratch-resistant 2-component water-based finish. Living rooms, kitchens, and hallways that experience moderate to heavy daily use.
Silver Traffic Plus From $4.00 Excellent wear resistance with a 1-component water-based finish. Bedrooms, home offices, and other areas with lighter foot traffic.

Each tier represents a step up in durability and performance. We can walk you through which one is the perfect match for your home during our initial consultation.

What's Really Inside Your East Rockaway Refinishing Quote?

A simple per-square-foot price is a great starting point, but the real cost to refinish wood floors is in the details of your specific project. Knowing what goes into a quote means you'll never be caught by surprise, giving you a crystal-clear understanding of the investment you're making in your home. For any homeowner, a proper quote should break down every single element that adds up to that final number.

This diagram shows a nice, simple visual of how we build a quote: starting with your specific needs, which determine the services required, and ultimately, the final cost.

Diagram illustrating a document input leading to cost, measurement, and service calculation icons.

As you can see, it's about much more than a single number. A truly transparent estimate walks you through each step of the process.

The Condition of Your Floors: The Biggest Price Shaper

The single most important factor is the shape your floors are in right now. If we're just dealing with light surface scuffs from everyday life, the job is pretty straightforward. It's the bigger issues that require more time and effort.

Here’s what can add to the cost:

  • Deep Gouges or Scratches: These aren't just surface-level. To get them out, we have to sand more aggressively to level the wood, which means more time on the job.
  • Water Stains or Discoloration: Those dark, pesky rings from a plant pot or an old leak can be stubborn. Sometimes they sand out, but other times they require special treatments or even replacing the affected boards entirely.
  • Layers of Old Finish: Sometimes we find floors caked with a thick, plastic-y layer of old polyurethane. In older homes, we might even run into layers of old wax. All of that has to come off before we can even start sanding, and that's a job in itself.

The Type of Wood Matters

When it comes to refinishing, not all woods behave the same way. The species of hardwood in your home has a direct impact on the labor and materials we’ll need.

  • Common Hardwoods (like Oak and Cherry): These are the workhorses. They sand down nicely and take a stain beautifully, which means they usually fall right into our standard pricing. Oak, in particular, is everywhere on Long Island and looks fantastic when it's brought back to life.
  • Dense Hardwoods (like Maple or Brazilian Cherry): These woods are tough—literally. Their density makes them fight the sander every step of the way. It takes more time, and we go through more abrasives to get them perfectly smooth, so that extra effort is reflected in the price.

Prep Work and Repairs: The Unsung Heroes

A perfect finish is only possible with perfect prep. These are the tasks that might show up as separate line items on your quote, and they are absolutely critical for a result that lasts.

"A beautifully refinished floor is built on a foundation of meticulous preparation. Skipping steps like board replacement or proper cleaning to save a few dollars upfront often leads to more significant and costly repairs down the road."

Here are some common prep and repair services:

  • Board Replacement: If you've got boards that are cracked, warped, or just too damaged to save, they have to go. This means we have to source matching wood, cut it to fit perfectly, and weave it into the existing floor so it looks seamless.
  • Carpet and Staple Removal: Pulling up old carpet to reveal the hardwood underneath is exciting! But it also means dealing with the padding, tack strips, and sometimes hundreds of staples left behind. It’s a painstaking process, but it has to be done right.
  • Moving Furniture: While most people prefer to clear the room themselves, we know that’s not always possible. We’re happy to offer a service to carefully move heavy furniture out of the way for you.

It's interesting to see how this principle applies to other home projects, too. Professionals in any trade will tell you that the final price depends on the unique variables of the job, just like with the cost to move a boiler.

Your Choice of Finish (and How Much of It)

The final coats of finish are your floor’s armor against the world. Here at Savera, we stick with high-performance, water-based finishes. They provide incredible durability without the harsh fumes and long curing times of old-school oil-based products.

We offer different levels of protection, from our Silver Traffic Plus package to our top-tier Diamond Traffic Plus with UV-curing, so you can pick what's right for your lifestyle. The number of coats—usually two to three—is also a key factor. Each additional coat costs a bit more in labor and materials, but it dramatically increases the lifespan and toughness of your floors. If you want to get into the nitty-gritty, you can find more on the cost of floor sanding and what goes into that process.

How Modern Methods Affect Your East Rockaway Project Investment

What if you could completely transform your floors without turning your house into a chaotic, dusty construction zone for a week? When we talk about the cost to refinish wood floors, it’s not just about the final number on an invoice. It's also about what it costs you in time, stress, and convenience. Here on Long Island, life doesn’t slow down, and your home improvement projects shouldn’t put your life on pause.

At Savera, we've built our business around newer techniques that deliver a far better result for our East Rockaway hardwood floor refinishing clients without the old-school headaches.

A man refinishes a wooden floor with a sanding machine in a bright room with a fireplace and large windows.

Think back to old refinishing jobs you might have seen. They usually involved two major problems: clouds of fine wood dust that coated everything in sight, and powerful chemical smells from finishes that took days to cure. We’ve eliminated both, offering a cleaner, faster, and healthier process for your family.

The True Value of Dust-Free Sanding

Old-school sanding equipment was messy. The fine dust it kicked up would work its way into everything—your air ducts, your electronics, your closets—and you'd be finding it for months. It wasn't just a cleaning nightmare; it posed a real health concern for anyone with allergies or asthma.

Our dust-free sanding system is a world apart. Here's what that actually means for you:

  • A Healthy Home: Our sanding machines are hooked up to powerful vacuums with HEPA filters, capturing over 99% of the dust the second it’s created. The air in your home stays clean from start to finish.
  • No Massive Cleanup: You won’t need to hire a cleaning crew or spend a weekend wiping down every single surface in your house. When we pack up, the job is truly done.
  • A Flawlessly Smooth Finish: Dust is the ultimate enemy of a perfect finish. By keeping the wood pristine during the process, we guarantee that no tiny particles get trapped in the polyurethane, giving you that glass-smooth feel under your feet.

This isn't just a minor upgrade; it’s a fundamental part of the value we bring to every hardwood floor refinishing project we take on in East Rockaway.

Instant Gratification with UV-Curable Finishes

The single biggest complaint about traditional floor refinishing has always been the wait. Oil-based finishes could take 3-7 days to fully cure, meaning no furniture, no rugs, and no regular life in that part of the house.

That’s where our state-of-the-art instant UV-curable finishes come in. This is the same type of technology dentists use to instantly harden a filling, but on a much larger scale. An ultraviolet light is passed over the freshly applied finish, and it cures it rock-solid on the spot.

For a busy family, time is everything. An instant UV-cure finish isn’t just a cool feature; it’s a practical solution that gives you your home back in hours, not days. It completely sidesteps the disruption and lingering odors of older methods.

When you choose our top-tier Diamond Traffic Plus package with UV curing, you’re getting:

  • Same-Day Use: Walk on your floors and move your furniture back in the very same day we finish. There is literally zero downtime.
  • Incredible Durability: UV-cured finishes are exceptionally tough, offering the highest level of protection against scratches, scuffs, and household spills.
  • Zero VOCs, Zero Smell: The curing process is immediate and total. This means no volatile organic compounds (VOCs) are released into your air and there's no chemical smell to tolerate for days on end.

To really see what this means for a project, you can learn more about our instant UV-curable finishes and just how much time they can save you.

Comparing UV-Cure vs. Traditional Finishes

Feature Savera's Instant UV-Cure Finish Traditional Polyurethane Finish
Cure Time Instant (ready for use same day) 24-72 hours to walk on; 3-7 days to fully cure
Durability Exceptional scratch & chemical resistance Good to very good, but less durable than UV
VOCs & Odor Zero VOCs, no lingering smell Low to moderate VOCs with a noticeable odor for days
Initial Cost Higher upfront investment Lower initial cost
Long-Term Value Higher; less need for recoating Lower; may require more frequent maintenance

While UV-curing represents a higher initial investment, its durability and the incredible convenience of getting your room back immediately often provide far greater long-term value for East Rockaway hardwood floor refinishing clients.

Lighter Options for a Quick Refresh

Sometimes, a full sanding and refinishing job is overkill. If your floors are in good shape but look dull or have light surface scratches, a less intensive service can restore their beauty at a lower cost.

  • Screen & Recoat: This is a fantastic maintenance procedure. We lightly abrade (screen) the existing topcoat and apply a fresh coat of finish. It restores the protective layer and original sheen in just a day, starting at $2.00/sq. ft.
  • Deep Cleaning & Buffing: Years of residue from household cleaners can dull your floors. Our professional deep cleaning lifts out grime from the wood's grain, and a high-speed buffing can restore a surprising amount of luster. This service starts at $1.50/sq. ft.
  • Wax Removal: For older floors, built-up wax can prevent new finishes from adhering properly. Our specialized wax removal service, starting at $2.50/sq. ft., properly strips old wax to prepare the surface for a new finish.

Refinishing vs. Replacing: A Cost Comparison for East Rockaway Homes

When your hardwood floors look worn, you face a classic crossroads: restore what you have, or tear it out and start over? For most homeowners in East Rockaway, the decision boils down to cost, and the numbers tell a very clear story.

Refinishing is almost always the more budget-friendly route. A full replacement involves much more than the price of new wood; you have to factor in demolition, disposal, and the intricate labor of installation. All in, you could easily be looking at $10 to $25 per square foot.

Compare that to professional refinishing. Our services at Savera start at just $4.00 per square foot. For a standard East Rockaway home, that difference adds up to thousands of dollars saved. You get that brand-new floor feeling without the brand-new floor price tag, all while preserving the original character of your home.

When Replacement Becomes Necessary

Of course, refinishing isn't a magic wand for every floor. While it’s the best option 9 times out of 10, some floors are simply too far gone.

  • Serious Water Damage: Deep, black stains or boards that are cupped, warped, and buckled from long-term moisture can't be fixed by sanding.
  • Structural Problems: Termite damage, a rotting subfloor, or numerous broken boards mean refinishing is just a temporary fix for a bigger problem.
  • The Wood is Too Thin: Solid hardwood can only be sanded so many times. If they're worn down to the tongue and groove, there's no wood left to sand.
  • Engineered Wood Veneer is Gone: Engineered floors have a thin top layer of real wood. Once that's gone, the floor can't be refinished again.

If you're curious to learn more about the nuances, we've covered the key differences between hardwood floor resurfacing vs. refinishing in another post.

Beyond the Budget: The Other Benefits of Refinishing

The financial argument for refinishing is compelling, but the perks don't end with your wallet. There’s a special value in keeping the original materials that are part of your home’s story. The wood in older homes often has a richness and grain that you just can't find in new flooring.

Refinishing is also the green choice. It prevents tons of perfectly good wood from ending up in a landfill and lessens the demand for new lumber. It’s a sustainable way to get a beautiful result without the waste.

Ultimately, by choosing to restore your floors, you're not just making a smart financial move. You're respecting your home's history and making an eco-friendly decision.

Putting It All Together: Real East Rockaway Project Costs

Theory is great, but what does the cost to refinish wood floors look like in the real world? Let’s walk through a few common jobs we see right here in East Rockaway and across Long Island. For instance, we recently restored a beautiful red oak floor in a classic Colonial in nearby Garden City, bringing back its original charm with modern durability.

These scenarios are based on actual projects, giving you a clear picture of how different needs, floor conditions, and service choices come together to form the final price.

Scenario 1: The Classic Colonial Living Room

Picture a beautiful colonial home where the 500 sq. ft. living room floor has seen its share of family life. It's covered in surface-level scratches and the finish has dulled over time, but the wood itself is in solid shape with no deep gouges or water damage.

  • The Job: A full dust-free sanding and refinishing to completely erase the wear and tear and restore the oak's original glow.
  • The Choice: The homeowner went with our Gold Traffic Plus package. It’s a very popular choice, featuring a tough, 2-component water-based finish that stands up beautifully to daily life in a main living space.
  • The Process: Our crew performed a complete dust-free sanding, applied three coats of the Gold finish, and had the job wrapped up with minimal disruption to the family.
  • Ballpark Cost: At $4.25 per sq. ft., the project total came to about $2,125.

Scenario 2: The Quick Bedroom Refresh

In this scenario, a 250 sq. ft. bedroom floor is structurally sound, but the protective finish is worn out, leaving it vulnerable and looking tired. A full sanding isn't really necessary here.

  • The Job: A maintenance service designed to bring back that protective sheen and luster without the need to sand down to bare wood.
  • The Choice: A Screen & Recoat was the perfect solution. We lightly abrade (or "screen") the existing finish to create a bond for the new coat, then apply a fresh layer of durable protection.
  • The Process: This is a fast and efficient job, often done in a single day. It essentially adds a new layer of armor, protecting the wood for years to come.
  • Ballpark Cost: Our Screen & Recoat service starts at $2.00 per sq. ft., putting this refresh right around $500.

Scenario 3: The High-Traffic Open-Concept Home

Now, let's look at a bigger job in a modern home in nearby Hewlett. We’re talking about 1,200 sq. ft. of connected space—kitchen, dining, and living room—that gets constant traffic from kids and pets. The goal was a total transformation with the strongest protection possible.

  • The Job: A complete dust-free sanding, a new custom stain to match their updated decor, and our most resilient finish.
  • The Choice: The homeowner selected our premier Diamond Traffic Plus package and added our instant UV-curable finish. This combo delivers unmatched durability and the incredible convenience of using your floors the very same day.
  • The Process: We sanded everything down, worked with the owner to find the perfect stain color, applied it, and then cured the topcoat instantly with our UV machine. They were moving furniture back that night!
  • Ballpark Cost: For this premium service, including the custom stain and UV upgrade, the total came to approximately $8,400.

As you can see, the cost to refinish wood floors is truly tailored to your home and your needs. It’s a worthy investment. Globally, the demand for professional floor care is booming, with the market projected to hit $4.76 billion. Skipping professional work can be costly, as typical repairs to fix a botched job can easily exceed $1,000.

For a precise, no-obligation quote for your East Rockaway hardwood floor refinishing project, just give us a call. We’re here to help you find the perfect solution.

Your East Rockaway Hardwood Floor Refinishing Questions Answered

To wrap things up, let's dive into the most common questions we hear from homeowners in East Rockaway. My goal here is to give you straight, clear answers so you feel completely confident before you even pick up the phone for a free estimate.

Is It Cheaper to Refinish or Replace Hardwood Floors in East Rockaway?

Nine times out of ten, refinishing is dramatically more cost-effective than a full replacement. Tearing out and replacing a hardwood floor is a massive project. You're looking at costs anywhere from $10 to $25 per square foot once you add up the new wood, demolition of the old floor, disposal fees, and installation labor.

In contrast, our professional refinishing services start as low as $4.00 per square foot. For the vast majority of floors we see, refinishing brings them back to that "brand new" look for a tiny fraction of the cost of replacement. Unless your floors have severe structural damage, deep-set water stains, or have already been sanded down to the tongue and groove, refinishing is the smarter choice for your wallet and the environment.

How Long Does the Floor Refinishing Process Take?

The timeline really hinges on two things: the size of the job and, more importantly, the type of finish you select. A typical 500-800 square foot project using conventional water-based finishes will usually take about 3 to 5 days. That accounts for the sanding and the necessary drying time between each coat of finish.

This is where our modern approach at Savera really makes a difference. If you opt for our advanced UV-curable finishes, we can do it all—sanding, staining, and finishing—and have your floors fully cured and ready for furniture in just one day. This incredible technology cuts out days of disruption and chemical smells, getting you back into your home faster than you thought possible.

Will There Be a Lot of Dust in My Home?

Not at all. This is probably the biggest myth about floor refinishing, and I'm happy to say it's a problem of the past. At Savera Wood Floor Refinishing, we only use a cutting-edge dust-free sanding system. Our commercial-grade sanders are hooked up to powerful, HEPA-filtered vacuums that capture over 99% of airborne dust the instant it’s created.

What does this mean for you? It means a clean, healthy home for your family throughout the entire project. When we’re done, you won't be finding a layer of fine wood dust on every surface for weeks to come. This is simply the modern, professional standard for hardwood floor refinishing in East Rockaway.

Can You Change the Color of My Hardwood Floors?

Absolutely! This is one of the most exciting parts of the job. When we do a full sand, we’re taking off every trace of the old finish and stain, getting the wood down to its raw, natural state. Think of it as a perfectly clean slate.

This gives you the creative freedom to completely reinvent your space. We can take you from a dated, honey-colored oak to a rich, sophisticated dark walnut, or go from a dark floor to a bright and airy natural look. We’ll even put down a few test samples right on your floor so you can see exactly how it looks in your home’s light before making a final decision.

Choosing a new stain is a powerful way to update your home’s entire feel. It's an investment that delivers an incredible visual punch, completely changing a room without the high cost of a major renovation.


Homeowners on Long Island trust Savera Wood Floor Refinishing to restore the natural beauty of their hardwood floors with our dust-free sanding system and advanced UV-curable finishes. Unlike traditional methods, our UV technology cures instantly, so you can move furniture back the same day with no lingering odor or downtime. Choose the perfect refinishing service to match your needs and home traffic. Our dust-free process ensures a clean, beautiful finish every time. For expert East Rockaway hardwood floor refinishing, contact us today.

📞 Phone: 631-866-1972
🌐 Website: saverawoodfloorrefinishing.com
📍 Service Area: East Rockaway, Lynbrook, Oceanside, Rockville Centre, and surrounding Nassau County towns.

Filling Hardwood Floor Cracks in Bellmore, NY: How Savera Restores Gaps, Splits & Seasonal Movement

When you're dealing with hardwood floors, a quality repair job starts with the right materials. To properly fix cracks in wood floors in Bellmore NY, you'll need a high-quality, flexible filler that can be sanded and stained to perfectly match your existing floor. Once the filler is set, sealing it with a durable topcoat during a professional hardwood floor refinishing in Bellmore, NY is the final, crucial step.

This process ensures the repair is not only invisible but also tough enough to handle the wood's natural expansion and contraction—a common challenge for homeowners right here in Bellmore, NY, from the waterfront homes near Newbridge Road Park to the classic colonials throughout the area.

Understanding Why Your Hardwood Floors Have Cracks

If you’ve started noticing gaps popping up between the boards of your beautiful hardwood floors, you're definitely not alone. It's a completely natural characteristic of a living, breathing material like wood. These changes are almost always a direct response to the environment inside your Bellmore home, especially the fluctuating humidity levels Long Island is famous for. This is a common concern we address during our hardwood floor refinishing services in Bellmore, NY.

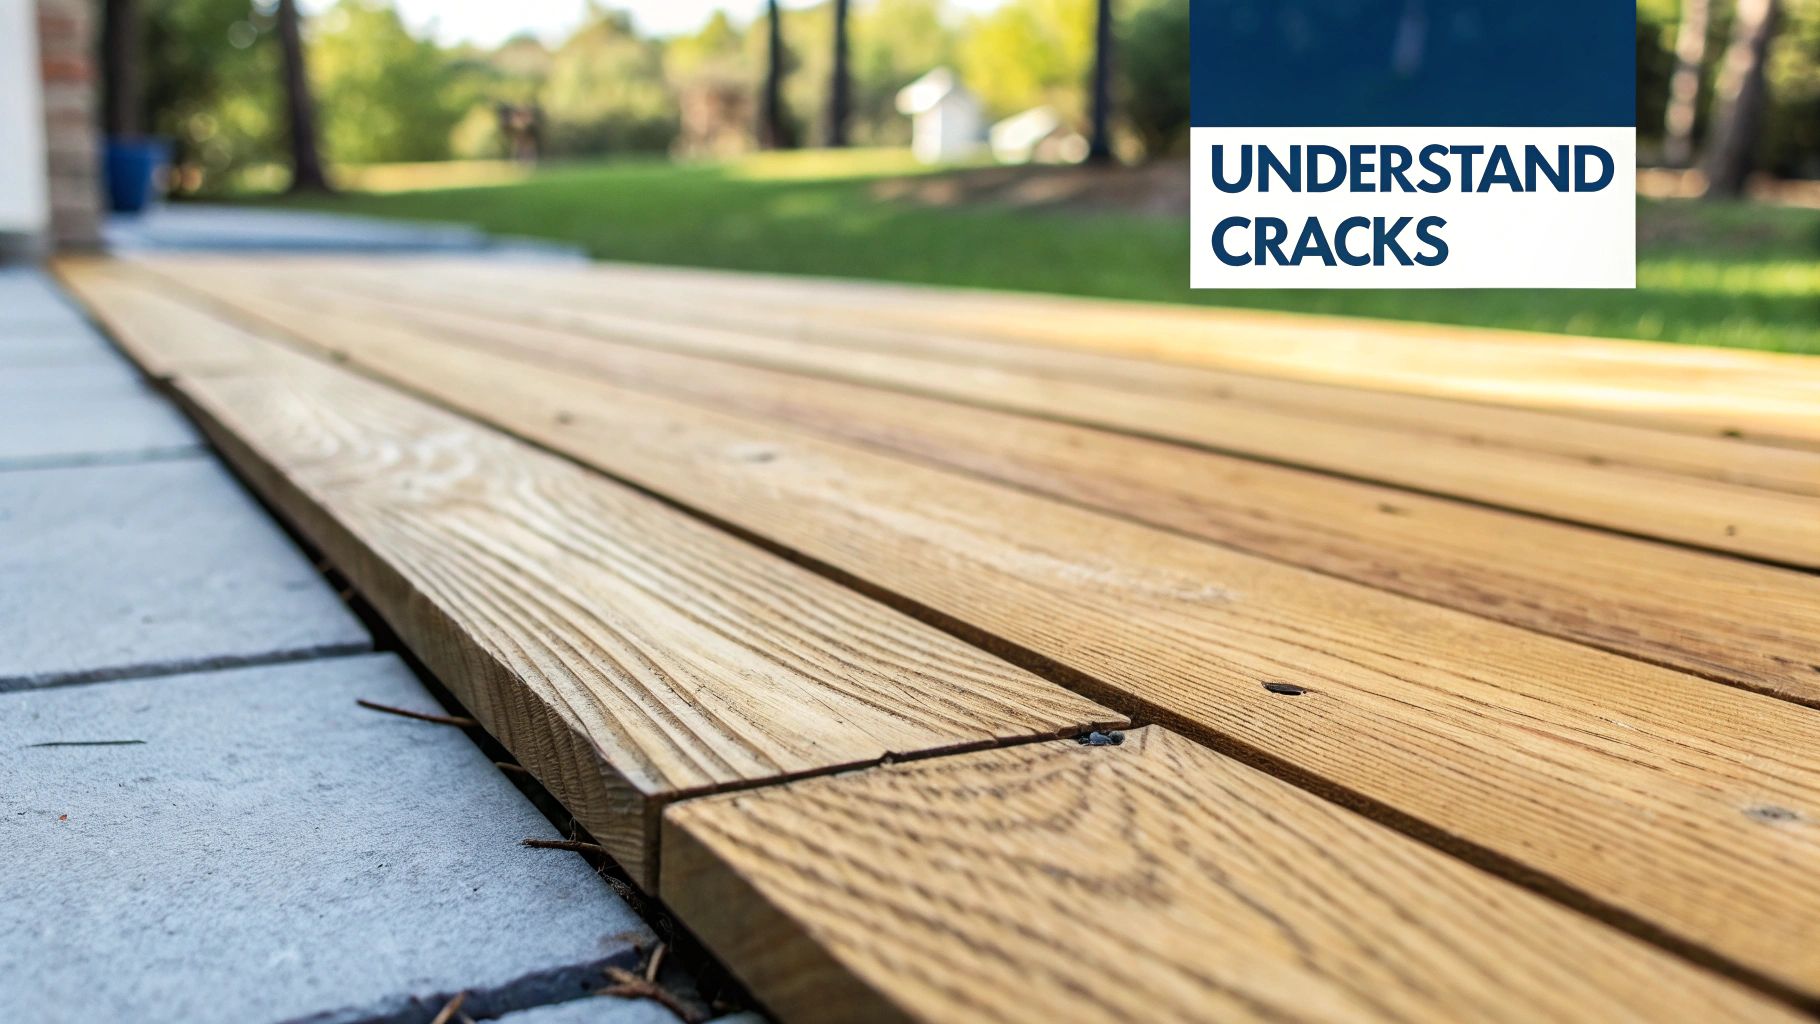
A close-up of a cracked hardwood floor, showing the texture and grain of the wood.

During our humid summer months, wood soaks up moisture from the air and swells. This causes the boards to press tightly against one another. When winter rolls around and the heat kicks on, the air dries out, the wood releases that moisture, and it contracts. The result? Small gaps. This seasonal cycle is perfectly normal.

When to Worry: Distinguishing Between Normal Gaps and Damage

So, how do you know if you're seeing harmless seasonal movement or a real problem that needs professional repair? Knowing the difference is the first step toward a lasting solution for your Bellmore home.

Use this quick guide to determine if your floor gaps are just a normal part of your wood's lifecycle or a sign that professional wood floor gap repair is needed.

Type of Crack/Gap Common Causes When to Call a Professional for Hardwood Floor Refinishing in Bellmore, NY
Hairline Gaps Seasonal humidity changes causing natural wood contraction. These often close on their own in summer. If they persist year-round, professional filling during a screen & recoat is a good option.
Wide, Persistent Gaps Improper acclimation during installation, subfloor issues, or excessive dryness. When gaps are wider than a dime and don't close seasonally, it's time for an expert assessment and repair.
Splintered Cracks Physical impact, water damage, or extreme dryness causing the wood to split. This indicates damage to the board itself and requires immediate professional repair to prevent worsening.

The key is to watch how your floors behave over a full year. Gaps that come and go with the seasons are usually nothing to worry about. But if you see splintering or wide gaps that never seem to close, it's time to call in a pro for floor restoration in Bellmore.

For more on this, check out our tips on how to maintain wood floors to help minimize these issues from the start.

Filling Cracks the Right Way for Your Bellmore Home

Not every gap you see in your hardwood floor is a reason to panic. Wood is a natural material that breathes with the seasons, so distinguishing between normal movement and a real problem is the first step.

A good rule of thumb I use is the "dime test." If you can't slide a dime into a crack, it's likely just a cosmetic issue that comes with the territory of having real wood floors.

However, some gaps are definite red flags. For homeowners here in Bellmore, these are the signs that point to bigger issues—often moisture or installation flaws—that filler alone will never fix.

Identifying Problematic Cracks

Keep a close eye out for these tell-tale signs. If you spot any of them, it's usually time for a professional assessment:

  • Widening Cracks: Gaps that seem to get bigger over time, instead of closing up in the humid summer months, signal a persistent issue.
  • Splintered Edges: When the edges of the boards look rough, splintered, or raised, it's a sign of damage to the wood fiber itself, not just seasonal shrinkage.
  • Cupping or Crowning: Look at the boards around the crack. If they aren't flat—either dipping in the middle (cupping) or bulging upwards (crowning)—that's a classic sign of a moisture imbalance.

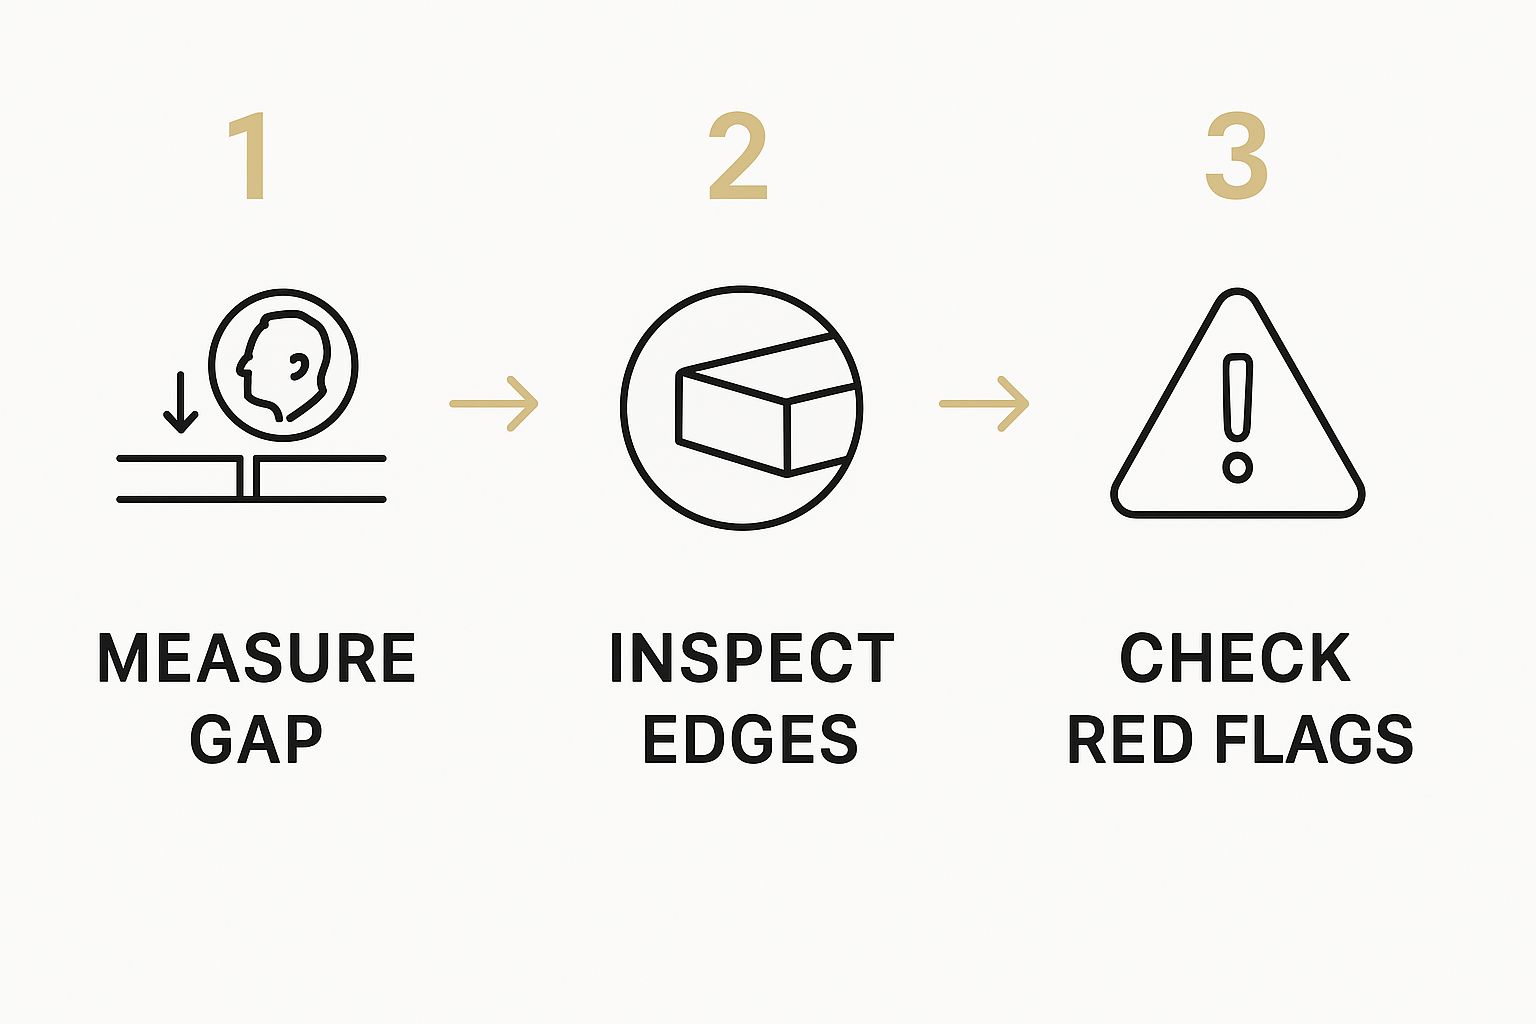
This simple diagnostic flow helps visualize when to be concerned.

Infographic showing a three-step process for evaluating hardwood floor cracks: Measure Gap, Inspect Edges, and Check Red Flags.

As the infographic shows, you have to look beyond just the gap's width. The condition of the board edges and whether the floor is still flat are critical clues.

We recently worked on a historic home near Bellmore Village where severe gapping was actually caused by hidden humidity in the crawl space. Our process always starts by finding the root cause to make sure our hardwood floor refinishing in Bellmore, NY provides a permanent solution, not a temporary patch.

It's clear homeowners value their floors. The global floor repair industry is valued at a massive $15 billion, and the residential sector makes up over 60% of that demand. This just goes to show how much people are willing to invest in maintaining their property's integrity and appearance.

Fixing these underlying issues first is non-negotiable for a repair that will actually last. For more guidance on the full restoration process, take a look at our article on when to refinish hardwood floors.

How Professionals Use Hardwood Crack Filler for a Flawless Finish

Anyone can squeeze some filler into a crack, but getting a seamless, long-lasting repair is a different story entirely. It's an art and a science. Our approach at Savera isn't about a quick patch-up; it's about a meticulous repair that looks invisible and moves with your floor for years to come.

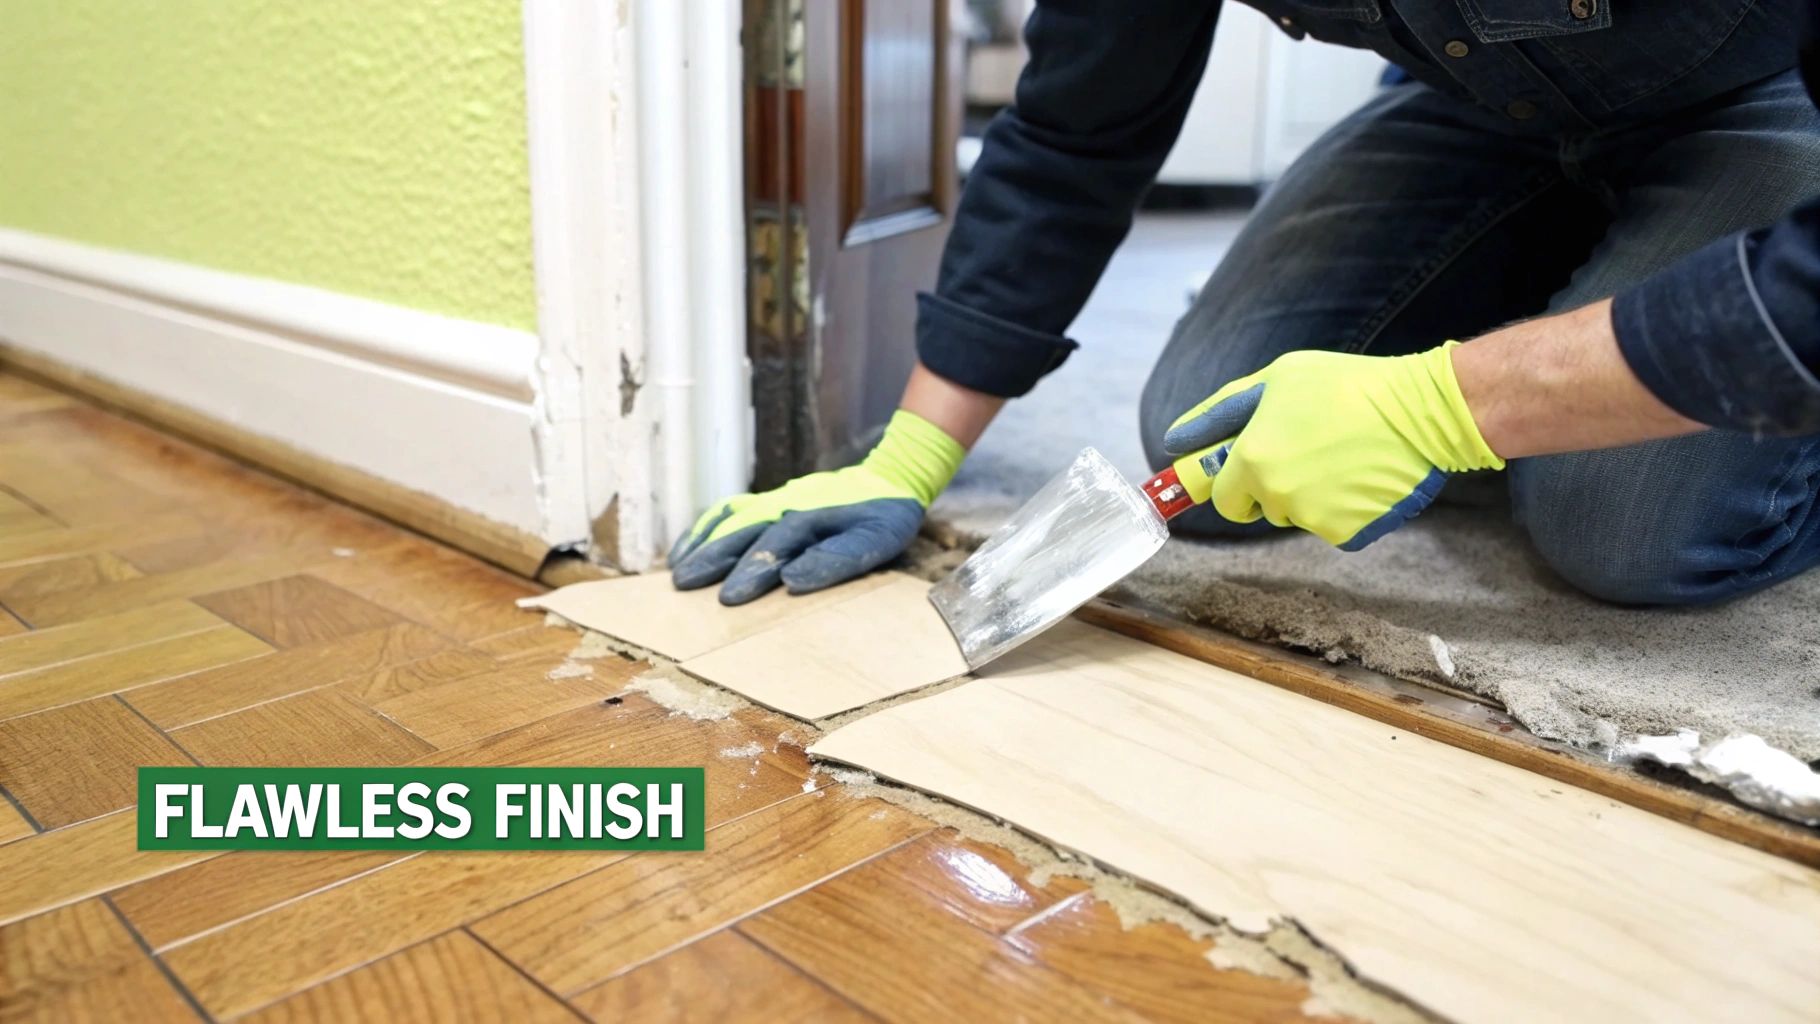
A professional applying wood filler to cracks in a hardwood floor before sanding.

It all starts with the right material. Wood naturally expands and contracts with Long Island’s humidity, so a rigid, off-the-shelf filler is a recipe for failure. It'll just crack and pop out in a year or two. We use a professional-grade, flexible high-performance wood filler that moves with the wood, staying put season after season.

Using Professional-Grade Wood Filler and Matching Stains

The real magic, though, is in the color matching. We don’t just grab a tube of "oak" colored putty. We custom-blend pigments right on-site to perfectly match the unique stain, grain, and patina of your specific floor. This is what separates a professional job from a noticeable DIY patch.

After the cracks are filled and the material has fully cured, we carefully sand the area until it’s perfectly flush with the surrounding boards. This creates a smooth, level surface that's essential for the next steps.

Sealing and Recoating for a Seamless Appearance

The final step is what truly integrates the repair into the floor. By sealing the filled cracks and applying a fresh, uniform topcoat, we create a single, durable surface that protects the repair and revitalizes the entire room.

This is exactly why filling cracks is a core part of a complete Hardwood Floor Refinishing service. It’s not just about plugging a hole; it’s about restoring the floor’s integrity and appearance as a whole. Our Screen & Recoat process is often the perfect finishing touch, making sure the new finish bonds perfectly over the repaired areas for a flawless, lasting result.

Why DIY Isn’t Always the Best Option for Floor Restoration in Bellmore

It's always tempting to grab a tub of wood filler from the hardware store, thinking you can knock out those floor gaps over a weekend. While I admire the DIY spirit, filling hardwood floor cracks the right way is a lot more complex than it seems. A botched job can create much bigger—and more expensive—headaches down the road.

A DIY attempt at filling wood floor cracks, showing mismatched color and uneven texture.

Many off-the-shelf fillers just aren't designed for the natural movement of wood floors. They dry hard and brittle. That means they’ll almost certainly shrink, crack, or pop right out as your floors expand and contract with Bellmore's seasonal humidity swings.

Risks of Uneven Texture, Discoloration, and Wasted Effort

Then there’s the look of it. Most generic fillers don’t take stain evenly, leaving you with ugly, discolored lines that actually draw more attention to the repair than the original crack did. It’s also nearly impossible to get the filled area perfectly flush without professional sanding equipment, which often results in noticeable dips or high spots on your floor.

Here’s what we see all the time with DIY attempts:

  • Uneven Texture: Amateur sanding can easily create divots and low spots that you won't even see until the final coat of finish goes on.
  • Weak Bond: If you don't get every last speck of dust and debris out of the crack, the filler won't adhere properly. It’s only a matter of time before it fails.
  • Color Mismatch: Nothing screams "bad DIY job" louder than a filler that doesn't match the wood. It completely detracts from the natural beauty of your floors.

Honestly, a poorly done wood floor gap repair often makes a future professional hardwood floor refinishing in Bellmore, NY more complicated and costly to fix.

The wood flooring repair services market is on track to hit $2.3 billion, and a big reason for that is homeowners realizing the value of getting it done right the first time. In fact, a staggering 90% of homeowners report high satisfaction with professional crack repairs, pointing to the seamless look and long-term durability as the main reasons. You can learn more about the growth of the wood floor repair market.

Protect your investment and save yourself the frustration. It’s always best to trust the experts for your hardwood floor refinishing in Bellmore, NY from the start.

Savera’s Dust-Free Restoration Advantage for Bellmore Homes

Filling cracks in your hardwood floors is a great start, but the real magic happens when the entire surface is blended and protected as one. At Savera, we’ve completely changed the game for floor restoration in Bellmore by getting rid of the one thing every homeowner hates: the mess. Our process is designed to be clean, convenient, and totally stress-free.

The secret is our powerful dust-free sanding system. Traditional sanding methods are notorious for kicking up a storm of fine wood dust that gets into everything. Our equipment is different—it captures the dust right at the source, before it ever has a chance to go airborne. This is a huge deal for your home's air quality and is absolutely critical for creating a perfectly clean surface for the new finish. You can see exactly how our dust-free hardwood floor refinishing process makes for a healthier, cleaner project.

Screen & Recoat to Reseal Filled Areas

After we’ve professionally filled the gaps and cracks, our Screen & Recoat service is the ideal next move. This isn’t a full-blown sanding; instead, we lightly abrade the floor's existing finish. This creates the perfect texture for a new, durable topcoat to grab onto, ensuring a flawless bond. It seamlessly seals the filled areas and gives the entire floor a fresh protective layer, making your repairs completely invisible.

Optional UV-Cure for Instant Hardening and Protection

For anyone who needs the absolute best in durability and convenience, we recommend our UV-Cure finish. This is where modern technology really shines. We use a specialized UV light that hardens the topcoat instantly.

No more waiting around for days, no chemical smells lingering in your house, and no more tiptoeing around wet floors. You can literally move your furniture back and get back to your life the same day we finish the job.

We recently did this for a gapped red oak floor in a beautiful colonial home right here in Bellmore. The owner couldn't believe it. Not only were the annoying cracks gone, but the entire floor looked brand new—and they were able to use their living room that same evening. Innovations like UV-cured resins have truly transformed how we approach repairs, making them faster and tougher than ever. If you're curious about how these technologies are shaping the industry, you can read the full research about wood flooring repair services to learn more.

A Few Common Questions About Fixing Wood Floor Cracks

When we talk to homeowners in Bellmore, a few questions about cracks and gaps in their hardwood floors always come up. It's completely understandable—you want to know what's possible and what to expect. Here are some of the most common things we get asked.

Can You Really Fill All The Cracks In My Floor?

Most of the time, yes. Those thin, hairline cracks and the slightly wider gaps that show up with the seasons can absolutely be filled as part of a professional hardwood floor refinishing in Bellmore, NY.

However, if you're looking at gaps wider than a quarter or cracks that stem from a bigger problem like water damage, filling them won't be a permanent fix. In those cases, the best move is usually to replace the damaged boards. Our team can take a look and give you the right recommendation for a solid, long-lasting solution.

Will The Filler Actually Match My Floor's Color?

It will, and that’s a key part of what we do. We don’t just grab a filler off the shelf; we custom-mix it to get a precise match for the unique color and tone of your specific floor.

Once the cracks are filled, the entire floor is sanded down and refinished. This process ensures the filled spots blend in perfectly with the rest of the wood, leaving you with a seamless, uniform look.

Is Filling Cracks A Permanent Fix?

When it's done right as part of a professional hardwood floor refinishing in Bellmore, NY, you bet. Using a high-quality, flexible filler during a full Screen & Recoat or refinishing service is a very durable solution. The secret is using a material that can move with the wood as it naturally expands and contracts through the year.

A good tip for preventing new cracks is to keep the humidity levels in your home as stable as possible.

One of the biggest perks we offer is our advanced UV-curable finish. With standard water-based finishes, you're usually waiting around 24 hours to walk on the floors in socks. But with our UV system, the finish is cured instantly with a special light. That means you can walk on it—and even move furniture back—the moment we're done. It's a game-changer for busy households here in Bellmore.

If you have more general questions, this resource on other common hardwood floor FAQs is a great read. For anything specific to our methods and services, head over to our complete Savera Wood Floor Refinishing FAQ page.

Homeowners on Long Island trust Savera Wood Floor Refinishing to restore the natural beauty of their hardwood floors with our dust-free sanding system and advanced UV-curable finishes. Unlike traditional methods, our UV technology cures instantly, so you can move furniture back the same day with no lingering odor or downtime. Choose the perfect refinishing service to match your needs and home traffic. Our dust-free process ensures a clean, beautiful finish every time.

📞 Phone: 631-866-1972
🌐 Website: saverawoodfloorrefinishing.com
📍 Service Area: Bellmore, Merrick, Wantagh, Seaford, and surrounding Nassau County towns.