Tag Archives: wood floor care

Recoat Floor Without Sanding Benefits for Woodbury Homes


TL;DR:

  • Recoating hardwood floors without sanding is a cost-effective method that preserves wood and takes only a day. It involves lightly abrading the finish, cleaning thoroughly, and applying new finish coats to refresh surface wear. This process suits lightly scratched floors with intact finish and can extend the floor’s lifespan by up to 15 years.

Screen and recoat is the industry term for what homeowners in Woodbury call “recoating without sanding,” and it is the most cost-effective way to maintain hardwood floors before damage sets in. This process lightly abrades the existing finish with a screen pad, then applies a fresh coat of polyurethane or UV-curable finish directly over the old surface. The recoat floor without sanding benefits include lower cost, minimal dust, and a one-day turnaround that full sanding simply cannot match. At Saverawoodfloorrefinishing, we have used this method on hundreds of Long Island homes, and it consistently delivers results that surprise homeowners who expected a much bigger project.

1. What are the key benefits of recoating hardwood floors without sanding?

Recoating hardwood floors without sanding costs 30–50% less than full sanding and refinishing. Screen and recoat runs roughly $1–$3 per square foot, while full sanding runs $3–$8 per square foot. That gap is significant for a 1,000-square-foot Woodbury home.

The advantages of recoating floors go well beyond price:

  • Lower cost. You spend a fraction of what full refinishing costs, freeing budget for other home projects.
  • Minimal dust and mess. Modern dust collection systems capture the fine particles produced during screening. Your furniture, curtains, and air quality stay clean.
  • One-day completion. A professional screen and recoat typically finishes in a single day. You can walk on the floor in socks by evening.
  • Less disruption. You do not need to empty the entire home. Most projects require clearing only the room being treated.
  • Wood thickness preserved. Sanding removes a thin layer of wood each time. Recoating leaves the wood untouched, which matters for floors that have already been sanded multiple times.
  • Ideal for light wear. Surface scratches and dull finish respond well to recoating. The floor looks refreshed without any structural work.

Pro Tip: Ask your floor professional to do a simple water-drop test before scheduling a recoat. If water beads on the surface, the finish is still intact and recoating is likely a good fit.

2. How does the recoating process work and why is sanding not necessary?

Recoating works because the existing finish is still bonded to the wood. The goal is not to remove it but to give the new coat something to grip. Here is how the process unfolds step by step:

  1. Screen the floor. A floor buffer fitted with a fine abrasive screen lightly scuffs the existing finish. This creates a mechanical bond for the new coat without cutting into the wood itself.
  2. Clean thoroughly. All dust and debris from screening must be removed before any finish is applied. Contamination at this stage causes adhesion failure and visible imperfections.
  3. Adhesion test. If previous treatments include wax or polish, new finish may not adhere, so a patch test is done first. This step protects you from a failed recoat.
  4. Apply new finish coats. One or two coats of polyurethane or UV-curable finish go down. UV-curable finishes speed curing time dramatically, allowing furniture to return the same day in many cases.
  5. Allow proper cure time. The floor needs time to harden fully before heavy use resumes.

Sanding is not part of this process because the wood and stain are still intact. Sanding removes finish and wood together, which is only necessary when the finish has worn through or when the homeowner wants to change the stain color. Recoating does not fix deep scratches or alter the floor color. It refreshes the protective layer only. Knowing this distinction saves Woodbury homeowners from paying for a full sand when a recoat is all they need.

Pro Tip: If you notice a small area where the finish looks worn through to bare wood, flag it for your technician before the recoat begins. That spot may need spot sanding before the new coat goes down.
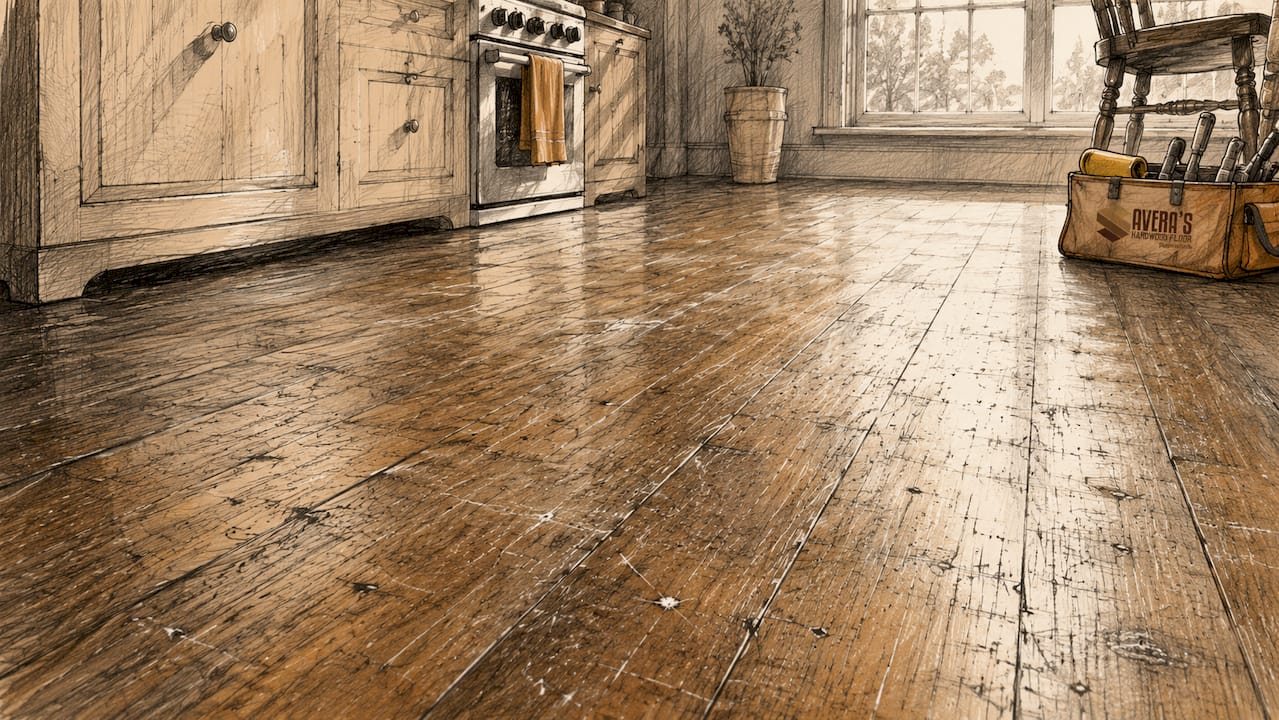
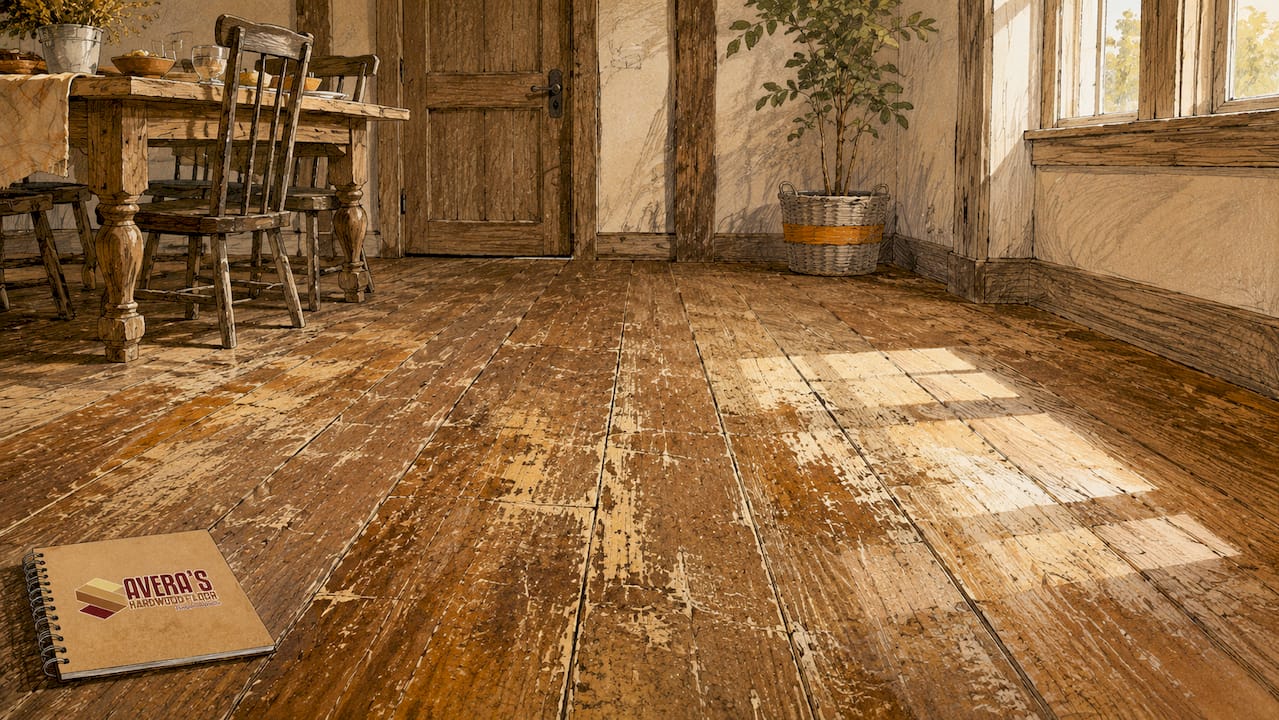
Close-up of scratched hardwood floor

3. When should Woodbury homeowners choose recoating versus full sanding and refinishing?

The decision comes down to the condition of your finish and wood. Recoating every 3–5 years as a maintenance practice can extend the life of your floor and push full refinishing out to 10–15 years. That is a meaningful difference in both cost and disruption.

Signs recoating is the right choice

  • The finish looks dull or slightly scratched but the wood color is even.
  • No bare wood is visible anywhere on the floor.
  • The floor passes an adhesion test.
  • You want a quick refresh before listing your home or hosting an event.

Signs you need full sanding and refinishing

  • Bare wood is exposed in high-traffic areas. Once wood is exposed, recoating is no longer an option.
  • Deep gouges, dents, or pet stains have penetrated the wood surface.
  • You want to change the stain color entirely.
  • The floor has been recoated multiple times and the finish layers are uneven.
Factor Recoating Full sanding and refinishing
Cost per square foot $1–$3 $3–$8
Project duration One day 3–5 days
Dust produced Minimal Significant
Wood removed None Yes, thin layer each time
Color change possible No Yes
Best for Light wear, dull finish Deep damage, bare wood, color change

Woodbury’s climate adds one more variable. Long Island humidity swings between seasons, and those changes stress wood joints and finish layers. Scheduling a recoat in spring or fall, when indoor humidity is stable, gives the new finish the best chance to bond and cure evenly.

4. Tips for maximizing the lifespan of recoated floors in the Woodbury area

Good floor maintenance tips extend the time between recoats and protect your investment. Grit buildup, more than foot traffic itself, is the primary cause of finish degradation. Sand and dirt act like sandpaper underfoot, grinding the finish down with every step.

Follow these practices to get the most from a freshly recoated floor:

  • Dust mop every 1–2 days. Daily dust mopping prevents grit from grinding into the finish. Use a microfiber pad, not a broom, which scatters debris instead of capturing it.
  • Use pH-neutral hardwood floor cleaners only. Vinegar, steam mops, and general-purpose sprays break down polyurethane over time. Stick to cleaners formulated for finished hardwood.
  • Control indoor humidity. Maintaining humidity between 35% and 55% year-round prevents the wood from expanding and contracting in ways that crack the finish. A whole-home humidifier or dehumidifier handles this in most Long Island homes.
  • Place entry mats at every door. Mats catch the grit before it reaches the floor. Shake them out weekly.
  • Use felt pads under all furniture legs. Hard chair and table legs scratch the finish with every movement.
  • Avoid wax and polish products. These build up on the surface and prevent future finish coats from adhering properly.

Post-recoat curing deserves special attention. Furniture should stay off the floor for 24–48 hours after recoating. Rugs should wait up to 1–2 weeks to prevent uneven finish wear. Plan your project timing so these restrictions do not disrupt daily life more than necessary.

Pro Tip: Set a calendar reminder every 3 years to have your floors assessed by a professional. Catching finish wear early keeps recoating on the table as an option and avoids the higher cost of full refinishing.

Key takeaways

Recoating hardwood floors without sanding is the most cost-effective maintenance method for Woodbury homeowners whose finish is intact, delivering one-day completion, minimal dust, and preserved wood thickness at a fraction of full refinishing costs.

Point Details
Cost advantage Recoating costs $1–$3 per sq ft versus $3–$8 for full sanding and refinishing.
One-day turnaround Most screen and recoat projects complete in a single day with same-evening walkability.
Recoat every 3–5 years Regular recoating pushes full refinishing out to 10–15 years, saving significant money.
Adhesion testing is critical Wax or polish residue prevents new finish from bonding; always test before recoating.
Humidity control matters Keeping indoor humidity at 35%–55% protects the finish and prevents wood movement.

What we have learned recoating floors in Woodbury homes

After years of working on hardwood floors across Long Island, the pattern we see most often is this: homeowners wait too long. They notice the floor looks dull and assume they need a full sand. By the time they call us, the finish is sometimes worn through in the kitchen doorway or hallway, which takes recoating off the table entirely.

The homes where recoating works best are the ones where the homeowner treated it as a scheduled maintenance task, not a last resort. We have recoated floors in Woodbury that looked nearly new afterward, simply because the homeowner caught the wear early. That is the real value of understanding this process.

We are also direct with homeowners about what recoating cannot do. It will not fix the deep scratch from a moved refrigerator. It will not lighten a floor that has darkened from pet stains. When those issues exist, we recommend a full sand and refinish, and we explain exactly why. Honest assessment builds trust, and it saves you money in the long run.

One thing that has changed our work significantly is UV-curable finish technology. Traditional water-based finishes require 24 hours between coats and days before the floor is fully usable. UV-curable finishes cure instantly under a UV lamp, which means we can apply multiple coats in a single visit and you can move furniture back the same day. For busy Woodbury households, that is a real difference. We use this system on most of our screen and recoat projects now, and the durability results have been consistently strong.

— Savera

Saverawoodfloorrefinishing serves Woodbury with expert recoating and floor care

Saverawoodfloorrefinishing is a veteran-owned, family-operated company serving Woodbury and all of Long Island. We specialize in one-day screen and recoat systems, dust-free sanding, and UV-curable finishes that let you return to normal life faster.
https://saverawoodfloorrefinishing.com

Our low-VOC, odor-free water-based finishes are safe for families, pets, and indoor air quality. Whether your floors need a quick refresh or a full hardwood floor restoration, we assess your floor honestly and recommend only what it actually needs. Call us at 631-866-1972 or visit saverawoodfloorrefinishing.com to schedule a free assessment for your Woodbury home.

FAQ

How much does a screen and recoat cost in Woodbury?

Screen and recoat typically costs $1–$3 per square foot, compared to $3–$8 per square foot for full sanding and refinishing. The exact price depends on floor size and condition.

How often should hardwood floors be recoated?

Industry guidelines recommend recoating every 3–5 years as a maintenance practice. Following this schedule can extend the life of your floor and delay full refinishing for 10–15 years.

Can recoating fix deep scratches or change the floor color?

No. Recoating refreshes the protective finish layer only. It does not repair deep scratches, dents, or pet stains, and it cannot change the stain color. Those issues require full sanding and refinishing.

How long does a screen and recoat take to dry?

You can walk on the floor in socks the same evening after a professional recoat. Furniture should stay off the floor for 24–48 hours, and rugs should wait up to 1–2 weeks to allow the finish to cure fully.

Is recoating safe for homes with children and pets?

Yes, especially when low-VOC, water-based finishes are used. Saverawoodfloorrefinishing uses odor-free, low-VOC finishes and HEPA-filtered dust containment systems, making the process safe for families and pets throughout the project.

Wood Finish Longevity Factors for Hardwood Floors


TL;DR:

  • Wood finish longevity depends on the type of finish, environment during application, and ongoing maintenance. Factory aluminum oxide finishes last over 25 years, while oil-based polyurethane offers 10 to 15 years under proper care. Proper application, controlled conditions, and regular upkeep significantly extend the life of hardwood floors.

Wood finish longevity factors are the specific conditions, materials, and practices that determine how long a hardwood floor finish holds its protective and visual qualities. For homeowners and property managers in North Woodmere, these factors carry real weight. Long Island’s coastal humidity, seasonal temperature swings, and busy household traffic all work against a finish over time. Whether you have solid oak, engineered hardwood, or prefinished planks, understanding what drives finish durability helps you make smarter decisions about North Woodmere hardwood floor refinishing, product selection, and ongoing care.


What are the main wood finish longevity factors by finish type?

The finish type you choose sets the ceiling on how long your floor will last. Aluminum oxide factory finishes last up to 25 years in residential settings, far outpacing site-applied options. That gap matters because most homeowners inherit or install prefinished floors without realizing how much longer those factory coatings hold up.

Oil-based polyurethane lasts 10+ years with proper care and remains the most durable consumer-grade film finish for high-traffic surfaces. Water-based polyurethane typically runs 7–10 years. Hardwax oils sit in a different category entirely: they penetrate the wood rather than forming a surface film, and they require maintenance every 2–5 years. That shorter cycle is not a flaw. It reflects a different philosophy around renewability versus raw hardness.

Pro Tip: Hardwax oils are easier to spot-repair than polyurethane. If a small area gets scratched or stained, you can treat just that section without sanding the entire floor.

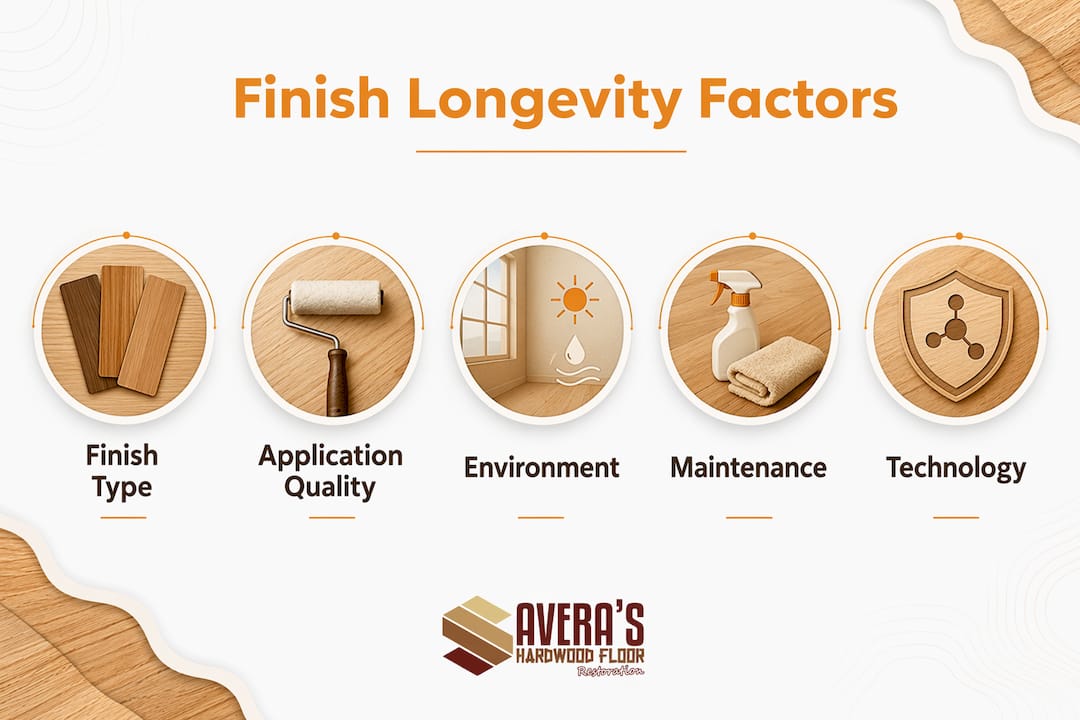
Infographic showing key wood finish longevity factors

Here is a quick comparison of the most common hardwood floor finish types and their expected lifespans:

Finish Type Expected Lifespan Maintenance Needs VOC Level
Aluminum oxide (factory) 25+ years Minimal Low
Oil-based polyurethane 10–15 years Moderate High
Water-based polyurethane 7–10 years Moderate Low
Hardwax oil 5–10 years (with upkeep) High (easy renewal) Low to medium

VOC content matters for North Woodmere families. Oil-based polyurethane carries high VOC levels, which means longer off-gassing periods and more ventilation requirements. Water-based and hardwax oil options are significantly cleaner for indoor air quality, especially in homes with children or pets.

  • Aluminum oxide: Best for prefinished floors; nearly impossible to replicate on-site
  • Oil-based polyurethane: Amber tone, excellent hardness, longer dry time
  • Water-based polyurethane: Clear finish, faster dry time, lower odor
  • Hardwax oil: Natural look, easy spot repair, requires periodic maintenance coats

Durability depends not only on finish hardness but also on practical renewability. A hardwax oil floor with consistent maintenance can outlast a neglected polyurethane floor in real-world conditions.


How do application quality and environment affect finish durability?

Improper application and poor environmental control cause premature finish failure more often than product choice. That finding should shift how you think about refinishing. Buying the most expensive finish means nothing if the surface is not properly prepared or the room conditions are wrong.

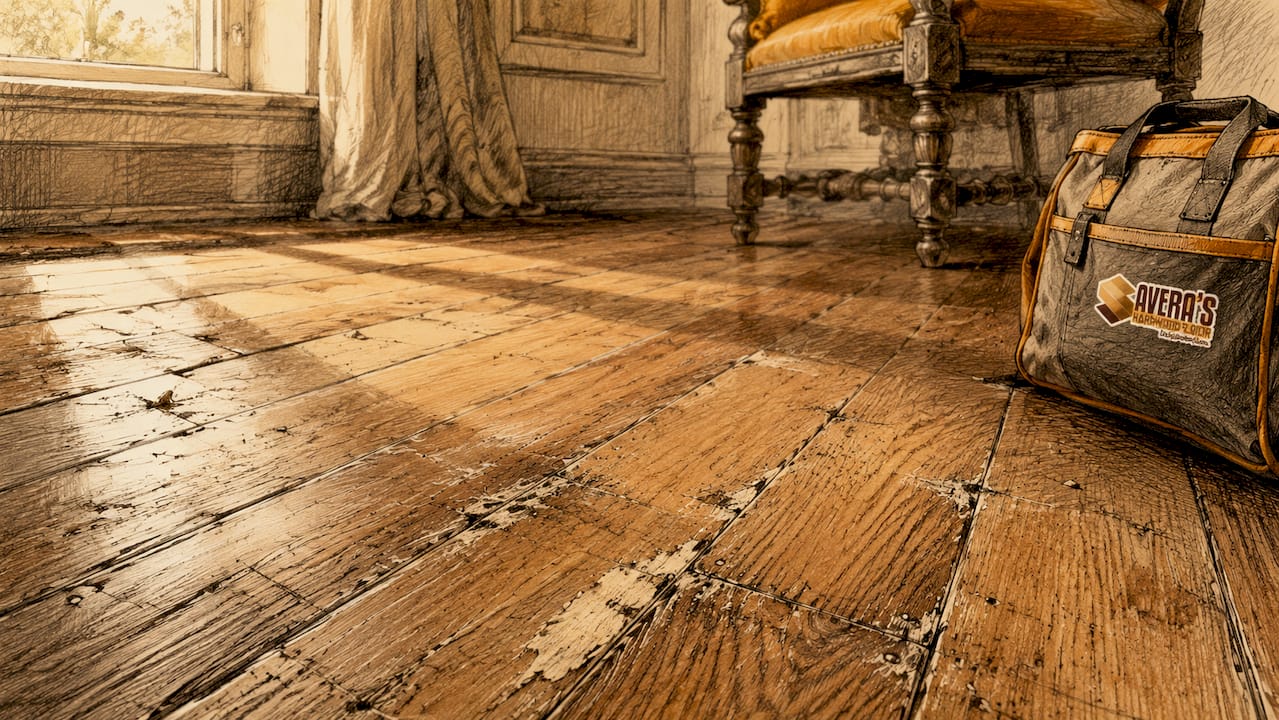
Close-up of worn scratched hardwood floor

Surface preparation starts with thorough sanding. Sanding between coats ensures mechanical adhesion between layers, creating what professionals call the molecular handshake that prevents peeling and delamination. Skipping this step is one of the most common causes of early finish failure. Applying three coating layers improves color stability and reduces mold susceptibility when environmental conditions are controlled during application.

Temperature and humidity are the two variables most homeowners underestimate. The ideal application window is 65–75°F with relative humidity below 65%. North Woodmere summers can push well past that humidity threshold. Stagnant air and high humidity can reduce finish durability by up to 50%. That is not a minor inconvenience. It is the difference between a finish that lasts a decade and one that starts peeling within two years.

Pro Tip: Run a dehumidifier and keep windows closed during finish application and for at least 24 hours after. Air movement from open windows introduces dust and humidity spikes that compromise adhesion.

One detail that catches many homeowners off guard is the difference between dry time and cure time. Wood finishes reach full hardness after 7–30 days, even when they feel dry to the touch within hours. Placing furniture or using harsh cleaners before full cure causes permanent damage to the finish film. This is especially relevant in North Woodmere move-in situations where new residents want to settle in quickly.

Key environmental factors that affect finish longevity:

  • Humidity above 65%: Slows curing, creates film defects, invites mold
  • Temperature below 60°F: Prevents proper chemical bonding between layers
  • Direct sunlight: Accelerates photodegradation; UV absorbers in modern finishes help slow this process
  • Poor ventilation during application: Traps solvents and creates bubbling or cloudiness in the finish film

Anti-aging chemistry like UV absorbers and HALS (hindered amine light stabilizers) protects finishes from photodegradation and extends lifespan, particularly in sun-exposed rooms. Choosing a finish that includes these compounds is a meaningful upgrade for south-facing rooms common in North Woodmere homes.


What maintenance practices extend the life of hardwood floor finishes?

Consistent maintenance is the single most controllable factor in how long your finish lasts. Most finish failures are not sudden. They build gradually through neglect, wrong cleaning products, and missed recoat windows.

Follow this maintenance schedule to protect your investment:

  1. Sweep or dry-mop daily in high-traffic areas. Fine grit acts like sandpaper underfoot and wears through finish faster than almost anything else.
  2. Use a pH-neutral hardwood floor cleaner weekly. Products with ammonia, bleach, or vinegar strip finish chemistry over time and dull the surface.
  3. Apply a screen and recoat every 3–5 years for polyurethane floors. This process lightly abrades the existing finish and adds a fresh topcoat, refreshing the finish without a full sand-down.
  4. Apply a maintenance coat to hardwax oil floors every 1–3 years. This renewal is far simpler than polyurethane recoating and can often be done without professional equipment.
  5. Schedule a deep cleaning and wax removal when buildup dulls the surface. Old wax layers prevent new finish from bonding properly and accelerate wear.

Pro Tip: Place felt pads under every piece of furniture and use area rugs at entryways. These two steps alone can add years to your finish by eliminating the two most common sources of surface abrasion.

Pet traffic is a real concern in North Woodmere households. Dog nails concentrate pressure on small points of the finish and create micro-scratches that accumulate into visible dullness. Keeping nails trimmed and using area rugs in pet zones extends finish life noticeably. Hardwax oil’s ease of renewal makes it a practical choice for pet-heavy homes, since spot repairs are simple and do not require full-room sanding.

Brightly lit refinished hardwood floor


How do dust-free sanding and UV-curable finishes improve durability?

Modern finishing technology has changed what is possible for North Woodmere homeowners. Two advances stand out: dust-free sanding and UV-curable finishes.

Dust-free sanding reduces contaminants and improves adhesion, producing a cleaner surface for finish bonding. Traditional sanding leaves fine particles suspended in the air that settle back onto the floor before the finish is applied. Those particles create weak spots in the finish film that become visible scratches and peel points over time. HEPA-filtered vacuum systems capture over 99% of that dust at the source, giving the finish a clean substrate to bond to.

UV-curable finishes provide faster curing and enhanced chemical resistance, increasing durability compared to traditional finishes. The UV curing process uses ultraviolet light to instantly harden the finish film rather than relying on air-drying chemistry that takes days. This means the finish reaches full hardness in minutes rather than weeks.

Benefits of UV-curable finishes for North Woodmere homeowners:

  • Same-day use: Furniture can return to the room the same day in many cases
  • Higher chemical resistance: The cured film resists cleaning products, spills, and pet accidents more effectively
  • Longer lifespan: The denser cured film holds up better under foot traffic than air-dried alternatives
  • Low VOC: UV-cured water-based finishes produce minimal odor, making them safe for families and pets

Engineered hardwood refinishing requires specific consideration. Engineered boards have a thinner wear layer than solid hardwood, which limits how many times they can be sanded. Dust-free sanding is especially valuable here because it removes less material per pass, preserving more of the wear layer for future refinishing cycles. For North Woodmere properties with engineered floors, this technology extends the useful life of the floor significantly.


Key Takeaways

The most important wood finish longevity factors are finish type, application environment, cure time respect, and consistent maintenance, all of which compound over the life of the floor.

Point Details
Finish type sets the baseline Aluminum oxide lasts 25+ years; oil-based polyurethane lasts 10–15 years under normal conditions.
Environment controls cure quality Apply finishes at 65–75°F with humidity below 65% to prevent film defects and early failure.
Cure time is not dry time Full hardness takes 7–30 days; early furniture placement causes permanent finish damage.
Maintenance extends finish life Screen and recoat every 3–5 years adds years to polyurethane floors without full refinishing.
Modern tech improves outcomes Dust-free sanding and UV-curable finishes produce cleaner bonds and faster, more durable results.

What we have learned from North Woodmere floors

After working on hardwood floors across Long Island, the pattern we see most often is not a bad finish. It is a good finish applied under bad conditions or neglected at the wrong moment. A homeowner picks a quality water-based polyurethane, the contractor applies it on a humid july afternoon with the windows open, and within three years the finish is cloudy and peeling. The product gets blamed. The real cause was the environment.

The second most common failure we see is the missed recoat window. Polyurethane floors give you a clear signal when they need attention: the finish starts to look dull and worn in traffic paths but the wood itself is still fine. That is the ideal moment for a screen and recoat. Wait too long, and you are sanding down to bare wood. The cost difference between those two services is significant.

We also see homeowners underestimate how much the cure time matters. A floor that feels dry after 24 hours is not ready for furniture. Placing a heavy couch or dining table on a finish that has not fully cured compresses the film and creates permanent impressions. We tell every customer: wait the full cure period, even when it feels inconvenient.

The floors that hold up best in North Woodmere homes share three traits. They were applied under controlled conditions. They received a recoat before the finish wore through. And the homeowners used the right cleaning products consistently. None of that requires expensive materials. It requires knowing what actually matters.

— Savera


Hardwood floor refinishing services for North Woodmere homeowners

Saverawoodfloorrefinishing brings dust-free sanding, UV-curable finishes, and screen and recoat services to North Woodmere homes and properties. Our process starts with a thorough assessment of your current finish condition, wood species, and household traffic patterns so we can recommend the right approach for your specific floor.

https://saverawoodfloorrefinishing.com

Whether your floors need a full hardwood floor restoration or a targeted recoat to refresh worn areas, we handle the entire process with HEPA-filtered dust containment and low-VOC finishes that are safe for families and pets. Our UV-curable finish system lets many homeowners return furniture the same day. Call us at 631-866-1972 or visit saverawoodfloorrefinishing.com to schedule a free evaluation for your North Woodmere property.


FAQ

How long does a hardwood floor finish typically last?

Finish lifespan ranges from 7 years for water-based polyurethane to 25+ years for aluminum oxide factory finishes, depending on traffic and maintenance. Oil-based polyurethane falls in the 10–15 year range under normal residential conditions.

What is the difference between dry time and cure time for wood finishes?

Dry time refers to when the finish no longer feels tacky, while cure time is when it reaches full hardness. Full cure takes 7–30 days, and placing furniture or using harsh cleaners before that point causes permanent damage.

How does humidity affect wood finish durability in North Woodmere?

High humidity above 65% during application slows curing, creates film defects, and can reduce finish durability significantly. North Woodmere’s coastal climate makes humidity control a critical step before and during any refinishing project.

What is a screen and recoat, and when should I schedule one?

A screen and recoat lightly abrades the existing finish surface and applies a fresh topcoat without sanding down to bare wood. Schedule one every 3–5 years, or when traffic areas look dull but the wood itself shows no deep scratches.

Are UV-curable finishes more durable than traditional polyurethane?

UV-curable finishes cure instantly under ultraviolet light and produce a denser, more chemically resistant film than air-dried polyurethane. They offer faster return to use and longer-lasting protection, making them a strong choice for busy North Woodmere households.

Best Seasons for Wood Floor Refinishing in Head of the Harbor


TL;DR:

  • Spring and fall are the best seasons for hardwood floor refinishing in Head of the Harbor due to stable indoor humidity and moderate temperatures. Proper timing prevents issues like bubbling or cracking and allows for faster, more durable finishes using water-based or UV-curable products. Planning ahead and maintaining indoor climate control ensures a smooth project and long-lasting results.

Spring and fall are the best seasons for wood floor refinishing in Head of the Harbor because both periods deliver the moderate temperatures and stable indoor humidity that polyurethane finishes need to cure properly. Hardwood floor refinishing, the industry term for sanding, staining, and recoating worn wood surfaces, depends far more on indoor climate conditions than most homeowners realize. In Head of the Harbor, where historic homes and luxury residences sit close to Long Island Sound, seasonal humidity swings can make or break a refinishing project. Choosing the right window, whether you plan a full sand with dust-free sanding technology or a lighter screen and recoat, protects your investment and keeps disruption to a minimum.

1. What makes spring the best season to refinish wood floors in Head of the Harbor?

Spring is the single strongest window for hardwood floor refinishing on Long Island. From late march through may, indoor temperatures typically hold between 60–75°F and relative humidity settles near 45–60% RH. Those numbers matter because optimal refinishing conditions require exactly that range to support consistent polyurethane bonding and finish leveling across every coat.

Close-up of scratched hardwood floor

Spring also avoids the humidity spikes that arrive with summer. When indoor RH climbs above roughly 65%, polyurethane cure times can stretch from about 24 hours to 48–72 hours, and the risk of bubbling or peeling finishes rises sharply. Catching the project in april or may sidesteps that problem entirely.

Spring scheduling carries a practical bonus as well. Most homeowners complete projects before summer gatherings, vacations, and outdoor activity fill the calendar. Contractors book up fast during this season, so planning ahead pays off.

  • Moderate temperatures support even finish leveling coat by coat
  • Stable humidity reduces wood expansion and contraction during curing
  • UV-curable finishes cure instantly under spring conditions, cutting downtime to a single day in many cases
  • Dust-free sanding systems work cleanly without humidity-driven dust clumping
  • Availability of top contractors is better in early spring before peak demand

Pro Tip: Open windows only briefly for ventilation during spring refinishing. Drafts and sudden humidity changes from outside air can disrupt the microclimate around your floors and cause uneven curing, even when outdoor conditions look ideal.

2. Why is fall a top season for hardwood floor refinishing in Head of the Harbor?

Fall rivals spring as the optimal season for floor refinishing, and in some ways it has the edge. From september through november, indoor humidity in Head of the Harbor typically ranges 35–55% RH, and temperatures cool to a range that favors finish drying without the HVAC-induced dry air problems that winter brings. That balanced humidity range is the gating condition for a clean, durable result.

Engineered hardwood floors benefit especially from fall timing. Engineered hardwood with thinner wear layers is more sensitive to expansion and contraction during curing. Poor timing can cause finish separation within months. Fall’s stable conditions reduce that risk significantly compared to summer or winter work.

Fall also lines up well with the household calendar. Fewer scheduling conflicts exist before the holiday season arrives, and completing a refinishing project in october means your floors are fully cured and furniture-ready well before thanksgiving gatherings.

  • Humidity stays in the 35–55% sweet spot without aggressive dehumidification
  • Cooler temperatures reduce odor concerns with water-based and low-VOC finishes
  • Less HVAC cycling means fewer indoor temperature swings during multi-coat curing
  • Ideal for engineered floor refinishing where wear layer sensitivity is highest
  • Strong contractor availability before the holiday slowdown

Pro Tip: Run a hygrometer in the room you plan to refinish for at least one week before the project starts. If readings fluctuate more than 10 percentage points day to day, use a dehumidifier or humidifier to stabilize conditions before sanding begins.

3. How do other seasons compare for wood floor refinishing in Head of the Harbor?

Summer and winter both present real challenges for refinishing hardwood floors, though neither is completely off the table with the right preparation.

Season Humidity Range Key Risk Viable With Preparation?
Spring 45–60% RH Minimal Yes, ideal
Fall 35–55% RH Minimal Yes, ideal
Summer Often above 65% RH Slow cure, bubbling, peeling Yes, with dehumidification
Winter Often 15–25% RH indoors Wood contraction, cracking, uneven sheen Yes, with humidifiers and HVAC control

Summer’s main problem is humidity. Summer humidity above 65% RH delays polyurethane cure times and creates conditions where bubbling and peeling can appear within a year of the project. The common belief that warm weather speeds up drying is wrong. Humidity control matters more than temperature, and summer’s moisture load works against you.

Winter creates the opposite problem. Low winter indoor humidity, often dropping to 15–25% RH when heating systems run hard, causes wood to contract. That contraction stresses fresh finishes and can produce cracking and uneven sheen. Winter work requires humidifiers and careful HVAC management throughout the entire curing period.

Both off-seasons can offer cost and scheduling advantages. Contractors may have more availability in january or july. If you choose either season, commit to strict indoor climate control from the first sanding pass through the full cure period.

  • Summer: use a whole-home dehumidifier and keep windows closed during and after coating
  • Winter: add a portable humidifier and avoid cranking the heat above 72°F
  • Oil-based finishes take 30–60 days to fully cure; water-based finishes cure in 21–30 days
  • Water-based finishes are preferred for off-season work because faster recoat windows (2–4 hours between coats) reduce exposure time to unstable conditions

4. What practical steps help homeowners plan refinishing during the best seasons?

Good planning separates a smooth refinishing project from a costly rescheduling headache. The steps below apply whether you are a homeowner in Head of the Harbor preparing a single room or a property manager coordinating a multi-unit building.

  1. Monitor indoor humidity for one week before booking. Use a digital hygrometer to confirm your home holds 35–60% RH consistently. This reading, not the calendar date, is the true green light for scheduling.
  2. Book your contractor 4–6 weeks in advance. Spring and fall demand fills contractor schedules quickly. Early booking secures your preferred dates and avoids the rush.
  3. Prepare your HVAC system before the project starts. A well-maintained furnace holds indoor temperatures steady throughout the multi-coat process. Reviewing your furnace preparation before a fall project is a practical step that most homeowners skip.
  4. Match your finish to the season and your schedule. Water-based polyurethane allows the next coat in 2–4 hours and reaches full cure in 21–30 days. Oil-based polyurethane requires 8–24 hours between coats and up to 60 days for full finish cure. For busy homes, water-based or UV-curable finishes cut downtime dramatically.
  5. Choose the right scope for your floor’s condition. Full sanding exposes bare wood that is vulnerable to moisture stress, making season and humidity control more critical than for a screen and recoat. If your floors have one or two good sanding cycles left, a screen and recoat in spring or fall extends their life without the full exposure risk.
  6. Close off the work area from the rest of the house. Sectional plastic barriers prevent drafts and humidity changes from adjacent rooms or HVAC vents from disrupting the microclimate around fresh coats.
  7. Plan furniture removal and return around full cure, not just dry time. Floors feel dry to the touch long before they reach full hardness. Placing heavy furniture too early compresses the finish and leaves permanent marks.

Pro Tip: Schedule your refinishing project to finish at least three weeks before a major event or holiday. Water-based finishes need 21–30 days to fully cure, and high-traffic events during that window can leave scuffs that are difficult to repair without a full recoat.

Key Takeaways

Spring and fall are the best seasons for wood floor refinishing in Head of the Harbor because stable indoor humidity between 35–60% RH and temperatures of 60–75°F produce the most durable, defect-free finish results.

Point Details
Spring is the top season Temperatures of 60–75°F and humidity near 45–60% RH create ideal curing conditions.
Fall is equally strong Humidity of 35–55% RH and cooler temps reduce HVAC-related drying problems.
Humidity beats temperature Indoor RH control matters more than outdoor warmth; summer humidity above 65% causes finish defects.
Book 4–6 weeks early Spring and fall contractor demand fills fast; early scheduling prevents disruption.
Match finish to season Water-based and UV-curable finishes cure faster and suit busy homes in any season.

What we have learned from years of refinishing floors in Head of the Harbor

After completing hardwood floor refinishing projects across Head of the Harbor and the wider Long Island area, one truth stands out above all others: homeowners who focus only on the calendar miss the real variable. Indoor relative humidity is the factor that determines whether a project succeeds or fails. We have seen beautiful spring days produce poor results because a homeowner left windows open and let humid air flood the room during coating. We have also seen solid december projects come out perfectly because the homeowner ran a humidifier and kept the HVAC steady throughout.

The other lesson we keep coming back to is finish selection. Water-based and UV-curable finishes are not just faster. They are genuinely better suited to the real-world conditions inside a lived-in home. Tiptoeing around for up to 72 hours waiting for an oil-based finish to dry is not a realistic ask for most families. UV-curable technology changes that equation entirely, letting you return furniture the same day in many cases.

We also encourage homeowners to think carefully about scope before committing to a full sand. If your floors have visible wear but still have material left, a screen and recoat in spring or fall can breathe new life into the wood without the moisture exposure risk that comes with bare-wood sanding. That conversation with your contractor before the project starts is worth more than any single product choice.

— Savera

Saverawoodfloorrefinishing serves Head of the Harbor with seasonal expertise

Timing your project right is only half the equation. The other half is working with a team that understands how to protect your floors through every coat and every cure stage.

https://saverawoodfloorrefinishing.com

Saverawoodfloorrefinishing brings dust-free sanding, UV-curable finishes, and engineered hardwood refinishing expertise to homeowners and property managers across Long Island, including Head of the Harbor. Our hardwood floor refinishing in Middle Island service page gives you a clear picture of what to expect from start to finish. Whether you are planning a spring project or locking in a fall date, we help you schedule at the right time, with the right finish, and with minimal disruption to your home. Call us at 631-866-1972 or visit saverawoodfloorrefinishing.com to book your consultation.

FAQ

What is the best time of year to refinish hardwood floors?

Spring and fall are the best times to refinish hardwood floors. Both seasons offer indoor humidity between 35–60% RH and temperatures of 60–75°F, which support proper polyurethane bonding and curing.

Does summer humidity affect wood floor refinishing results?

Yes. Humidity above roughly 65% RH slows polyurethane cure times and increases the risk of bubbling and peeling finishes. Summer refinishing requires active dehumidification to achieve reliable results.

How far in advance should I schedule a refinishing project?

Book your contractor 4–6 weeks before your target date during spring or fall. Demand for refinishing hardwood floors peaks in these seasons, and early scheduling secures your preferred window.

How long does it take for refinished floors to fully cure?

Water-based polyurethane reaches full cure in 21–30 days. Oil-based polyurethane takes 30–60 days. UV-curable finishes cure instantly under the UV lamp, allowing same-day furniture return in many cases.

Is engineered hardwood more sensitive to seasonal conditions during refinishing?

Yes. Engineered hardwood with thinner wear layers expands and contracts more during curing. Refinishing during spring or fall, when humidity is stable, reduces the risk of finish separation and premature wear.

Floor Finishing Tips for Families: Safe & Durable Floors


TL;DR:

  • Family-safe hardwood floor finishing involves low-VOC, non-toxic sealants that protect children and pets from harmful fumes. For active households, water-based polyurethane in satin or matte sheen, combined with dust-free sanding and proper ventilation, ensures durability and safety. Regular maintenance routines, including furniture protection and timely recoating, extend the life of family-friendly floors.

Family-safe floor finishing is defined as the process of sanding, staining, and coating hardwood floors using low-VOC, non-toxic finishes that protect children and pets from harmful fumes while delivering a surface durable enough to handle daily wear. For South Valley Stream homeowners, getting this right means choosing the correct finish type, sheen level, and wood species before a single piece of furniture moves. The best floor finishing tips for families center on water-based polyurethane, proper dust control, and a maintenance routine that keeps floors safe long after the last coat dries. Saverawoodfloorrefinishing serves families across South Valley Stream with dust-free sanding systems and low-VOC finishes designed exactly for this purpose.

What are the best floor finishing tips for families?

The single most important decision in family-safe hardwood floor refinishing is finish chemistry. Water-based polyurethane emits under 50 g/L of VOCs, compared to oil-based products that can release three to four times that amount. Lower VOC output means shorter displacement times for your family and far less chemical exposure for kids and pets who spend time close to the floor.

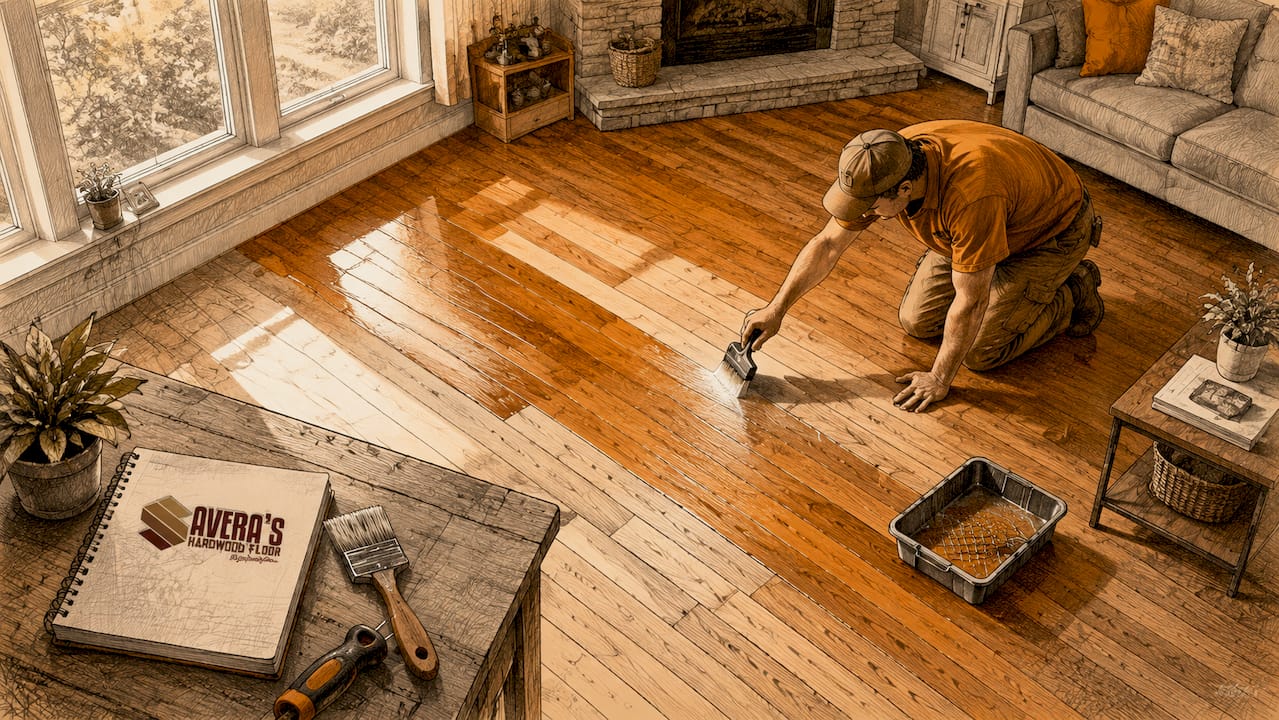
Applying water-based polyurethane to hardwood floor

Sheen level is the second critical choice. Matte or satin finishes hide scratches and wear 50–70% better than high-gloss options and provide superior slip resistance. That combination of safety and concealment makes satin the go-to sheen for active South Valley Stream households.

Dust control is the third pillar. Refinishing generates fine particulate matter that settles on surfaces throughout the home. Dust-free sanding systems with HEPA-filtered vacuums contain that debris at the source, protecting indoor air quality for everyone in the house.


What tools and materials do you need for safe floor finishing?

Preparation separates a smooth, lasting finish from one that peels or looks gritty within a year. The table below covers the core materials for a family-safe refinishing project.

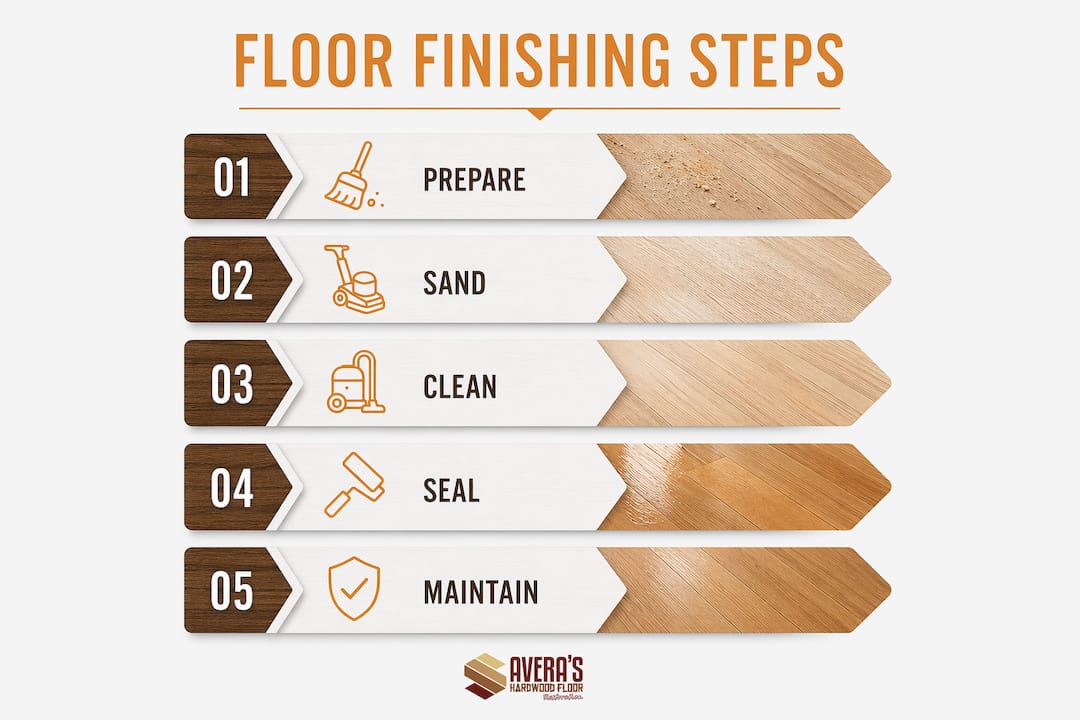
Infographic illustrating floor finishing process steps

Item Purpose Family-Safe Note
Drum or orbital sander Removes old finish and levels surface Rent with dust containment bag
Sandpaper (36, 60, 80, 120 grit) Progressive surface preparation Use finer grits last for smoothness
Tack cloth Removes microscopic dust before coating Critical for smooth finish texture
Water-based polyurethane Primary protective topcoat Under 50 g/L VOC; low odor
Applicator pad or lamb’s wool roller Applies finish evenly Avoid foam rollers that create bubbles
Plastic sheeting and painter’s tape Seals off work area Keeps dust and fumes out of living spaces
Exhaust fan Ventilates the room during application Required even with low-VOC products

Choosing the right finish for kids and pets

Water-based polyurethane is the clear winner for family-friendly flooring options. It dries faster than oil-based formulas, typically in two to four hours per coat, which shortens the time your family spends out of the room. It also stays clear over time, so your floors won’t develop the amber tint that oil-based products produce.

For homes with engineered hardwood, Saverawoodfloorrefinishing offers engineered hardwood refinishing using the same low-VOC systems. The process is gentler on thinner wear layers while still delivering a durable, family-safe surface.

Sealing off the work area

Seal doorways with plastic sheeting before sanding begins. Use painter’s tape to close gaps around HVAC vents so dust does not circulate through your ductwork. Move all furniture, rugs, and toys out of the room completely. These steps protect your family and make cleanup significantly faster.

Pro Tip: After vacuuming the sanded floor, wipe the entire surface with a tack cloth before finishing. This removes microscopic dust particles that vacuums miss. Skipping this step causes a gritty, rough texture in the cured finish that no amount of buffing will fix.


How do you refinish floors safely in an active family home?

Refinishing hardwood floors typically takes 3–5 days from sanding through the final coat. Planning around your family’s schedule is as important as the technical work itself. Here is the step-by-step process Saverawoodfloorrefinishing recommends for South Valley Stream families.

  1. Clear and prep the room. Remove all furniture, rugs, and décor. Seal doorways with plastic sheeting. Disconnect HVAC vents in the work area.
  2. Sand with a drum or orbital sander. Start with 36-grit paper to remove the old finish, then progress to 60-grit and 80-grit for smoothing. Always keep the sander moving. Stopping the drum sander while it is still spinning causes visible indentations in the wood. Lift the drum before powering down.
  3. Edge-sand and hand-sand corners. Use an edge sander for perimeter areas. Finish tight corners by hand with 80-grit paper.
  4. Vacuum thoroughly, then tack cloth. Vacuum the entire floor, then follow with a tack cloth pass to capture remaining fine dust.
  5. Apply the first coat of water-based polyurethane. Work in the direction of the wood grain using a lamb’s wool applicator. Allow two to four hours of drying time.
  6. Screen between coats. Screening lightly between coats removes dust nibs and creates a mechanical bond for the next layer. Skipping this step leads to peeling or premature finish failure.
  7. Apply two to three total coats. Most family floors benefit from three coats for maximum durability. Tack cloth between each coat.
  8. Ventilate for 72 hours. Ventilating the refinished area for 72 hours reduces fume exposure even from low-VOC products. Run exhaust fans and keep windows open. Keep children and pets out of the space during this period.

Pro Tip: Choose a matte or satin sheen for the final coat. Beyond aesthetics, satin finishes provide better grip underfoot, which matters when kids are running in socks. High-gloss looks sharp in photos but becomes a slip hazard on busy family floors.


How do you maintain family floors after refinishing?

The finish you apply is only as good as the maintenance routine that follows. Grit tracked in from outside acts like sandpaper on your floor’s surface every time someone walks across it. Controlling that grit is the single most effective thing you can do to extend finish life.

Using felt pads and a no-shoes policy indoors can reduce abrasive dirt on floors by up to 50%. That reduction directly translates to fewer scratches and a longer interval before your next refinishing project.

Daily and weekly habits that protect your floors

  • Sweep or dry-mop daily in high-traffic areas like hallways and kitchens.
  • Vacuum weekly with a soft-bristle floor attachment. Avoid beater-bar attachments that scratch the finish.
  • Wipe up spills immediately using a barely damp cloth. Standing water warps wood and breaks down finish over time.
  • Use pH-neutral floor cleaners specifically formulated for hardwood. Vinegar and steam mops degrade polyurethane finishes faster than normal wear.
  • Place felt pads under all furniture legs, including chairs that move frequently.

Maintenance frequency guide

Task Frequency Why It Matters
Dry sweeping or dust mopping Daily Removes grit before it scratches the finish
Vacuuming with soft attachment Weekly Captures debris in grain lines and edges
Spot cleaning spills Immediately Prevents moisture damage and staining
Deep cleaning with pH-neutral cleaner Monthly Removes buildup without stripping finish
Screen and recoat Every 3–5 years Refreshes protective layer without full sanding
Full sand and refinish Every 10–15 years Restores surface when finish is fully worn

Saverawoodfloorrefinishing offers a one-day screen and recoat service that refreshes your finish without the disruption of a full refinishing project. For South Valley Stream families, this is the most practical way to keep floors looking sharp between major restorations.


Which finish and wood species are best for kids and pets?

Wood species and finish type work together to determine how well your floor holds up under family traffic. Choosing the wrong combination means refinishing sooner than necessary.

Pro Tip: Hickory and white oak are the top choices for durable flooring for families. Both species score high on the Janka hardness scale, meaning they resist dents from dropped toys, pet claws, and heavy foot traffic far better than softer species like pine or cherry.

The table below compares common options for family homes in South Valley Stream.

Option Janka Hardness / Sheen Best For Family Safety Note
White oak + satin water-based poly 1,360 / medium sheen All family rooms Excellent scratch resistance; low slip risk
Hickory + matte water-based poly 1,820 / low sheen High-traffic areas Hardest domestic species; hides wear well
Maple + satin water-based poly 1,450 / medium sheen Bedrooms, playrooms Hard surface; satin reduces glare
White oak + UV-cured finish 1,360 / satin Whole-home projects Cures instantly; same-day return to use
Pine + high-gloss oil-based poly 870 / high sheen Low-traffic rooms only Soft species; gloss increases slip risk

UV-cured finishes deserve special attention for families. Saverawoodfloorrefinishing’s UV-curable finish technology cures the surface instantly under UV light, which means you can return furniture and resume normal activity the same day in many cases. Traditional oil-based finishes require tiptoeing around for up to 72 hours. For a household with young children, that difference is significant.

Aluminum oxide-enhanced finishes add another layer of protection. This additive is mixed into the topcoat and dramatically increases surface hardness. It is commonly used in prefinished hardwood but can also be applied during professional refinishing for homes that need maximum durability.


Key takeaways

The most effective floor finishing approach for families combines water-based polyurethane, a satin or matte sheen, a hard wood species like white oak or hickory, and a consistent maintenance routine to protect the finish long-term.

Point Details
Choose water-based polyurethane VOC levels stay under 50 g/L, making it safer for children and pets during and after application.
Select satin or matte sheen These sheens hide wear 50–70% better than gloss and reduce slip risk on active family floors.
Screen between every coat Light sanding between coats prevents peeling and ensures each layer bonds properly to the last.
Ventilate for 72 hours Even low-VOC finishes require full ventilation after application to protect family health.
Maintain with felt pads and no-shoes policy Reducing grit by up to 50% extends finish life and delays the need for refinishing.

What we have learned finishing floors in family homes

After working in homes across South Valley Stream and the rest of Long Island, the pattern we see most often is this: families focus on the finish color and forget about the sheen. They pick a beautiful warm stain, approve the color, and then default to high-gloss because it looks impressive in the showroom. Six months later, they are calling us because the floor looks scratched and their toddler slipped twice near the kitchen.

Satin is not a compromise. It is the correct choice for a home with children and pets. The science backs it up, and so does every job we have done in an active household.

The second mistake we see regularly is skipping the 72-hour ventilation window. Families assume that because the finish is water-based and low-odor, they can move back in after 24 hours. The finish may feel dry to the touch, but the curing process continues. Bringing kids and pets back too early means they are breathing residual off-gassing and potentially tracking marks into a finish that has not fully hardened.

The third thing worth saying plainly: dust-free sanding is not a luxury upgrade. It is a health decision. Traditional sanding fills your home with fine particulate matter that settles on every surface and stays in the air for hours. Our HEPA-filtered containment system eliminates that problem at the source. For a family with young children or anyone with respiratory sensitivities, that matters more than the color of the stain.

Time your project around a long weekend or a planned trip. South Valley Stream summers are a good window because you can ventilate with open windows and the family can spend time outdoors. Plan the project, not just the finish.

— Savera


Restore your south valley stream floors the family-safe way

Saverawoodfloorrefinishing specializes in hardwood floor restoration designed specifically for active family homes. We use dust-free sanding with HEPA containment, low-VOC water-based finishes, and UV-curable topcoats that let you return to normal life faster. Our screen and recoat service refreshes worn floors in a single day without the disruption of a full sand.

https://saverawoodfloorrefinishing.com

Whether your South Valley Stream home needs a full refinishing, a color correction, or a protective recoat, we build a plan around your family’s schedule and safety. Call us at 631-866-1972 or visit saverawoodfloorrefinishing.com to schedule your free estimate. Explore our top restoration methods to see which service fits your floors best.


FAQ

What is the safest floor finish for homes with kids and pets?

Water-based polyurethane is the safest option, with VOC emissions under 50 g/L. It dries faster than oil-based finishes and produces minimal odor, making it the top choice for family homes.

How long should families stay off refinished floors?

Families should stay off refinished floors for at least 24 hours after the final coat and ventilate the space for a full 72 hours. This applies even to low-VOC water-based finishes to allow complete curing.

What sheen level is best for floors with children?

Satin or matte finishes are best for floors with children. They hide scratches and wear significantly better than high-gloss and provide better slip resistance underfoot.

How often should family floors be recoated?

Most family floors benefit from a screen and recoat every 3–5 years to refresh the protective layer. A full sand and refinish is typically needed every 10–15 years depending on traffic and maintenance habits.

Does dust-free sanding really make a difference for families?

Yes. Dust-free sanding with HEPA-filtered equipment contains fine particulate matter at the source, protecting indoor air quality for children and pets throughout the refinishing process.